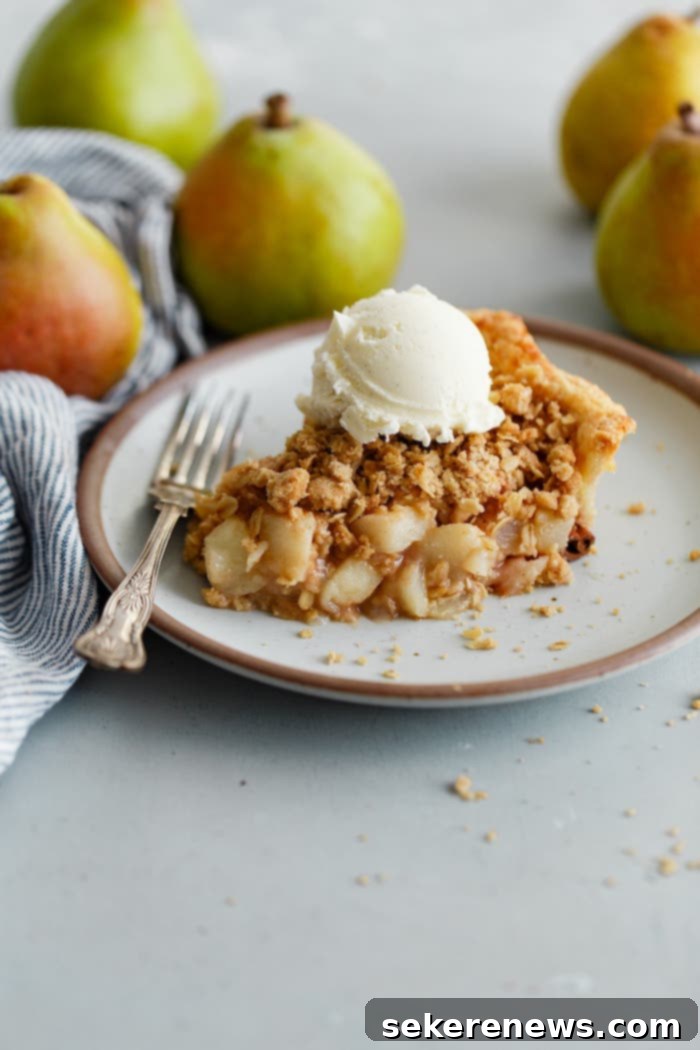
Ultimate Spiced Pear Pie with Buttery Streusel Topping: Your New Favorite Holiday Dessert
Elevate your holiday table this season with a dessert that truly stands out: a magnificent spiced pear pie, crowned with a rich, buttery, oat-flecked streusel topping! This recipe promises to be a showstopper, offering a delightful twist on traditional festive bakes.
No holiday season feels truly complete without the warmth and aroma of a homemade pie wafting through the kitchen. While apple and pumpkin pies often steal the spotlight, if you’re yearning for a delightful departure from the usual suspects, this Spiced Pear Pie with Streusel Topping is an absolute must-try! It’s a dessert that perfectly captures the essence of autumn and winter celebrations, bringing a unique blend of flavors and textures to your festive spread.
This pear pie masterfully combines the best elements of two beloved dessert categories: a classic fruit pie and a rustic fruit crisp. For those who often find themselves torn between a flaky pastry base and a crunchy topping, this recipe offers the ultimate compromise. It delivers an experience that is both familiar and excitingly new, promising to become a cherished addition to your annual baking repertoire.
What makes this pie truly exceptional? It encompasses everything you could wish for in a perfect fruit dessert: a exquisitely flaky pie crust base that melts in your mouth, a generously proportioned and wonderfully juicy fruit filling brimming with tender, spiced pears, and a light yet satisfyingly crunchy streusel topping that adds an extra layer of texture and sweetness. Each component works in harmony to create a truly unforgettable pie.
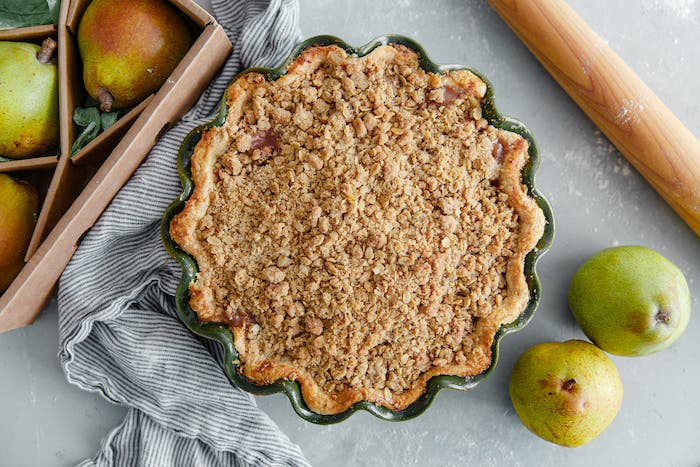
As you may have gathered, our kitchens are quite fond of pear-centric desserts, and for good reason! Pears offer a subtle sweetness and delicate texture that truly shines in baked goods. While our tender Spiced Pear Cake and the elegant Classic Pear Frangipane Tart have long been personal favorites, this magnificent pear pie has recently carved out its own special place on that esteemed list. Its unique charm lies in its comforting familiarity combined with a fresh, aromatic profile that distinguishes it from other fruit pies.
Choosing the Best Pears for Baking: A Goldilocks Guide
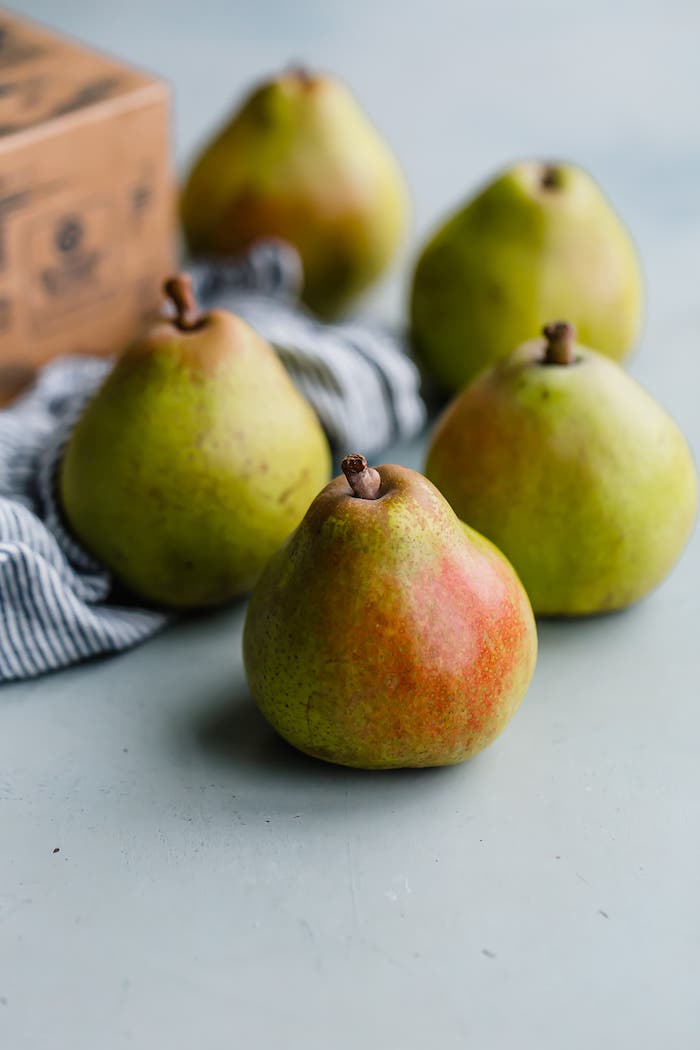
The selection of your pears is paramount to the success of this pie. Not all pear varieties are created equal when it comes to baking. For optimal texture and flavor, we highly recommend using Anjou (both Red or Green varieties), Bartlett (Red or Green), Bosc, or certain specialty varieties of Comice, such as Royal Rivieria®.
It is absolutely essential that you use firm, yet just slightly ripened pears for your pie. The nuance here is crucial. If the pears are overly ripe, their internal structure will break down too much during baking, resulting in a mushy, shapeless filling. You want the pears to maintain a pleasant bite and distinct pieces within the juicy filling.
A simple test for ripeness is to gently press on the neck of the pear. It should yield just slightly under your fingers, indicating it’s ripe enough for flavor but still firm enough to hold its shape. Conversely, if your pears are unripe or excessively firm, they won’t soften adequately in the oven and will lack the desired depth of flavor. Think of it as a culinary “Goldilocks and the Three Bears” situation – you need them to be just right, not too hard and not too soft!
Ingredient Shopping Tip: Perfecting Your Pear Selection
To ensure you have pears at their ideal baking ripeness, we recommend purchasing them a few days in advance while they are still somewhat unripe. Allow them to ripen gently on your kitchen countertop at room temperature. This gives you full control over their progress, letting you monitor them daily until they reach that perfect “just slightly yielding” stage. Remember, unlike many other fruits, pears are designed to ripen off the tree, making this method not just convenient, but also crucial for achieving the best flavor and texture.
Crafting the Perfect Pear Pie Filling: Essential Ingredients
The heart of any great pie lies in its filling, and this pear pie boasts a perfectly balanced, aromatic, and wonderfully juicy filling. Each ingredient plays a vital role in achieving that irresistible flavor and texture:
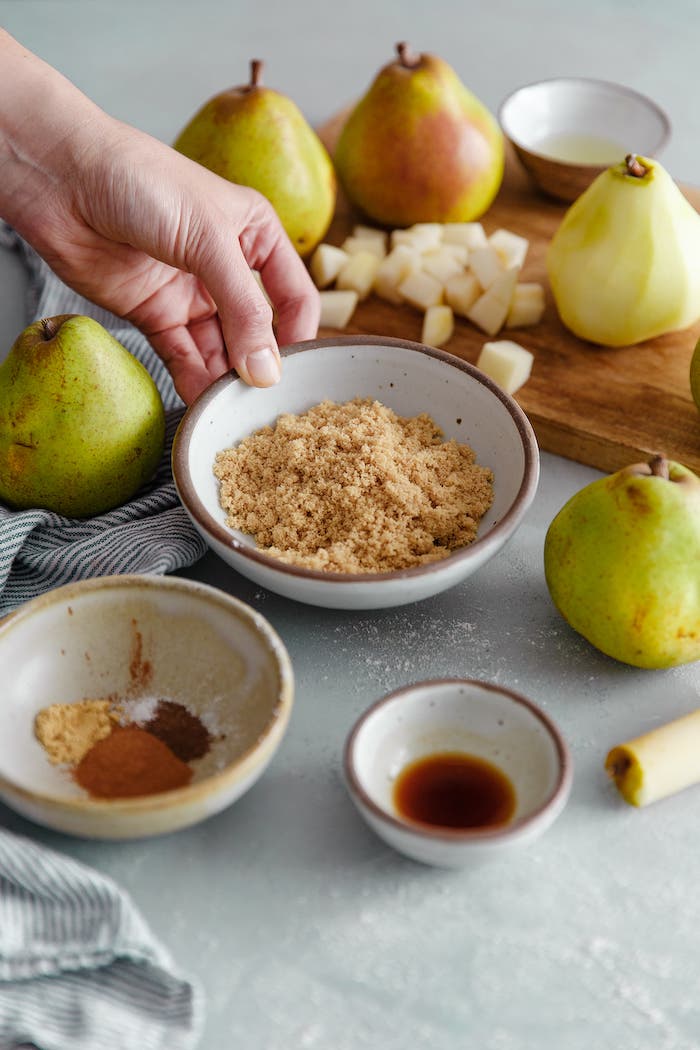
- Peeled, Cored, and Chopped Pears: For the smoothest texture and an elegant eating experience, peeling the pears is highly recommended. Chop them into consistent, manageable pieces to ensure even cooking and a beautiful presentation within the pie.
- All-Purpose Flour: This acts as a crucial thickening agent for the fruit filling. Similar to how cornstarch or tapioca starch would perform, the flour helps to bind the fruit juices, preventing a runny, watery pie and ensuring a perfectly set slice.
- Light Brown Sugar: Beyond just adding sweetness, light brown sugar contributes a lovely depth of flavor with its subtle molasses notes. It complements the pears beautifully and enhances the overall richness of the filling.
- Fresh Lemon Juice: A splash of fresh lemon juice is essential in any fruit pie. Its acidity brightens the flavors, cuts through the sweetness, and provides a necessary balance, preventing the pie from tasting cloyingly sweet.
- Warming Baking Spices: A carefully selected blend of ground cinnamon, ginger, and allspice creates the perfect trifecta of fall and winter flavors. These spices harmoniously enhance the natural sweetness of the pears, infusing the pie with a comforting, aromatic warmth that is simply delightful.
- Pure Vanilla Extract: A touch of high-quality vanilla extract deepens and rounds out all the flavors in the filling, adding a subtle complexity that elevates the entire pie.
The Irresistible Streusel Topping: Simple Ingredients, Amazing Flavor
What sets this pear pie apart is its magnificent streusel topping – a crunchy, buttery crown that adds both texture and a burst of flavor. Much like a classic fruit crisp, this streusel is a straightforward combination of pantry staples, designed to deliver maximum impact:
- All-Purpose Flour: Provides the structural base for the streusel crumbs.
- Old-Fashioned Rolled Oats: Adds a delightful chewiness and a rustic texture that contrasts beautifully with the soft pear filling.
- Light Brown Sugar: Contributes sweetness and moisture, helping the streusel clump together and bake to a golden-brown finish with hints of caramel.
- Warming Spices (Cinnamon, Ginger, and Allspice): By mirroring the spices in the filling, the streusel topping maintains a consistent and cohesive flavor profile throughout the entire pie, enhancing the overall aromatic experience.
- Salt: A pinch of salt is crucial for balancing the sweetness and bringing out the full potential of the other flavors.
- Cubed Unsalted Butter: Cold butter is key here. As it bakes, the butter melts, creating pockets of steam that result in that coveted crumbly, golden-brown texture. Using unsalted butter allows you to control the overall saltiness of the streusel.
Mastering Your Pear Pie: Expert Make-Ahead Tips for Stress-Free Baking
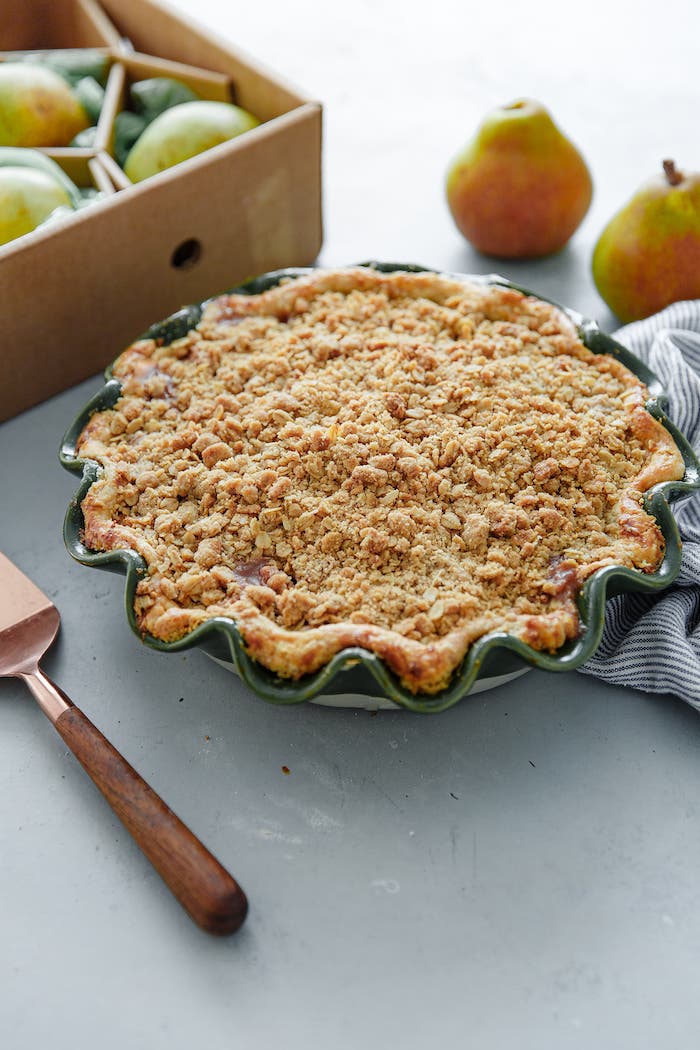
Homemade pie, particularly during the bustling holiday season, can feel like a labor of love. However, with a little strategic planning, you can significantly reduce last-minute stress. We highly recommend prepping various components of this pear pie in advance, allowing you to enjoy the process and the occasion. Here are our best make-ahead tips to streamline your baking:
- Single Pie Crust: Pie dough is incredibly forgiving when it comes to advance preparation. You can prepare your pie dough, shape it into a 1-inch round disc, wrap it tightly in plastic wrap, and store it in the refrigerator for up to 48 hours. This allows the gluten to relax, resulting in a more tender crust. For even longer storage, pie dough can be frozen for up to 3 months. Remember to allow frozen pie dough to thaw completely in the refrigerator (typically 24 hours) before you plan to use it. Furthermore, you can even go a step further and roll out and fit the dough into your pie dish up to 24 hours in advance. Just be sure to cover the surface of the dough tightly with plastic wrap and refrigerate until you’re ready to assemble the pie.
- Streusel Topping: The crumbly streusel topping for this pear pie is another excellent candidate for advance preparation. Once made, it can be stored in an airtight container or a Ziplock bag in the refrigerator for 3 to 4 days. You can use it straight from the refrigerator; no need to bring it to room temperature. For even longer storage, the streusel can be frozen for up to 3 months. Simply sprinkle it directly from the freezer onto your pie filling when you’re ready to bake.
- Bake Ahead: While nothing quite beats a freshly baked, warm pie, this pear pie holds up beautifully when baked a day in advance. If you choose to bake it ahead, allow it to cool completely before covering it loosely. To reheat for serving, tent the pie with aluminum foil to prevent the crust and topping from over-browning. Place it in a preheated 350°F (175°C) oven for about 15 minutes. Then, remove the foil and continue heating for an additional 15 minutes, or until the filling is warmed through and bubbling gently. This method ensures a delicious, warm pie without the last-minute rush.
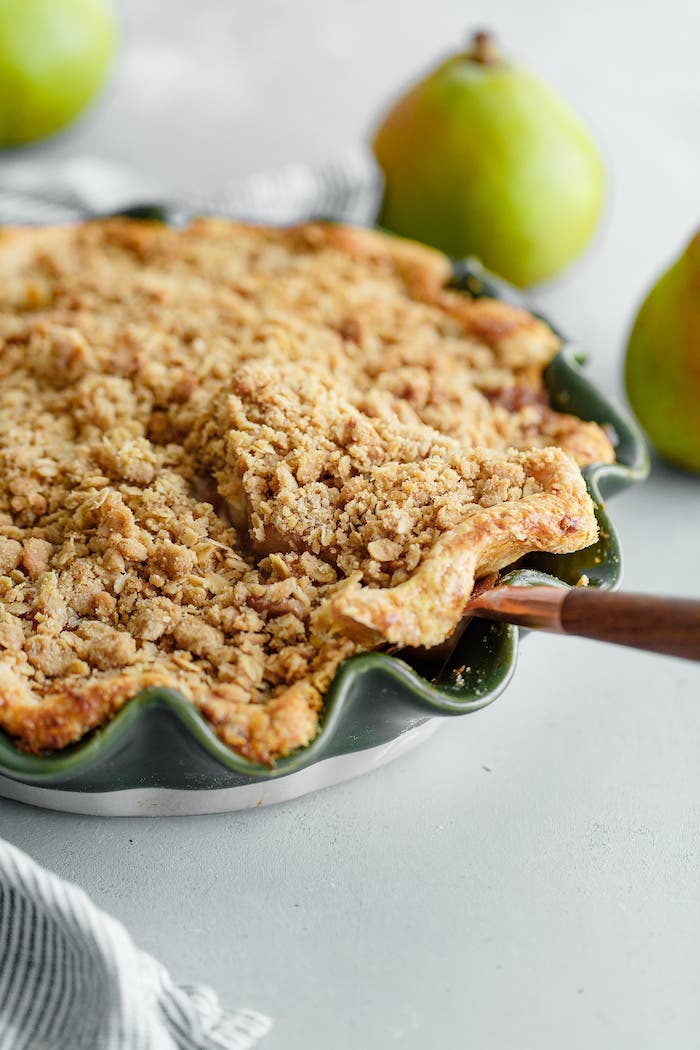
Serving Your Pear Pie: The Art of Presentation and Enjoyment
The anticipation of slicing into a warm, fragrant pie straight from the oven is undeniable, but patience is a virtue when it comes to fruit pies! It is critically important to allow your pear pie to cool for at least 2 to 3 hours after it comes out of the oven, and preferably even longer. This crucial resting period allows the hot fruit filling to cool down and, more importantly, to properly set. Skipping this step often results in a messy, loose, and runny filling that spills out when sliced, rather than holding its beautiful form.
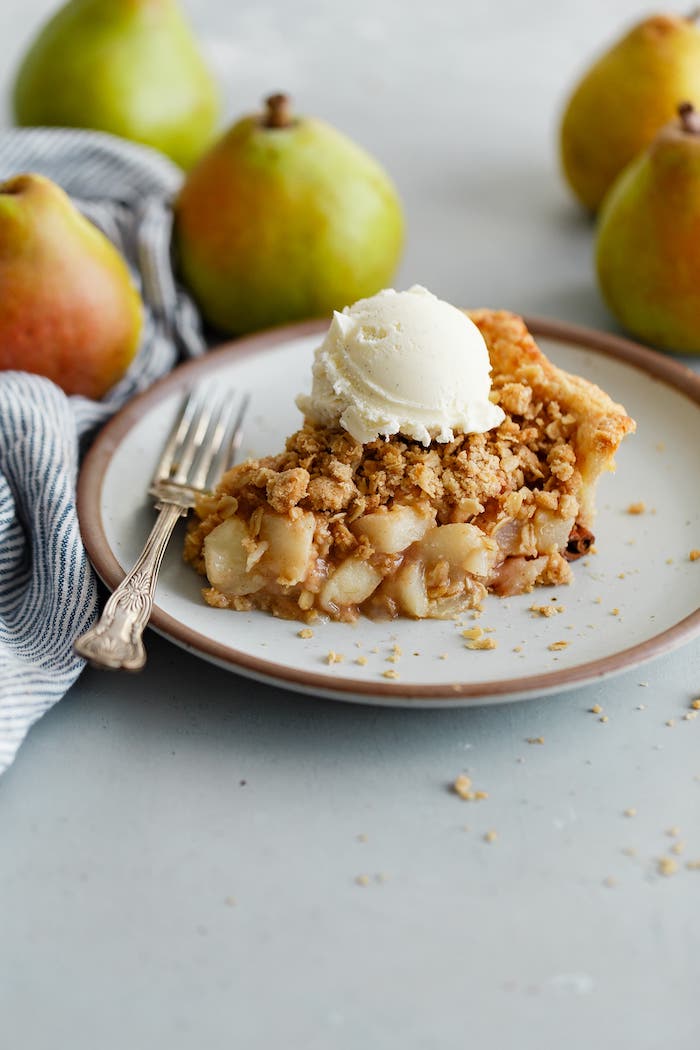
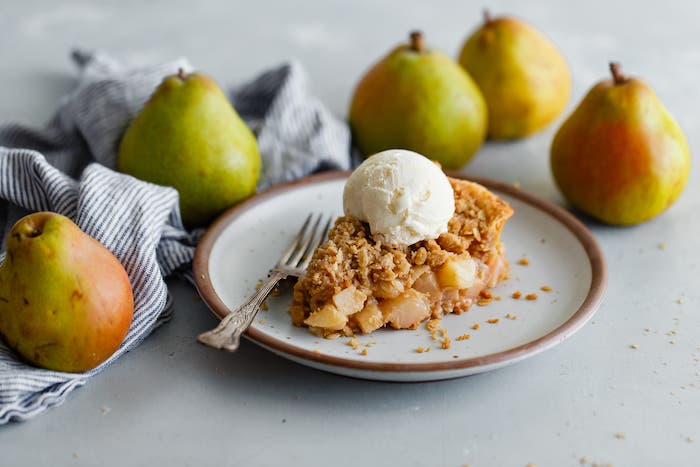
Once cooled, or slightly warm, this pie truly shines. We adore serving it slightly warm, paired with a generous scoop of creamy vanilla ice cream that slowly melts into the spiced pears. A simple drizzle of heavy cream also adds a touch of elegance and richness. For other luxurious accompaniments, consider lightly sweetened homemade whipped cream or a velvety homemade custard. These additions not only elevate the flavor but also add a delightful contrast in temperature and texture, making each bite an absolute indulgence.
Classic Pear Pie with Streusel Topping
5 stars (1 rating)
Pin Recipe
Review
Save Recipe
Yield: 8 Servings
Prep Time: 3 hours (includes dough chilling)
Cook Time: 1 hour 15 minutes
Resting Time: 2 hours (post-bake cooling)
Total Time: 8 hours 15 minutes
Move aside apple pie! This Spiced Pear Pie with Streusel Topping offers the best of both worlds, perfect if you struggle to choose between a traditional fruit pie and a crisp. It has it all: a flaky pie crust base, a juicy, warmly spiced pear filling, and a delightful oat streusel topping!
For the best texture, it’s crucial to use firm, *just* barely ripe pears. Overly ripe pears will become mushy during baking. Refer to the article above for more details on pear selection.
Tips for Success: Always factor in proper chill time (minimum 1-2 hours) for homemade pie dough, or prepare it a day or two in advance. See the detailed make-ahead notes below for more time-saving tips and instructions.
Equipment
- Half Sheet Pan
- Emile Henry Pie Dish (or any 9-inch ceramic pie plate)
- Rolling pin
- Pastry brush
- Bench scraper
- Kitchen scissors
Ingredients
For the Single Crust Pie Dough:
- 1 ¼ cup (150 g) unbleached all-purpose flour, plus more for dusting – Provides the structure for a tender, flaky crust.
- 1 teaspoon (4 g) granulated sugar – Adds a hint of sweetness and helps with browning.
- ½ teaspoon kosher salt – Balances the flavors and enhances the overall taste of the dough.
- 4 ounces (1 stick; 115 g) cold unsalted butter, cut into ¼-inch cubes – Crucial for achieving flaky layers; ensure it’s very cold.
- 3-4 tablespoons (45-60 mL) cold ice water, plus more if needed – Binds the dough without over-developing gluten.
For the Streusel Topping:
- ¾ cup (90 g) unbleached all-purpose flour – The base for our irresistible crumb topping.
- ¾ cup (75 g) old-fashioned rolled oats – Adds a wonderful chewiness and rustic texture.
- ¼ cup (55 g) light brown sugar – Provides sweetness and helps the streusel clump.
- ¼ teaspoon ground cinnamon – Contributes a warm, aromatic spice.
- ⅛ teaspoon ground ginger – Adds a subtle zesty kick.
- ⅛ teaspoon ground allspice – For an extra layer of warm, complex spice.
- ¼ teaspoon kosher salt – Essential for balancing the sweetness and enhancing flavor.
- 5 tablespoons (70 g) cold unsalted butter, cut into small cubes – Creates crisp, buttery crumbs when baked.
For the Pear Filling:
- 1 tablespoon (15 mL) freshly squeezed lemon juice – Brightens the fruit flavors and prevents oxidation.
- 3 lbs (about 5-6 large) pears (*should be firm and just barely ripe) such as Anjou, Bartlett, Comice, or Bosc – The star of the pie; choose wisely for best results.
- ⅓ cup (75 g) packed light brown sugar – Adds sweetness with a hint of molasses.
- ¼ cup (30 g) unbleached all-purpose flour – Thickens the juicy pear filling.
- 1 teaspoon pure vanilla extract – Enhances the overall aroma and flavor.
- 1 teaspoon ground cinnamon – Classic warm spice, perfect with pears.
- ¼ teaspoon ground ginger – Aromatic and complements the pears beautifully.
- ⅛ teaspoon ground allspice – Adds depth to the spice blend.
- ⅛ teaspoon kosher salt – Balances sweetness and amplifies fruit flavor.
For the Egg Wash (Optional):
- 1 large egg – For a golden, glossy crust edge.
- 1 teaspoon milk – Thins the egg for easier brushing and even color.
Instructions
Prepare and Assemble Pie Dough:
-
Gather Equipment: Have your rolling pin, 9-inch (23-cm) ceramic pie plate (highly recommended for even baking), pastry brush, bench scraper, kitchen scissors, and plastic wrap ready before you begin.
-
Mix Dry Ingredients & Add Butter: In a medium bowl, whisk together the flour, sugar, and salt until well combined. Add the cubed cold butter pieces and gently toss them, ensuring each piece is lightly coated in the flour mixture. Using your thumb and forefinger on both hands, press the butter cubes into flat “shingles” or thick discs. Break up any excessively large pieces of butter so they are no bigger than half a walnut. Larger pieces can lead to butter leaking during baking. If the mixture starts to feel greasy, chill it in the refrigerator for 15 minutes before proceeding.
-
Incorporate Water: Add 3 tablespoons (45 mL) of cold ice water to the flour and butter mixture. Toss and gently mix the ingredients together with your hands until the water is evenly incorporated. If you notice any particularly dry bits of flour, add a tiny splash more water to those areas as needed. *Note: You will most likely need to use the full 4 tablespoons (1/4 cup; 60 mL) of water, but this can vary depending on your specific flour and the humidity in your kitchen. The dough will appear slightly shaggy, but it should be cohesive enough to be pressed together with your hands. Transfer the mixture to a clean kitchen countertop and gently press the dough together, folding it over itself once or twice. This lamination technique helps bring the dough together and creates flaky layers.
-
Chill the Dough: Gently shape the dough into a round disc, about 1-inch thick. Wrap it tightly in plastic wrap to prevent it from drying out. Refrigerate for a minimum of 1-2 hours, or ideally 1-2 days ahead. Make-Ahead Tip: Pie dough can also be frozen for up to 3 months. If frozen, thaw it overnight in the refrigerator before using.
-
Roll Out the Dough: Remove the chilled dough from the refrigerator, unwrap it, and place it on a lightly floured countertop. If the dough is very cold and stiff, allow it to sit at room temperature for 5 to 10 minutes to soften slightly. Using a lightly floured rolling pin, roll the dough into a 14-inch (35-cm) diameter circle. Continuously rotate the dough and add small amounts of flour to the surface and your rolling pin to prevent sticking. Be gentle and avoid stretching the dough, which can make it tough. If the dough becomes too soft, warm, or difficult to handle at any point, simply chill it in the refrigerator for 10 to 15 minutes before continuing.
-
Fit into Pie Dish: Carefully transfer the rolled dough into a 9-inch (22-cm) pie pan. Gently lift and nudge the dough into the edges and bottom of the pan, making sure it sits flush without stretching. Using kitchen scissors, trim the excess dough so that it extends no more than ¾-inch to 1-inch past the edge of the pan. Fold these edges under themselves and then crimp them decoratively as desired. Brush off any excess flour with a pastry brush, then cover the surface of the dough tightly with plastic wrap and chill it in the refrigerator while you prepare the streusel topping and pear filling.
Preheat Oven and Prepare the Streusel Topping:
-
Preheat Oven: Place a half sheet pan in the center rack of your oven and preheat the oven (along with the sheet pan) to 400°F (204°C). Note: If you have a baking stone or steel, placing the half sheet pan directly on top can provide an extra burst of heat to ensure a perfectly crispy bottom crust.
-
Make the Streusel Topping: In a medium mixing bowl, combine the ¾ cup (90g) unbleached all-purpose flour, ¾ cup (75g) rolled oats, ¼ cup (55g) light brown sugar, ¼ teaspoon cinnamon, ⅛ teaspoon ginger, ⅛ teaspoon allspice, and ¼ teaspoon kosher salt. Add the 5 tablespoons (70g) of cold, cubed unsalted butter and toss to coat it lightly with the dry ingredients.
-
Form Streusel Crumbs: Using your fingertips, work and press the butter into the dry ingredients. Continue until the butter is well dispersed, and you have a mixture of both smaller, sand-like crumbs and larger, pea-sized crumbs. This variation in size creates a more interesting texture when baked. Chill the topping in the refrigerator until you are ready to use it.
Prepare the Filling:
-
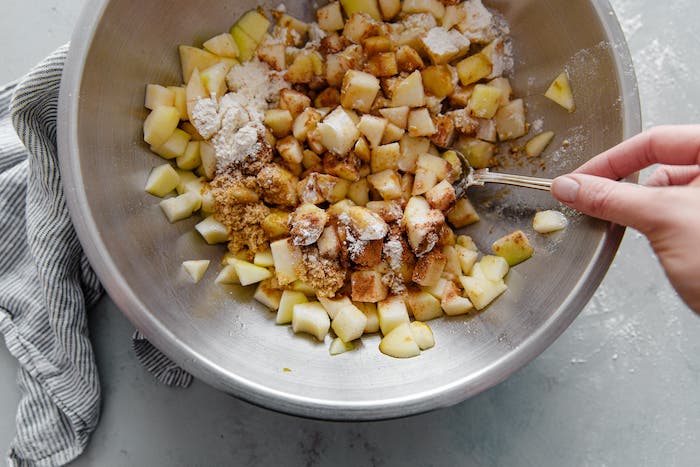
Prepare Pears: Pour the lemon juice into a large mixing bowl. Peel the pears, cut them in half, and carefully core them (a small melon scooper works wonderfully for this). Chop the cored pears into roughly ½-inch chunks. Add the chopped pear pieces directly into the bowl with the lemon juice, tossing gently to ensure all pieces are coated. This step is crucial to prevent the pears from oxidizing and turning brown. Note: For best results and to prevent browning, we recommend peeling, coring, and chopping one pear at a time, adding it to the lemon juice, and tossing before moving on to the next pear.
-
Mix Filling Ingredients: To the bowl with the chopped, lemon-coated pears, add the brown sugar, all-purpose flour, vanilla extract, cinnamon, ginger, allspice, and salt. Gently toss the entire mixture together until all the ingredients are evenly incorporated and the pears are well-coated with the spice mixture.
Assemble and Bake:
-
Prepare Egg Wash (Optional): In a small bowl, combine the egg and milk. Whisk thoroughly until the mixture is smooth and uniform. Set aside for brushing the pie crust edges.
-
Fill the Pie Shell: Remove the shaped and chilled pie crust from the refrigerator. Gently transfer the pear filling, including any accumulated juices, into the prepared pie shell. Spread the filling into an even, thick layer, ensuring it’s distributed uniformly.
-
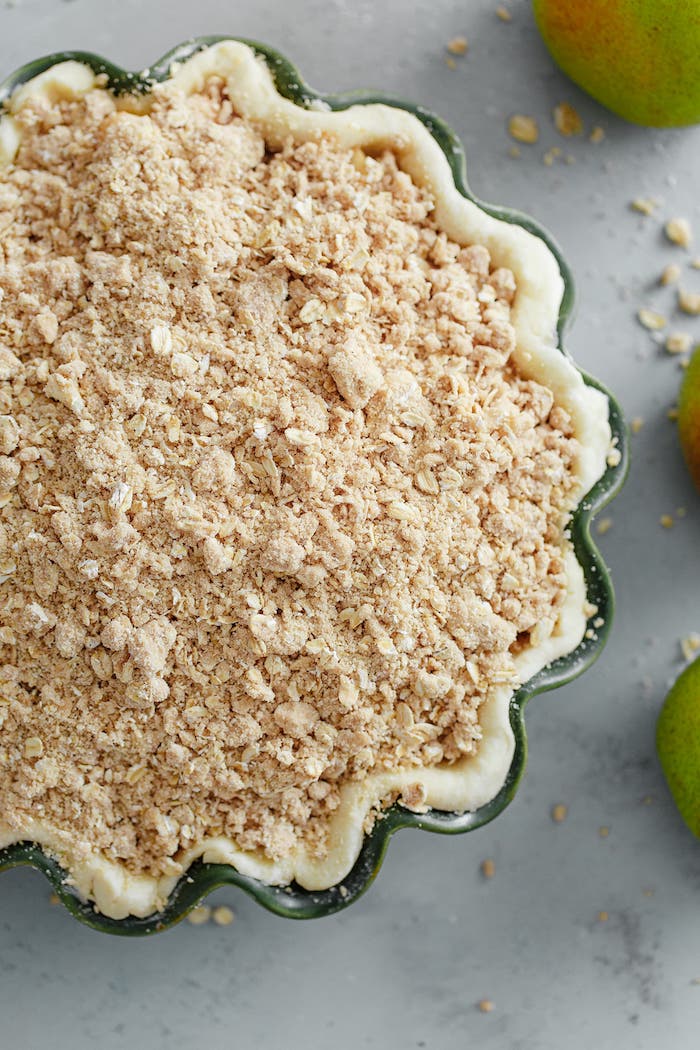
Add Streusel & Egg Wash: Evenly sprinkle the chilled streusel topping over the pear mixture. You’ll find it creates a wonderfully thick and generous layer. If using, lightly brush the crimped edges of the pie dough with the prepared egg wash mixture. Carefully transfer the pie dish onto the preheated half sheet pan in the oven. The preheated sheet pan provides an initial blast of heat to the bottom crust, encouraging it to cook through and brown beautifully, and also catches any potential bubbling juices during baking, keeping your oven clean.
-
Bake the Pie: Bake the pie at 400°F (204°C) for the first 30 minutes. After this initial bake, reduce the oven temperature to 350°F (176°C) and continue baking for an additional 30 to 40 minutes, or until the pie’s streusel topping is deeply golden brown, and the pear filling is visibly bubbling around the edges. This two-stage baking helps achieve a crisp crust and a perfectly cooked filling.
-
Cool Completely: Carefully remove the pie from the oven and place the entire sheet pan on a wire rack. Allow the pie to cool for at least 2 to 3 hours before attempting to slice and serve. This cooling period is paramount as it allows the fruit juices and thickener in the filling to properly set, preventing a runny, messy slice. Patience will be rewarded!
-
Serve: Serve the pie slightly warm, or at room temperature. It’s exquisite on its own, but truly divine with a scoop of vanilla ice cream or a luxurious drizzle of heavy cream. Other fantastic accompaniments include a dollop of lightly sweetened whipped cream or a side of homemade custard.
-
Storage Tips: Leftover pie can be covered with plastic wrap and stored at room temperature for up to 2 days. For longer freshness, refrigerate the pie for up to 4 to 5 days. Reheat individual slices gently in the microwave or oven if desired.
Make-Ahead Tips:
- Single Pie Crust: Prepare your pie dough, shape it into a 1-inch disc, wrap tightly, and refrigerate for up to 48 hours. It can also be frozen for up to 3 months; thaw overnight in the fridge before use. You can also press the dough into your pie dish up to 24 hours in advance, cover tightly with plastic wrap, and refrigerate.
- Streusel Topping: The streusel can be prepared and stored in an airtight container or Ziplock bag in the refrigerator for 3 to 4 days, or frozen for up to 3 months. Use directly from the fridge or freezer.
- Bake Ahead: While fresh is best, you can bake the pie a day before serving. To reheat, tent with aluminum foil and bake at 350°F (175°C) for 15 minutes, then remove foil and bake for another 15 minutes, or until heated through.
Nutrition Information (per serving):
Serving: 1 serving, Calories: 539kcal, Carbohydrates: 78g, Protein: 9g, Fat: 21g, Saturated Fat: 12g, Polyunsaturated Fat: 1g, Monounsaturated Fat: 5g, Trans Fat: 1g, Cholesterol: 50mg, Sodium: 429mg, Potassium: 179mg, Fiber: 4g, Sugar: 18g, Vitamin A: 589IU, Vitamin C: 1mg, Calcium: 45mg, Iron: 4mg
Course: Pies, Tarts, and Pastries
Cuisine: American
