Ultimate Sourdough Bread Troubleshooting Guide & FAQ: Solve Common Baking Problems
Basics + FAQ
Equipment and Tools
Troubleshooting
Embarking on the sourdough baking journey is incredibly rewarding, but it often comes with its unique set of challenges. Whether you’re a beginner encountering your first dense loaf or an experienced baker striving for that perfect open crumb, questions and issues inevitably arise. This comprehensive **Sourdough Bread Troubleshooting Guide** is designed to address the most common baking issues and frequently asked questions, helping you master the art of sourdough.
This guide specifically focuses on sourdough bread troubleshooting and general baking inquiries. If your concerns are related to your sourdough starter’s health and activity, please refer to my Sourdough Starter Troubleshooting Guide for detailed information and solutions.
Pro Tip: Beyond this written guide, I highly recommend watching my step-by-step YouTube video. It offers invaluable visual cues and instructions that complement my artisan sourdough bread recipe, making complex techniques much easier to understand.
Throughout this guide, you’ll find expert answers to perplexing questions such as:
- How do I determine the right amount of sourdough starter for my dough?
- Can I use all-purpose flour if bread flour isn’t available, and what adjustments are needed?
- What’s the best baking vessel for achieving ideal oven spring and crust?
- Why are my sourdough loaves dense or gummy, and how can I achieve that desirable open crumb?
- How can I prevent the bottom of my sourdough bread from over-browning too quickly?
- And many more common sourdough dilemmas!
Note: If your specific question isn’t covered here, please feel free to leave it in the comment section below. We’re always eager to help fellow bakers!
Quick Navigation to Sections:
Basics + FAQ
Equipment and Tools
Troubleshooting
Sourdough Bread Baking FAQ: Essential Questions Answered
This section covers fundamental questions about sourdough baking, from starter ratios to proofing techniques, laying the groundwork for successful loaves.
Q: How much sourdough starter should I use in my dough?
The amount of sourdough starter can significantly impact your dough’s fermentation timeline and final texture. While every recipe may vary based on technique and desired schedule, a common baker’s percentage for sourdough starter typically ranges from 10% to 20% of the total flour weight in your recipe. For example, if your recipe calls for 500 grams of flour, you might use 50-100 grams of active sourdough starter.
It’s important to remember that higher amounts of sourdough starter generally accelerate bulk fermentation, leading to a faster rise. Conversely, lower amounts of starter will slow down the bulk fermentation process. This allows for more flexibility, enabling you to adjust the fermentation schedule to fit your personal routine or ambient kitchen temperature. Understanding these baker’s percentages is key to controlling your dough’s development.
For a deeper dive into baker’s percentages and their role in sourdough, consult my sourdough starter troubleshooting guide.
Q: I can’t find bread flour. Can I substitute unbleached all-purpose flour in your recipe?
Yes, you can substitute unbleached all-purpose flour for bread flour, but it’s crucial to understand the differences and make necessary adaptations. Bread flour typically has a higher protein content (e.g., King Arthur Bread Flour at 12.7%) compared to most unbleached all-purpose flours (e.g., King Arthur All-Purpose at 11.7%). Some all-purpose brands can be significantly lower, ranging from 9% to 11% protein. This protein difference is vital because higher protein levels contribute to stronger gluten development, which is essential for sourdough’s structure and open crumb.
Due to its lower protein, all-purpose flour absorbs less liquid than high-protein bread flour and cannot develop as much gluten strength. If you’re substituting all-purpose flour in my sourdough bread recipe, I highly recommend reducing the hydration. A safe starting point would be to reduce the water quantity to roughly 300 grams to prevent a very slack, unmanageable dough. You might also notice a slightly less airy crumb, but it will still yield a delicious loaf. For comprehensive guidance on this topic, I recommend reading my detailed article on bread flour vs. all-purpose flour.
Q: I can’t find any flour. Do you have any good resources?
During times of high demand or supply chain disruptions, finding flour at conventional supermarkets can be a challenge. This often stems from logistical issues rather than an actual flour shortage. Don’t despair, there are excellent alternative sources to explore!
One fantastic option is to seek out local flour mills in your area. Many small mills have adapted to offer direct-to-consumer sales, and some even ship nationally. You can also contact local bakeries; they often buy flour in bulk and might be willing to sell you a smaller quantity. Another effective strategy is to organize a bulk buying system with friends or neighbors. Purchasing larger quantities (like 25lb or 50lb bags) from suppliers can be more economical and ensures you have a consistent supply.
A valuable resource for finding local flour mills across every state is Challenger Breadware’s guide to grain and flour suppliers. When working with freshly milled flours, keep in mind they can vary in protein levels and extraction rates, and they often ferment more quickly than commercially processed flours due to higher enzyme activity. Adjust your fermentation times accordingly!
Q: Why do some recipes call for different mixing and folding methods (stretch and fold, coil folds, lamination, etc.)?
The beauty of sourdough baking lies in its versatility. There are countless methods and techniques, and every baker develops their own preferences. While this variety can be confusing for beginners, it also means there’s no single “right” way to make sourdough. Different mixing and folding methods are employed to achieve specific dough characteristics and gluten development.
- Stretch and Folds: A gentle method that builds strength and elasticity without degassing the dough too much. It’s great for beginners.
- Coil Folds: Similar to stretch and folds but often performed on a wet surface, allowing the dough to release more easily and build structure from the bottom up.
- Lamination: An advanced technique where the dough is gently stretched into a large, thin rectangle, allowing for even gluten distribution and the incorporation of inclusions like cheese or olives. It significantly enhances dough strength and creates a beautifully open crumb.
I encourage you to learn about these various techniques, experiment with each, and discover what works best for you and the specific type of bread you aim to create. For those eager to delve into advanced methods and achieve truly open crumbs, I recommend Trevor Wilson’s Open Crumb Mastery e-book (though it’s better suited for intermediate to advanced bakers).
Q: How can you build more tension and strength into dough?
Achieving the right amount of tension in your sourdough dough is crucial. You need enough to create structure and trap gases produced during fermentation, but not so much that you degas it excessively or hinder its development. A strong, well-developed dough will be extensible yet elastic, capable of holding its shape and expanding beautifully in the oven.
If you’re consistently struggling with slack, undeveloped dough, one of the most effective strategies is to reduce the hydration (water quantity) in your recipe. Working with lower hydration doughs is significantly easier for beginners as they are less sticky and more manageable, allowing you to build confidence in your handling techniques. As your skills improve, you can gradually increase the hydration levels. Additionally, ensure you are performing enough sets of stretch and folds or coil folds during bulk fermentation, giving your dough ample time to develop gluten strength. Paying attention to the dough’s texture and feel throughout this process will guide you.
Q: How do you know when bulk fermentation is done?
Bulk fermentation, the period from when you add your active starter (levain) to your dough until you turn it out for shaping, is arguably the most critical and challenging stage in sourdough baking. Its duration is highly variable, influenced by factors such as ambient kitchen temperature, dough temperature, the strength and quantity of your sourdough starter, and even the type of flour used (e.g., whole grain vs. white flour).
There isn’t a single clock-based answer, as doughs develop differently. For my sourdough bread recipe and olive sourdough, I typically push bulk fermentation quite far, as the dough often goes directly into a very cold fridge with little to no room temperature rest. Key indicators to look for include:
- Volume Increase: A visible increase in dough volume, usually around 30-50% for many recipes. My recipes often aim for closer to a 50% increase.
- Surface Activity: Small bubbles of varying sizes should be visible on the surface of the dough, indicating active fermentation.
- Texture and Feel: The dough should look alive, feel aerated, and be slightly domed. If you gently shake the bowl, the dough should jiggle, showing good gas development and elasticity. It should also have a slightly expanded, puffy appearance, not dense or flat.
Mastering bulk fermentation comes with practice and observation. You can read more below on how to distinguish between under-proofed vs. over-proofed dough, which is directly related to bulk fermentation.
Q: Do I have to retard my dough in the refrigerator prior to baking?
No, retarding your dough in the refrigerator before baking is not strictly mandatory. You can certainly allow your dough to complete its final proofing at room temperature and bake it immediately. However, most sourdough enthusiasts, myself included, prefer to retard the dough overnight in the fridge for several compelling reasons:
- Enhanced Flavor Development: This cold retardation period significantly slows down fermentation, allowing enzymes to break down starches and proteins more extensively. This process develops more complex, nuanced flavors and aromas in your final loaf, creating a richer, more satisfying taste.
- Superior Oven Spring and Crust: Baking cold dough directly from the refrigerator generally leads to dramatically better oven spring. The cold temperature slows down the crust from setting too quickly, allowing the dough to expand for a longer period in the initial phase of baking. This also contributes to a more pronounced ear and a crispier, more caramelized crust.
- Easier Handling and Scoring: Cold dough is much firmer and less sticky, making it significantly easier and safer to handle, transfer from the banneton to your baking vessel, and score precisely. This improved manageability allows for more intricate scoring designs and cleaner cuts, which directly impacts the aesthetic appeal and expansion of your bread.
Essential Sourdough Bread Baking Equipment and Tools
The right tools can significantly enhance your sourdough baking experience. This section addresses common questions about essential equipment, from baking vessels to scoring tools.
Q: What are your favorite sourdough tools and resources?
Having the right tools can make a significant difference in your sourdough journey, making the process smoother and more enjoyable. You can find a comprehensive list of all my preferred sourdough tools, from scales to bannetons, conveniently organized in my online shop. For more in-depth insights and detailed information on why these tools are essential and how to use them effectively, I highly recommend consulting my dedicated article: Favorite Sourdough Bread Tools and Resources.
Q: What baking vessel do you use to bake your bread?
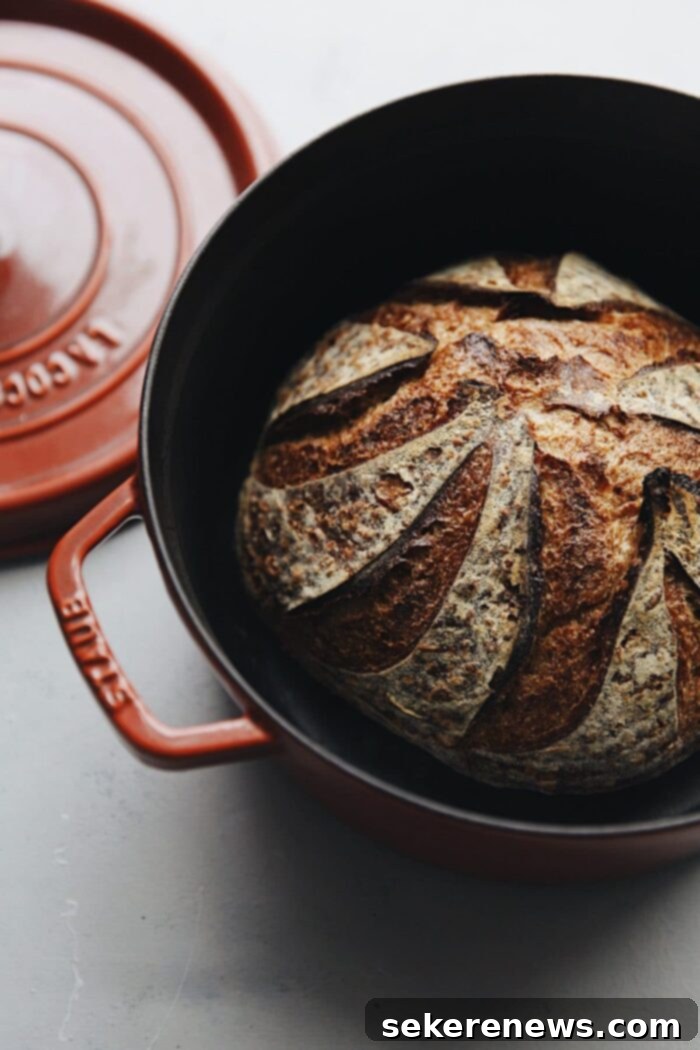
The choice of baking vessel plays a crucial role in achieving optimal oven spring and a beautiful crust. When I first began my sourdough journey, a standard 5.5 Quart Dutch Oven was my go-to for all my bread baking needs, and it remains an excellent choice for many home bakers.
However, since January 2020, I exclusively bake all my bread in my Challenger Bread Pan (which was generously gifted to me). This unique baking vessel stands out due to its thoughtful design, accommodating various loaf shapes like batards (ovals, my personal favorite), demi-baguettes, and boules (rounds). The Challenger Bread Pan delivers incredible results, consistently producing loaves with superior oven spring, more even color development, and a crispier, more appealing crust texture.
Beyond performance, its design greatly improves ease-of-use. It makes transferring dough significantly safer and easier, eliminating the need for parchment paper, which is both convenient and environmentally friendly. For serious bread bakers, it’s a worthwhile investment. The versatile bottom griddle can also be utilized for baking focaccia, pizzas, or even as a high-quality cast-iron skillet for other culinary tasks.
Q: Can I still make sourdough if I don’t own a Dutch oven, combo cooker, or Challenger Pan?
Absolutely, you can still bake delicious sourdough bread without these specialized vessels. However, creating adequate steam in the oven is paramount for sourdough bread baking, and you’ll need to employ alternative methods to achieve it. Steam plays a critical role in the initial phase of baking by preventing the dough crust from setting too quickly. This allows the loaf to expand fully, resulting in optimal oven spring and a more developed, crackly crust.
Dutch ovens, combo cookers, and the Challenger Bread Pan are highly effective because they create a sealed, steamy environment, mimicking the conditions of a professional bakery deck oven. Without one, you’ll need to generate steam manually. Common alternatives include:
- Roasting Pan with Hot Water: Place a pan of boiling water on the bottom rack of your oven during preheating and the initial baking phase.
- Lava Rocks or Cast Iron Skillet with Water: Place lava rocks or a cast iron skillet on the bottom rack. Pour hot water into it just before placing your bread in the oven. Be careful of the steam.
- Spray Bottle: Lightly spray the inside of your oven with water a few times during the first 10-15 minutes of baking.
While these methods can work, they often don’t trap steam as effectively or consistently as a Dutch oven, potentially leading to slightly less oven spring and a thicker crust.
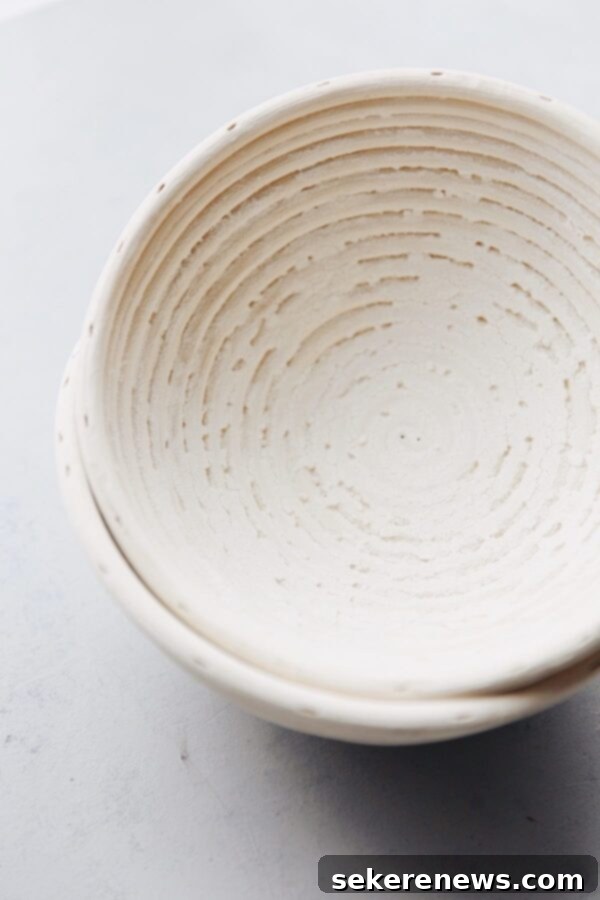
Q: I don’t own a banneton. What should I use instead?
While a banneton (or proofing basket) is a highly useful tool for sourdough bread, it’s not strictly essential for making delicious loaves. Bannetons serve two main purposes: they help hold the dough’s shape during the final proofing, and their porous material helps draw moisture from the dough’s surface, contributing to a better crust development and a less sticky dough. They are also relatively affordable and available in various shapes and sizes, with round (boule) and oval (batard) being the most common.
If you don’t own a banneton, a simple bowl can serve as an excellent substitute. Choose a bowl that is similar in shape and dimension to the banneton size recommended in your recipe. Line the bowl generously with a clean, lint-free kitchen linen or towel (avoid terry cloth). Dust the linen heavily with rice flour or a 50/50 mix of all-purpose flour and rice flour. Rice flour is highly recommended because it is less likely to stick to the dough. Ensure the dough is well-floured before placing it seam-side up into the prepared bowl for proofing. This method will help your dough maintain its shape and prevent sticking.
Q: What can I use to score my dough if I don’t own a bread lame?
A bread lame is essentially a specialized tool that securely holds a very sharp, curved or straight razor blade. Its design allows for quick, precise, and clean cuts on your dough, which is crucial for proper oven spring and steam release during baking. Scoring is not just for aesthetics; it directs the expansion of the dough, preventing uncontrolled cracks.
If you don’t have a bread lame, your next best alternative is any extremely sharp razor blade. A fresh, single-edge razor blade works wonderfully. The sharper the blade and cleaner the scores, the better results you’ll see in terms of oven spring and the development of a beautiful “ear.” Cold, retarded dough is significantly easier to score cleanly than room-temperature dough because it’s firmer and holds its shape better.
While a very sharp knife or kitchen scissors can be used in a pinch, they are not ideal. They tend to drag and tear the dough more, leading to less defined scores and less impressive expansion. If you’re serious about creating beautiful designs or achieving prominent “ears” on your loaves, investing in a good-quality bread lame will make a world of difference in the appearance and texture of your finished bread.
Advanced Sourdough Troubleshooting: Solving Common Problems
This section delves into specific problems that sourdough bakers often face, providing detailed diagnostics and actionable solutions to help you achieve consistent success.
Q: I don’t own a baking scale. Can you provide volume measurements for your recipe?
Unfortunately, I cannot provide volume measurements (cups, spoons, etc.) for my sourdough recipes, and here’s why: volume measurements are notoriously inaccurate, especially when it comes to precision baking like sourdough bread or sourdough pizza. Factors like how tightly you pack flour into a cup, humidity, and even the size of your spoon can drastically alter the actual quantity of ingredients. There’s simply no reliable way to accurately measure sourdough starter using cups.
My primary goal is for you to succeed with my recipes, and given the numerous variables involved in sourdough baking, using accurate measurements is a foundational step to ensure consistent results. Metric weights are the standard in professional bread baking for a reason – they yield the most precise and consistent outcomes every time. They also make it incredibly easy to scale recipes up or down, or to accurately adjust baker’s percentages. A basic digital kitchen scale costs less than $10 and is an absolute must-have tool for any serious baker. It’s a small investment that pays huge dividends in baking success and reduced frustration!
Q: My dough is taking forever to gain volume and is still very dense and lifeless at the end of the recommended bulk fermentation time.
If your dough is sluggish and shows minimal activity during bulk fermentation, it typically points to one of two common issues: either your dough temperature and/or ambient kitchen temperature is too cold, or you’re working with a weak or under-active sourdough starter. Yeast and bacteria, the workhorses of sourdough, thrive in warmer environments.
To remedy this, try placing your dough in a warmer area of your kitchen. An ideal temperature range for bulk fermentation is usually between 75°F-80°F (24°C-27°C). Monitoring your final dough temperature is crucial to maintain consistency. If your kitchen consistently runs cool, investing in a bread proofing box can be a game-changer, providing a stable, warm environment for optimal fermentation. Additionally, ensure your sourdough starter is robust and active; feed it consistently and ensure it’s doubling or tripling in size before using it. A strong starter is the foundation for lively dough.
Q: My dough is too slack and is not developing good strength. Help!
A slack, undeveloped dough that lacks strength can be a frustrating problem, often stemming from issues during the mixing and bulk fermentation stages. Good dough strength is vital for trapping gases and creating that desired open crumb structure. Here are some solutions:
- Increase Folding: If your dough feels particularly weak, add an extra set or two of stretch and folds or coil folds during the bulk fermentation. These actions help align and strengthen the gluten network.
- Reduce Hydration: For your next loaf, consider reducing the hydration (water quantity) slightly. Higher hydration doughs are inherently stickier and more challenging to work with, requiring more advanced handling skills to develop strength.
- Observe Flour Absorption: When working with new flours or unfamiliar brands, I recommend holding back a small portion of the water during the autolyse phase (the initial mix of flour and water). Observe how the dough develops – can you stretch it very thinly without it tearing easily? This indicates good gluten development. If you feel confident the dough can handle more water, gradually add the reserved portion back when you incorporate your starter.
Patience and observation are key here; learning to “read” your dough’s texture and responsiveness will greatly improve your ability to build strength.
Q: My dough was a sloppy mess after bulk fermentation and couldn’t be shaped. Help!
Diagnosing sourdough issues without specific details can be tricky. Factors like your exact recipe, flour type, starter age and activity, and ambient kitchen temperature all play a significant role. However, a dough that develops nicely during bulk fermentation but then turns into a sloppy, disintegrating mess during shaping is a classic sign of **over-proofed dough**.
Over-proofing occurs when the dough ferments for too long, causing the gluten structure to break down and lose its ability to hold gas. This can be caused by:
- High Kitchen Temperature: A very warm kitchen can dramatically speed up fermentation.
- Extended Bulk Fermentation: Leaving the dough to bulk ferment for too long, beyond its optimal window.
- Freshly Milled Flour: These flours often ferment more rapidly due to higher enzyme activity.
- Poor Dough Development: Insufficient gluten development from the start can lead to a structure that collapses easily even if not severely over-proofed.
Higher hydration sourdough recipes are inherently more challenging, especially if you’re new to them. For specific pre-shaping and shaping tips, be sure to watch my step-by-step Youtube video. If your dough is substantially over-proofed and impossible to shape, don’t throw it out! Your best option is to transfer it into a well-oiled sheet pan and bake it immediately as focaccia or a rustic flatbread. For your next attempt, closely monitor your bulk fermentation and allow the dough’s activity, not just the clock, to dictate when it’s ready.
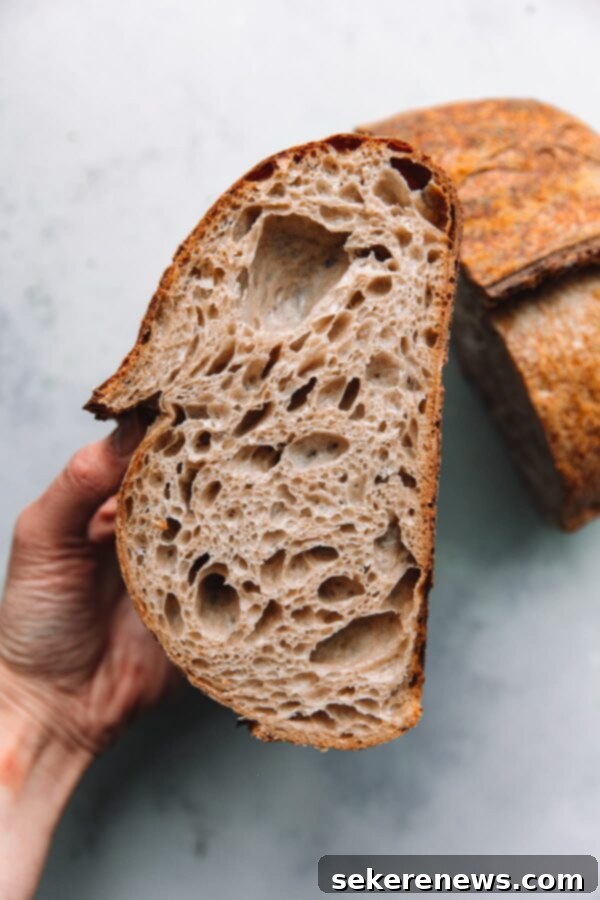
Q: My loaves are dense and gummy or have huge air pockets surrounded by a tight crumb. Why is this happening?
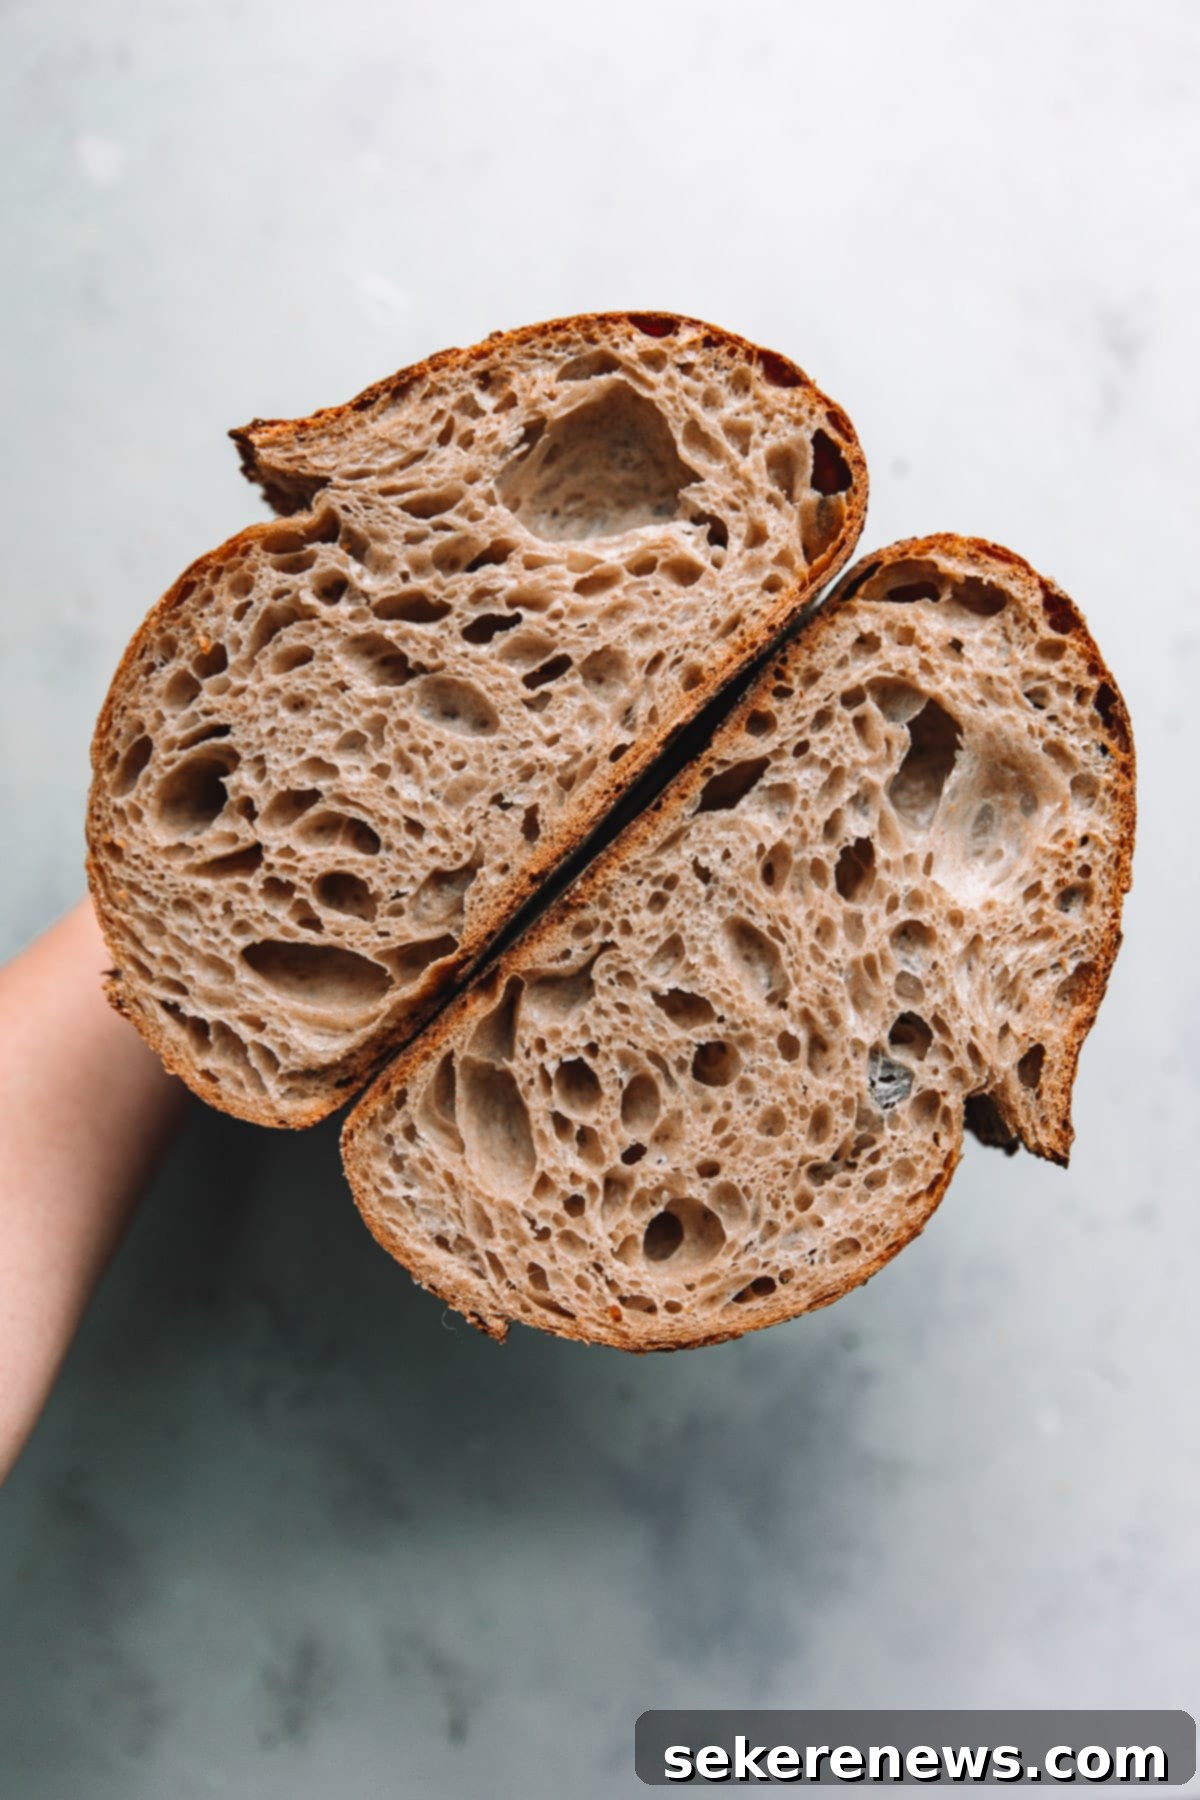
These are classic indicators of **under-proofed dough**, an extremely common problem for beginners. This occurs when your dough hasn’t fermented enough to develop a strong, even gluten network capable of trapping gases uniformly. As a result, the crumb either remains dense and gummy (lacking enough gas) or develops a few massive, irregular air pockets (where gas was trapped but the surrounding structure is too tight) rather than a consistent, open structure.
Common culprits include:
- Weak or Under-active Sourdough Starter: If your starter isn’t robust and active, it won’t produce enough gas to properly leaven the dough. (Refer to my sourdough starter troubleshooting guide for details on strengthening your starter.)
- Insufficient Bulk Fermentation: The dough simply hasn’t had enough time or warmth to ferment adequately.
- Cold Ambient Temperatures: Cold kitchens slow down fermentation considerably, leading to under-proofing even with sufficient time.
To troubleshoot this, try focusing on strengthening your starter for another week by consistent feeding. For your next loaf, extend the bulk fermentation time, carefully observing the dough’s volume and activity. Find a warmer spot in your kitchen (75°F-80°F or 24°C-27°C is ideal), or consider investing in a bread proofing box to maintain a consistent warm environment.
Q: How do I achieve an even, open crumb structure?
Achieving an open, lacy crumb is a hallmark of well-made sourdough for many bakers, but it’s important to remember that crumb preference is subjective, and different bread types naturally have different crumb structures. Ultimately, figure out what type of bread you want to make!
For those aspiring to achieve that beautiful, open crumb, several factors are critical:
- Active Sourdough Starter: A strong, active starter is the foundation for good gas production.
- Proper Hydration: While high hydration isn’t always necessary, sufficient water allows for greater extensibility and gas expansion.
- Effective Gluten Development: Through proper mixing, stretching, and folding techniques, you need to build a strong yet extensible gluten network capable of trapping gases.
- Optimal Bulk Fermentation: Perfecting bulk fermentation (as discussed above) ensures the dough is neither under- nor over-proofed.
- Gentle Handling: During pre-shaping and final shaping, minimize degassing the dough.
- Good Oven Spring: Achieved through adequate steam and high initial baking temperatures.
If you’re looking to dive deep into the advanced techniques specifically designed for creating highly open, irregular crumbs, I highly recommend Trevor Wilson’s Open Crumb Mastery e-book. While an excellent resource, it’s best suited for bakers who have already mastered the basics.
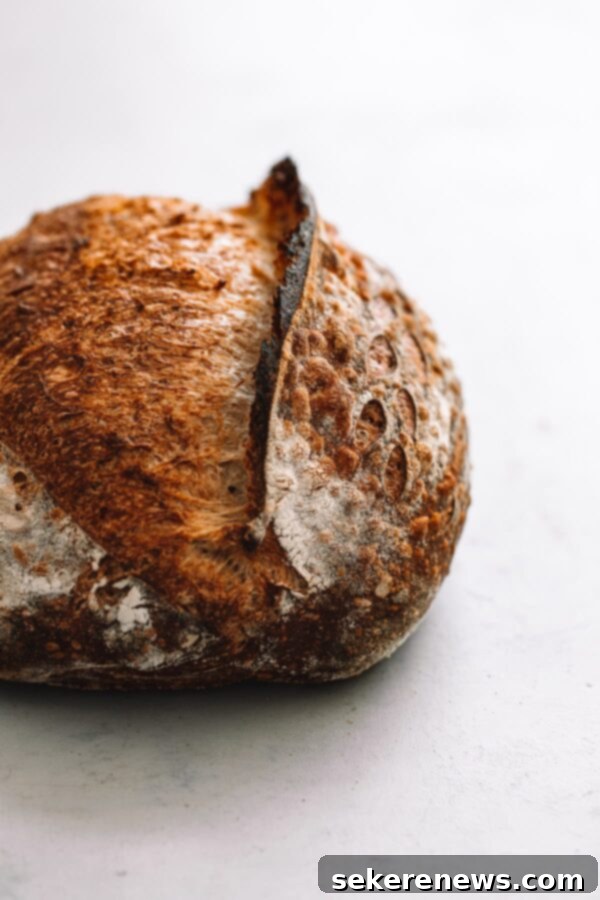
Q: Why aren’t my ears or scores opening nicely?
The prominent “ear” and beautifully opened scores on a sourdough loaf are the culmination of several critical factors working in harmony, rather than just one technique. Achieving them demonstrates a good understanding of the entire sourdough process:
- Proper Fermentation and Dough Development: This is fundamental. Your dough needs to have developed sufficient strength and trapped enough gas during bulk fermentation and proofing. Under-proofed dough often results in dull scores and a pale, unyielding crust because it lacks the internal pressure and elasticity to expand properly. Over-proofed dough might have better color but lacks the structural integrity to support the score, leading to a collapse rather than an opening.
- Optimal Tension and Shaping: A tightly shaped loaf with good surface tension is essential. This tension helps direct the dough’s expansion through the score.
- Scoring Skill and Technique: The angle, depth, and swiftness of your cut significantly impact the outcome. A sharp, high-quality bread lame is also crucial for clean, effective scores. If your score isn’t deep enough, or if the blade isn’t at the right angle (typically a shallow angle for an ear), the ear won’t develop as nicely.
- Oven Temperature and Steam: High initial oven heat and abundant steam are vital. Steam keeps the crust supple for longer, allowing for maximum expansion through the score before the crust sets.
As you can see, many variables are at play. Don’t be discouraged! Consistency comes with practice. The more you bake and experiment, the better you will become at understanding your dough and achieving those coveted sourdough ears.
Q: The bottom of my loaves are darkening too quickly. Is there a way to prevent this during baking?
A rapidly darkening or even burnt bottom crust can be a common issue, especially when baking at high temperatures. Here’s how to address it:
- Calibrate Your Oven: First and foremost, invest in a separate oven thermometer. Many home ovens can be off by as much as 25°F (15°C) or more. An accurate thermometer will help you ensure your oven is truly at the temperature you set. Adjust your oven settings as necessary based on this calibration.
- Add Insulation: If the problem persists even after calibrating your oven, the issue might be direct heat transfer from the bottom of your oven. Try placing a baking sheet (or two stacked baking sheets for extra insulation) on the rack *below* your baking vessel. Crucially, do not preheat these baking sheets; add them when you place your bread in the oven. This creates a buffer that shields the bottom of your Dutch oven or Challenger Pan from direct radiant heat.
- Check Fermentation: Interestingly, if the bottom of your loaf darkens rapidly while the rest of the crust remains pale, it can sometimes be an indication of poor fermentation. A well-fermented dough will brown more evenly across the entire crust.
Experiment with these methods to find the optimal balance for your oven and equipment.
Q: My Dutch Oven can’t be preheated to 500°F. Can I reduce the baking temperatures?
Some Dutch oven brands or models are not designed to withstand preheating at extremely high temperatures like 500°F (260°C). This limitation often stems from the material of their lid knobs (some plastic or phenolic knobs can melt or degrade) or other manufacturing specifications. Additionally, certain home ovens, particularly some European models, may not offer temperature ranges that go up to 500°F.
If your Dutch oven or oven cannot reach or safely handle 500°F, you can certainly reduce the preheating and baking temperatures. A common alternative is to preheat your Dutch oven and oven to 450°F (232°C). Experiment with this lower temperature to see if you achieve satisfactory results. While 500°F provides a strong initial burst of heat for maximum oven spring, 450°F can still yield excellent bread.
If the issue is specifically the Dutch oven knob, check if the brand offers a stainless steel or metal replacement knob, which can typically withstand much higher temperatures. Most high-quality Dutch ovens are designed to be safe at high temperatures, but it is **imperative** that you always consult and follow the brand manufacturer’s specific instructions and temperature recommendations before proceeding with any high-temperature baking. Safety should always be your top priority.
We hope this comprehensive guide helps you overcome your sourdough challenges and achieve consistently delicious loaves. Happy baking!
If you enjoyed this post and found it helpful, be sure to check out my other sourdough bread baking resources:
- How to Revive Dried Sourdough Starter
- Sourdough Starter Troubleshooting Guide
- How to Bake Sourdough in a Dutch Oven (and Shape a Boule)
- Artisan Sourdough Bread Recipe + Step-By-Step YouTube Video
- Kalamata and Castelvetrano Sourdough Recipe
- Sourdough Pizza Dough
- Favorite Sourdough Bread Tools and Resources
- How to Store, Freeze, and Refresh Bread
