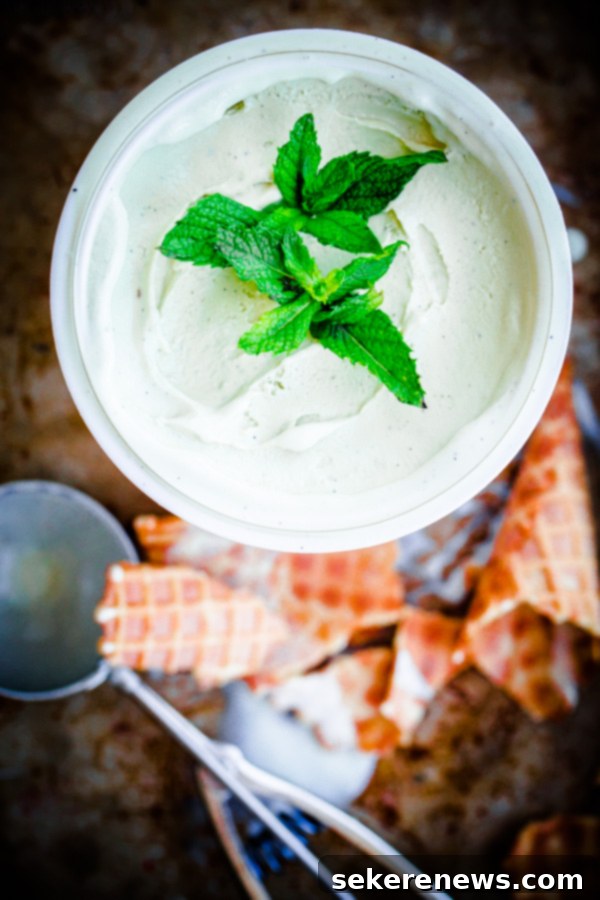
Homemade Fresh Vanilla Mint Ice Cream: A Naturally Flavored Delight
There’s an undeniable magic that happens when classic flavors are reimagined with fresh, natural ingredients. Our journey into crafting the perfect ice cream brings us to a harmonious blend: fresh vanilla mint ice cream. This isn’t just any mint ice cream; it’s a luxurious, naturally flavored treat infused with the vibrant essence of torn mint leaves and the rich aroma of whole vanilla beans. Prepare for a dessert experience that truly doubles your pleasure and deepens your appreciation for homemade indulgence.

The Unrivaled Taste of Natural Flavor: Why Fresh is Best
In a world saturated with artificial flavors and extracts, returning to nature’s bounty offers a profound difference, especially when it comes to something as delicate as ice cream. This recipe champions authenticity by shunning artificial peppermint extracts and vanilla essences in favor of their true, unprocessed counterparts. The result is a sophisticated flavor profile that commercial ice creams can rarely replicate.
The Power of Fresh Mint Leaves
Unlike the sharp, sometimes overpowering taste of peppermint extract, fresh mint leaves impart an herbaceous, bright, and incredibly refreshing flavor. When torn and gently infused into a warm dairy base, the natural oils from the mint leaves slowly release, creating a complex and nuanced minty goodness that is both invigorating and subtle. You’ll notice a distinct, clean taste that is characteristic of true spearmint or peppermint (depending on your choice), rather than a generic, sugary mint.
The Elegance of Whole Vanilla Beans
Similarly, using a whole vanilla bean elevates the vanilla component from a background note to a star player. The tiny, fragrant seeds (often called caviar) from a Madagascar vanilla bean lend an unmistakable depth, warmth, and visual appeal to the ice cream. These specks are a testament to the real deal, offering a far richer and more aromatic experience than vanilla extract, which, while useful, cannot compare to the full-bodied flavor of the bean itself. This combination creates a two-in-one flavor sensation: the classic comfort of vanilla bean intertwined with the invigorating burst of fresh mint.

My Personal Quest for the Ultimate Mint Ice Cream
It’s no secret that mint ice cream holds a special place in my heart. While I enjoy experimenting with unique ice cream flavors, mint (especially a good mint chocolate chip) is often my go-to choice. This passion, however, sometimes leads to a peculiar dilemma. Standing in front of a vast array of ice cream flavors, I often succumb to a serious case of FOMO (Fear Of Missing Out), always convinced that the next scoop of mint could be the best mint ice cream I’ve ever had. More often than not, it isn’t, and I’m left wishing I’d ventured out to try something more adventurous. A true first-world problem, I know!
This quest, however, led to a truly memorable discovery. Last summer, during a visit to my older sister in Berkeley, California, I experienced one of the most incredible mint ice creams at a place called Smitten. This trendy spot makes ice cream to order using liquid nitrogen, which results in an incredibly smooth and fresh texture. Their mint ice cream was nothing short of extraordinary. Made with solely fresh mint leaves, its flavor was so intense and pure, almost mojito-esque (minus the alcohol, of course) in its minty punch. It was a revelation – so, so minty, and perfectly balanced!

Crafting Your Own Minty Masterpiece: The Infusion Method
That unforgettable experience at Smitten spurred a vow: I would recreate a similar, intensely fresh mint ice cream using *only* fresh mint leaves, completely free of extracts. A year later, the time finally came to bring this vision to life. To add another layer of complexity and sophistication, I decided to infuse the ice cream base not just with fresh mint, but also with the fragrant seeds of a whole vanilla bean. This dual infusion technique is the secret to this ice cream’s exceptional depth of flavor.
The Art of Infusion for Maximum Flavor
The key to achieving that authentic herbal mint flavor, so distinct from traditional peppermint extract, lies in the infusion process. It’s crucial to allow the fresh mint leaves to steep in the warm milk and cream mixture for *at least an hour*. By gently tearing the mint leaves before adding them, you help to break open their cells and release their precious natural oils more effectively. This slow, gentle infusion allows the mint’s essence to fully permeate the dairy, resulting in a wonderfully aromatic base. You might even notice the milk and cream taking on a subtle, delicate green hue – a natural sign that the mint’s magic is at work!

Tips for Success: Achieving the Perfect Creamy Texture
Creating homemade ice cream is a rewarding process, and a few key steps will ensure your fresh vanilla mint ice cream turns out perfectly creamy and delicious:
- Thorough Infusion: Don’t rush the mint infusion. The longer the mint steeps (within reason, 1-2 hours is ideal), the more robust the flavor will be.
- Tempering Eggs: When adding the hot milk mixture to the egg yolks, do so slowly while continuously whisking. This prevents the eggs from scrambling and ensures a smooth custard base.
- Proper Thickening: Cook the custard over low heat, stirring constantly, until it’s thick enough to coat the back of a wooden spoon. This stage is crucial for the ice cream’s rich texture.
- Complete Chilling: The ice cream base must be *completely* chilled before churning. This can take anywhere from 6 hours to overnight in the refrigerator. A well-chilled base freezes faster and results in a smoother, less icy ice cream.
- Churning Consistency: Follow your ice cream maker’s instructions carefully. Over-churning can lead to a buttery texture, while under-churning might result in a softer set.
- Storage: Once churned, transfer the ice cream to an airtight container. Placing a layer of parchment paper or plastic wrap directly on the surface of the ice cream before sealing helps prevent ice crystals from forming.

Beyond the Scoop: Enjoying Your Homemade Creation
Once you’ve tasted this homemade fresh vanilla mint ice cream, you’ll find it stands wonderfully on its own. Its balanced flavors are a delightful palate cleanser and a refreshing dessert. However, don’t hesitate to get creative with how you serve it! A sprinkle of dark chocolate shavings can mimic a high-end mint chocolate chip experience, or a drizzle of homemade hot fudge can add a classic touch. For a truly indulgent treat, consider pairing it with fresh berries or serving it alongside a slice of rich chocolate cake.
And speaking of fresh mint, if you happen to have any leftover from this recipe, you absolutely *must* try making these refreshing sorbet prosecco floats with muddled raspberries and fresh mint. It’s another fantastic way to utilize this versatile herb and truly elevate your beverage game. Whether it’s cocktails or artisanal ice cream, fresh ingredients always make the difference.

Fresh Vanilla Mint Ice Cream
Pin
Review
SaveSaved!
Equipment
-
KitchenAid 5 Qt. Artisan Stand Mixer
Ingredients
- 2 cups (460 mL) whole milk
- 1 cup (230 mL) heavy cream
- 1 ounce fresh mint leaves
- 5 large egg yolks
- ¾ cup (150 g) granulated sugar
- 1 whole Madagascar vanilla bean
Instructions
-
Combine the milk and heavy cream in a medium saucepan. Tear the mint leaves into small pieces (you want to release as much oil from the leaves as possible to infuse maximum flavor), and add to the milk and cream mixture. Place over medium-low heat and heat until just steaming. Remove from the heat, cover with a lid, and allow the fresh mint to infuse in the milk and cream mixture for at least one hour.
-
Strain the mint milk mixture through a fine-meshed sieve into a medium bowl. Press the mint leaves with the back of a wooden spoon to release as much oil as possible (the cream milk mixture might be light green in color, don’t worry!).
-
In a separate large mixing bowl, whisk together the egg yolks and sugar until smooth and pale yellow in color.
-
Transfer the strained milk mixture back into the same saucepan and heat over medium heat until just beginning to boil. Remove from the heat immediately. Temper the hot milk mixture into the egg yolks slowly, whisking continously with your other hand as you pour. Transfer the mixture back into the saucepan, and heat over low heat, stirring constantly, until the ice cream base has thickened considerably and coats the back of a wooden spoon.
-
Once the ice cream base is thick, pour it through a fine-meshed sieve into a large heat-proof bowl. Place the vanilla bean pod on a cutting board and slice it in half lengthwise with a pairing knife. Using the back of your knife, scrape the vanilla bean caviar and whisk it into the ice cream base. Add the scraped vanilla bean halves to the mixture as well. Set _blank;the bowl in an ice bath, stirring every 10 minutes or so, until the base has cooled. Place ice cream base in an airtight container and set in the refrigerator until it has completely chilled.
-
Remove the ice cream base from the fridge. Remove the scraped vanilla pod from the ice cream and discard. Churn the ice cream in an ice cream maker according to the manufacturer’s instructions. Place the ice cream in an airtight container, cover the surface of the ice cream lightly with parchment paper or plastic wrap (I use this type of container, which works great!).
-
Freeze the ice cream for a minimum of 4 to 6 hours, or until firm enough to scoop.
