Mastering Homemade Sourdough Pizza: Your Ultimate Guide to a Perfect Crust and Classic Margherita

For many dedicated bakers, maintaining an active sourdough starter is a labor of love, yielding the unparalleled satisfaction of crafting artisanal breads. However, one of the most rewarding and surprisingly accessible benefits of a healthy starter is the ability to create truly exceptional **homemade sourdough pizza**. Far easier to master than sourdough bread, sourdough pizza will revolutionize your dinner table, delivering a depth of flavor and texture that’s simply unmatched by conventional crusts.
This irresistible **sourdough pizza dough** is naturally leavened, harnessing the power of wild yeasts and beneficial bacteria from your starter. Our recipe uniquely combines Type “00” flour—a fine, strong flour renowned in Italy for its role in traditional pizzas and fresh pasta—with high-protein bread flour. This precise blend is the secret to a crust that is both delightfully crisp and satisfyingly chewy, with an incredibly tender interior and the distinct, complex tang that only sourdough can provide. Every single bite is bursting with flavor, transforming your pizza night into a gourmet experience.
After years of tireless experimentation with countless pizza recipes, this particular formula has consistently emerged as our unwavering favorite. It’s not just easy to follow; it reliably produces consistently delicious, truly **restaurant-worthy sourdough pizza** that will exceed all your expectations. A fair warning: once you taste the superior quality of pizza made with this dough, you’ll likely find yourself forever spoiled, making it nearly impossible to go back to any other kind of crust!
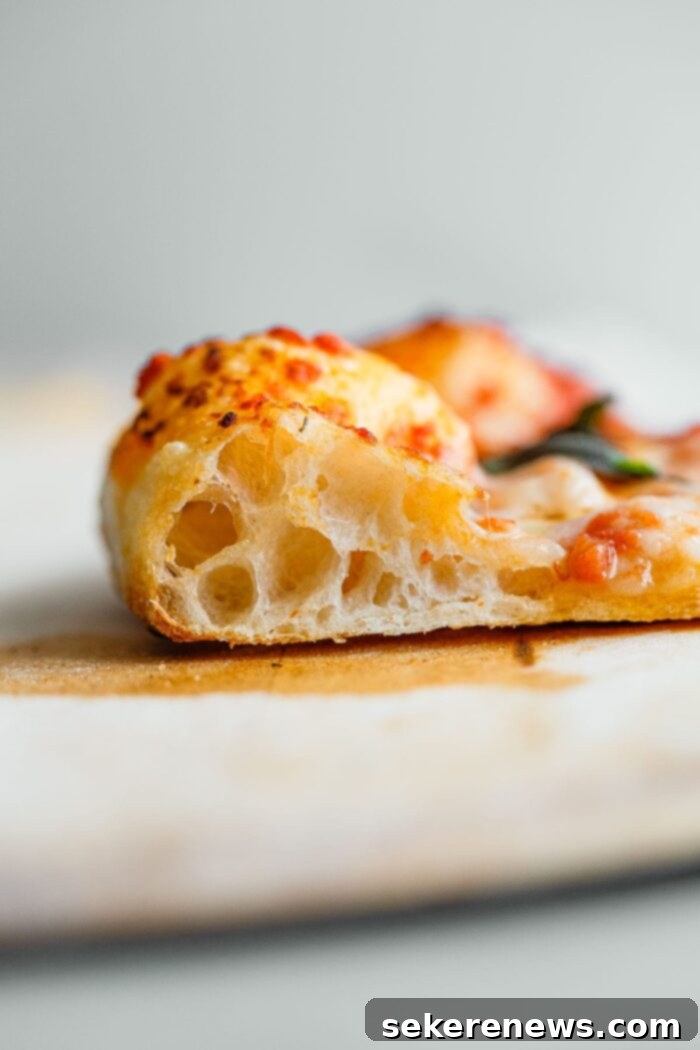
Essential Sourdough Pizza Dough Ingredients
This recipe is perfectly designed to yield three delicious 10-inch pizzas, an ideal quantity for a family meal or a small gathering. To achieve the absolute best results, we recommend using high-quality ingredients, paying attention to the details:
- 225 grams filtered water, precisely heated to 90°F-95°F (32°C-35°C). The specific temperature is vital for optimal sourdough starter activity and gluten development.
- 15 grams fine sea salt or kosher salt. Salt is not just for flavor; it also plays a critical role in controlling the dough’s fermentation rate and strengthening the gluten structure.
- 250 grams active, ripe sourdough starter (100% hydration). Your starter should be bubbly, active, and have recently been fed, ideally showing signs of peak activity.
- 250 grams Type “00” flour. This finely milled Italian flour imparts a delicate, tender texture and excellent extensibility to the pizza crust. We’ve extensively tested this formula with Central Milling Type “00” Flour, and on occasion, Caputo “00” Flour, both yielding superb results.
- 125 grams high-protein bread flour. This ingredient is key for providing the dough with structure, strength, and that satisfying chewiness we all love in a great pizza crust. We highly recommend using a reputable brand such as King Arthur Bread Flour for consistent performance.
The strategic combination of Type “00” and high-protein bread flour creates a harmonious balance. The “00” flour contributes to the delicate, airy crumb and authentic Italian character, while the bread flour ensures enough gluten development for a robust, chewy texture that can withstand high temperatures without becoming overly soft. This thoughtful blend is what sets this sourdough pizza dough apart, promising a superior crust every time.
Crafting Your Sourdough Pizza Dough: A Step-by-Step Guide
Creating exceptional sourdough pizza dough is a process that demands a little patience, but the results are undeniably worth the wait. This detailed, step-by-step guide will walk you through each stage, ensuring your success. For in-depth equipment recommendations and an example baking timeline to help you plan your day, please consult the complete recipe card located at the very end of this article.
Step 1: Hydration and Starter Integration – Building the Dough’s Foundation
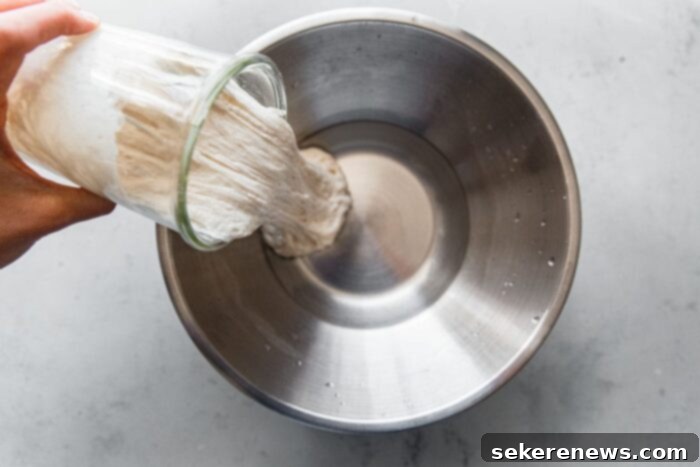
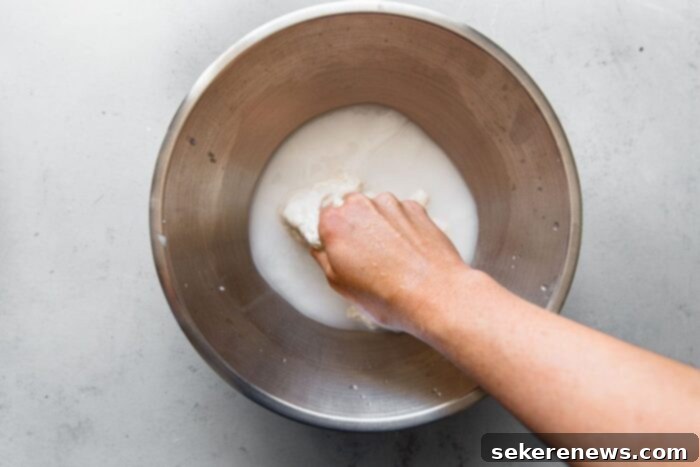
Begin by combining the precisely measured warm filtered water and salt in a spacious mixing bowl. Stir the mixture vigorously with your fingers or a whisk until the salt is completely dissolved; this step is crucial for even flavor distribution and proper gluten development later on. Next, introduce your active, ripe sourdough starter. Using your hands, gently pinch and mix the starter into the water until it breaks down into small, uniform clumps and is thoroughly dispersed throughout the liquid. This initial mixing helps to evenly distribute the leavening power of your starter.
Step 2: Incorporating Flours and the Initial Rest (Autolyse)
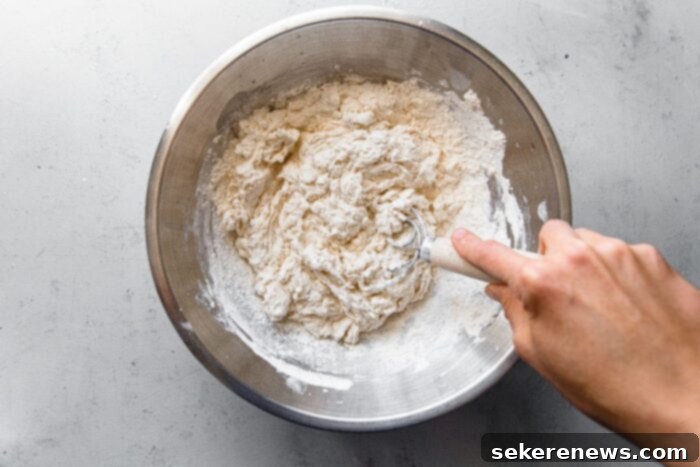
Once the starter is well combined, add both the “00” flour and the high-protein bread flour into the bowl. Employ a sturdy Danish dough whisk or your clean hands to thoroughly mix all the ingredients together. Continue mixing until no pockets of dry flour or unmixed lumps remain, and the dough just begins to come together in a shaggy mass. This rough appearance is perfectly normal at this stage. Cover the bowl tightly with a lid or plastic wrap and allow the dough to rest at room temperature (ideally around 72°F/22°C) for a precise 20 minutes. This crucial rest period, often referred to as an autolyse, allows the flours to fully hydrate, initiating gluten development and making the subsequent kneading much more efficient and less strenuous.
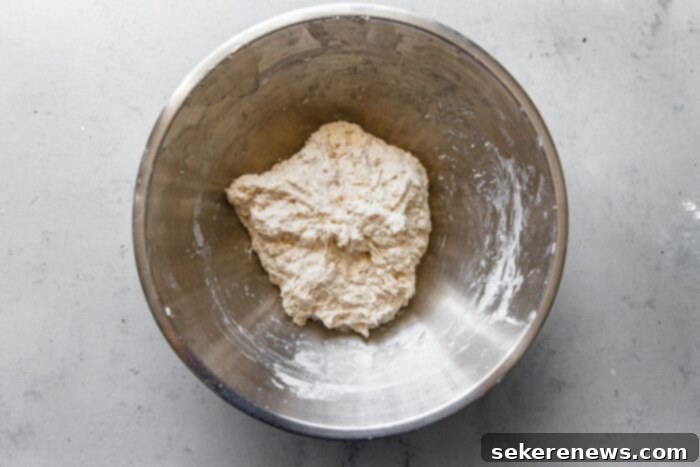
Step 3: Brief Kneading and Bulk Fermentation – Developing Strength and Flavor
Following the rest, transfer the shaggy dough onto a lightly floured countertop. Knead the dough gently but consistently for approximately 1 minute. You will observe a remarkable transformation: the dough will become considerably smoother, more elastic, and cohesive, shifting from a sticky mass to a supple, manageable ball. Only lightly dust with flour if absolutely necessary to prevent sticking, as excessive flour can alter the dough’s hydration. Once smooth, lightly grease your mixing bowl with a touch of olive oil, gently shape the dough into a loose round, and return it to the greased bowl. Cover tightly and allow it to proof at room temperature (aim for 72°F/22°C) for about 3 hours. This critical bulk fermentation period allows your sourdough starter to actively leaven the dough. You should expect to see a significant increase in volume, approximately 50%, and the edges of the dough will appear noticeably smoother and rounded, indicating healthy gluten development and vigorous fermentation.
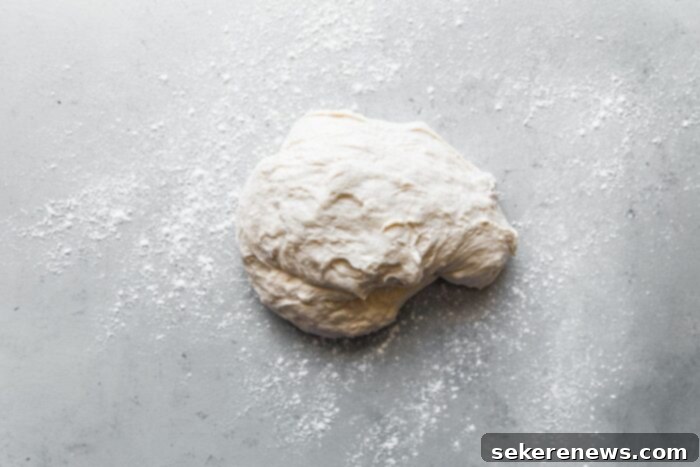
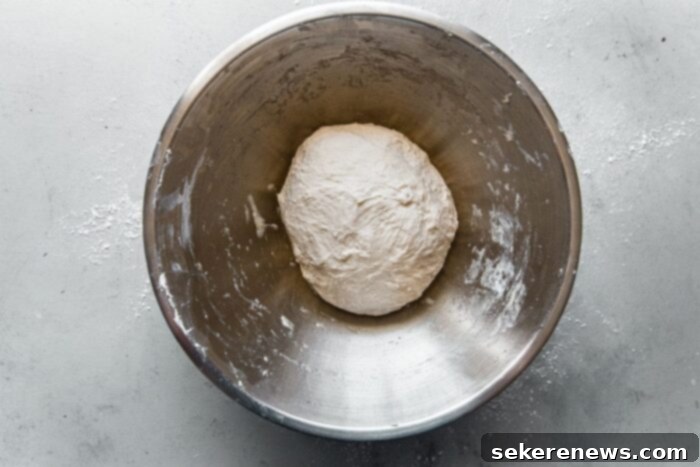
Step 4: Dividing the Dough – Precision for Uniform Pizzas
Once the bulk fermentation is complete, gently transfer the risen, airy dough onto a clean, unfloured countertop. The dough should feel light and slightly resilient. Using a bench knife or a sharp, floured knife, carefully divide the entire dough mass into three equal pieces. Each piece should weigh approximately 280 grams, which is the ideal portion for a single 10-inch pizza. Handling the dough delicately at this stage is crucial to preserve the precious gases and airy structure developed during fermentation, which contributes to a light, bubbly crust.
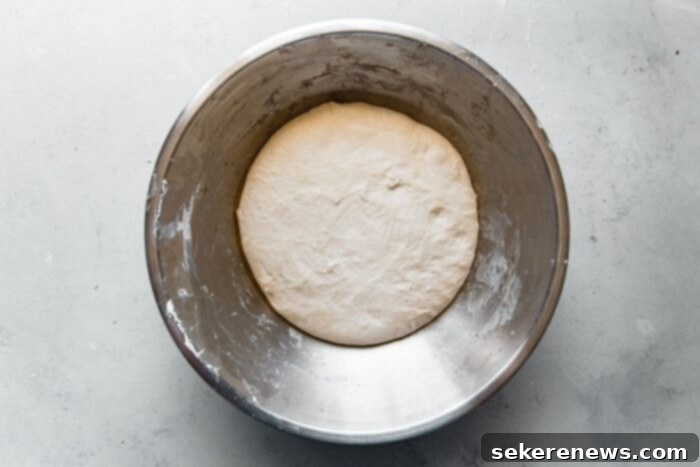
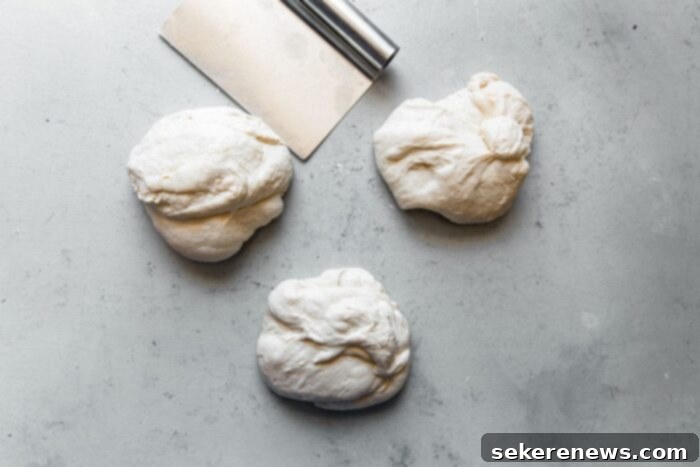
Step 5: Shaping into Perfect Pizza Balls – Building Surface Tension for Oven Spring
Now, meticulously shape each individual dough piece into a tight, round ball. This step is fundamental for cultivating optimal surface tension, which directly translates to a beautifully airy and bubbly crust with impressive oven spring during baking. Work with one piece of dough at a time, keeping the others covered to prevent them from drying out. Grab the top portion of the dough, gently stretch it upwards, and then meticulously fold it back into the center. Rotate the dough slightly and repeat this folding action from the opposite edge. Continue working your way around the outer edges of the dough, folding them inwards towards the center, aiming to create a tightly seamed package, much like gathering a small pouch.
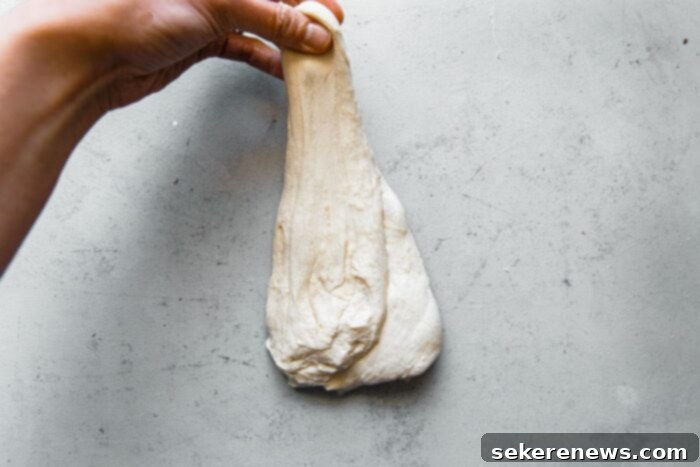
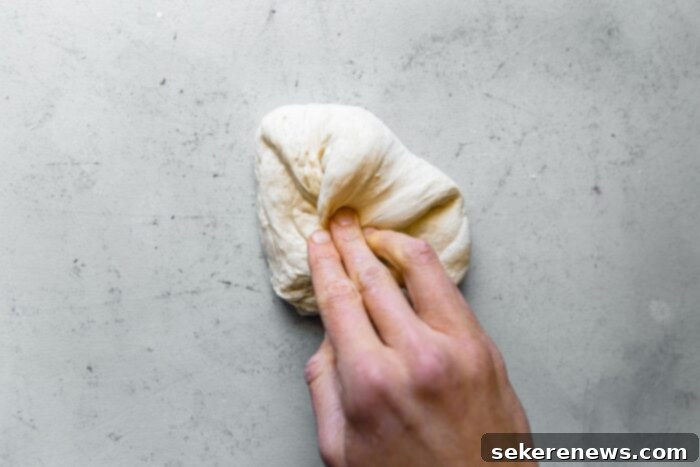
Step 6: Final Proofing – Flavor Development and Dough Maturity
Once you’ve achieved a tightly seamed package, flip the dough seam-side down onto your clean countertop. Using the gentle pressure of your cupped hands, rotate the dough to further shape it into a perfectly round ball, building tautness on its surface. Repeat this precise shaping technique for the remaining two dough pieces.
Carefully transfer these beautifully shaped dough balls into a flour-dusted proofing box, a rectangular pan with a lid, or even a large plate covered snugly with plastic wrap, ensuring adequate space between them for expansion. Lightly dust the tops of the dough balls with a sprinkle of flour to prevent any sticking. Cover the container and allow the dough to rest and proof at room temperature (around 72°F/22°C) for a minimum of 5 to 6 hours. This extended proofing period is absolutely essential for the development of the deep, complex flavors and the characteristic airy texture that sourdough is celebrated for. The dough should become noticeably lighter, considerably airier, and significantly expand in volume. It will be ready when it looks well-risen and feels delicate to the touch. This dough is remarkably forgiving, capable of holding its prime for an additional 3 to 4 hours after its minimum proofing time, offering excellent flexibility for your dinner preparations.
For enhanced flavor and added convenience, refer to the full recipe card at the bottom of this post for detailed make-ahead instructions. This includes guidance on how to cold-proof your dough in the refrigerator overnight, a method that further deepens the sourdough flavor and easily accommodates a busy schedule.
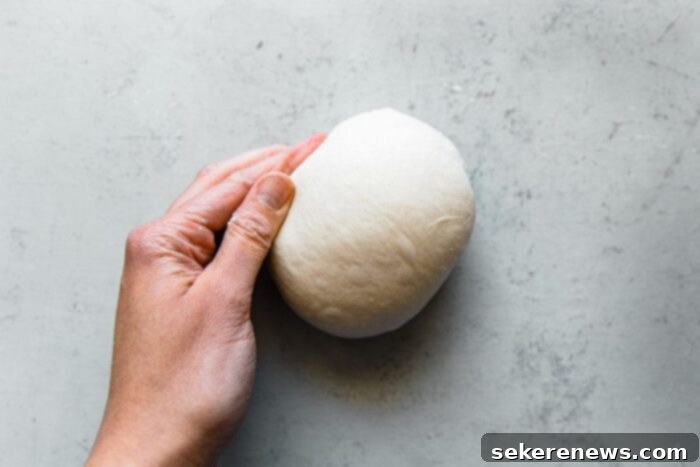
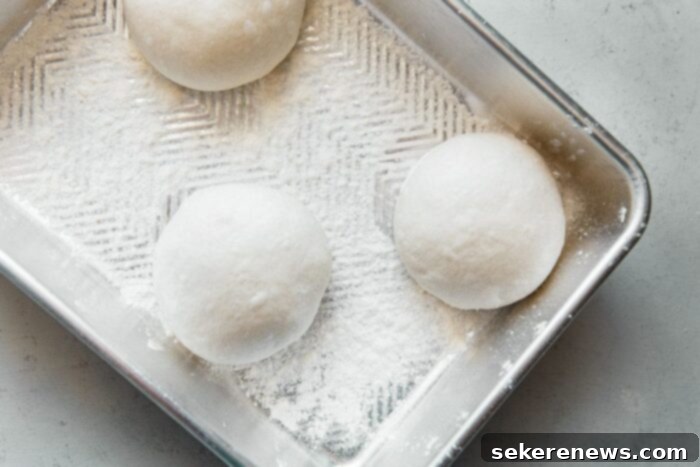
Step 7: The Final Transformation – Your Dough is Ready!
Following the extended and patient proofing period, your sourdough pizza dough balls will have undergone a magnificent transformation. They should have expanded considerably, likely touching each other within the container, and nearly doubled in their original size. The surface will appear smooth, supple, and filled with a multitude of tiny air bubbles, a clear indicator of a perfectly fermented and developed dough. This is the precise moment when your **sourdough pizza dough** is primed and ready to be shaped and baked into glorious, flavorful pizzas! Proceed to the detailed shaping and baking instructions that follow to turn these exquisitely proofed dough balls into true culinary masterpieces, ready to be enjoyed.
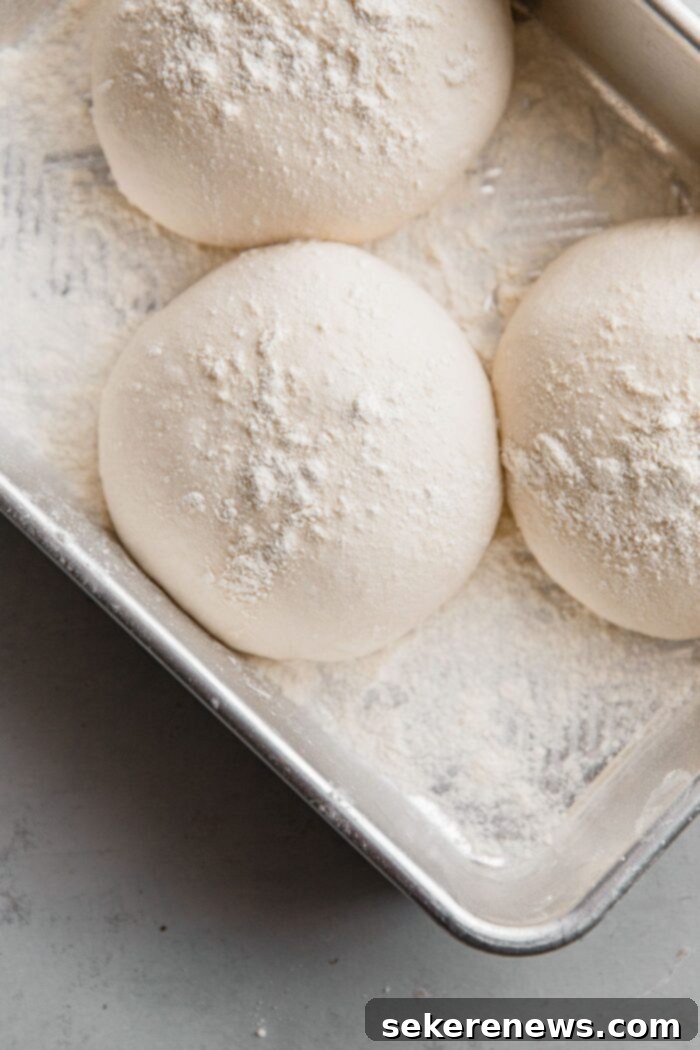

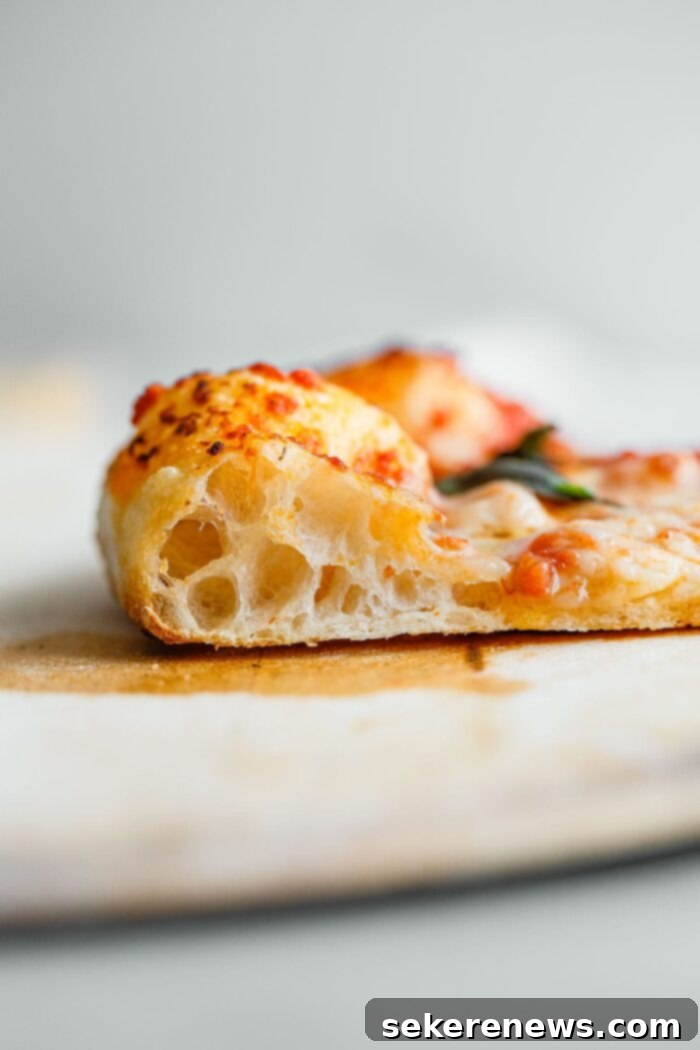
How to Shape and Bake Sourdough Pizza: The Timeless Margherita Style
With your perfectly proofed sourdough pizza dough now prepared, the truly exciting phase begins: assembling and baking your pizzas! For an authentic taste of Italy that perfectly showcases the quality of your homemade crust, we’ll guide you through crafting a classic Margherita-style pizza. Its simplicity allows the exceptional flavors of the ingredients and, most importantly, the sourdough crust, to truly shine.
To create a truly irresistible Margherita pizza, you’ll need only a handful of high-quality, fresh ingredients: our vibrant homemade pizza sauce (or a premium store-bought alternative), creamy fresh mozzarella cheese, fragrant fresh basil leaves, and a generous drizzle of the finest extra virgin olive oil. This elegant, minimalist approach results in a pizza that is utterly irresistible, allowing the distinct sourdough tang to come through beautifully, complementing every element.
For invaluable visual guidance on shaping pizza dough like a seasoned pizzaiolo, be sure to watch this quick and highly informative step-by-step video series. It offers essential tips and techniques, especially helpful for beginners!
Step 1: Preheat for Perfection – The Critical Role of a Super-Hot Baking Surface
Achieving a beautifully crisp, perfectly cooked pizza crust hinges on intense, sustained heat. Position a baking steel (a high-quality pizza stone can also work, but a steel offers superior heat retention) on a rack in the upper third of your oven, ideally positioned approximately 6 to 7 inches directly below the broiler element. Preheat your oven and the steel to a blistering 500°F (260°C) for a minimum of one full hour. This extended preheating ensures the steel is thoroughly saturated with heat, effectively mimicking the fierce conditions of a professional pizza oven. While your oven and steel are heating, take this opportune moment to prepare all your pizza sauce and toppings, meticulously arranging them for seamless and swift assembly. Speed is paramount once the dough is stretched!
Step 2: Preparing Your Peel – The Ultimate Non-Stick Solution
A meticulously prepared pizza peel is absolutely essential for a smooth, swift, and stress-free transfer of your delicate pizza to the intensely hot oven. Begin by lightly dusting a wooden pizza peel with a generous coating of all-purpose flour. Following this, evenly sprinkle a layer of fine semolina flour over the flour. This ingenious combination creates an exceptionally slippery, non-stick surface, allowing your delicate dough to glide effortlessly off the peel and onto the scorching baking steel without tearing or sticking. Use your hands to gently spread this flour mixture uniformly across the entire surface of the peel, ensuring complete coverage. This step is a critical preventative measure against one of the most common and frustrating pitfalls for home pizza makers – a stuck pizza!
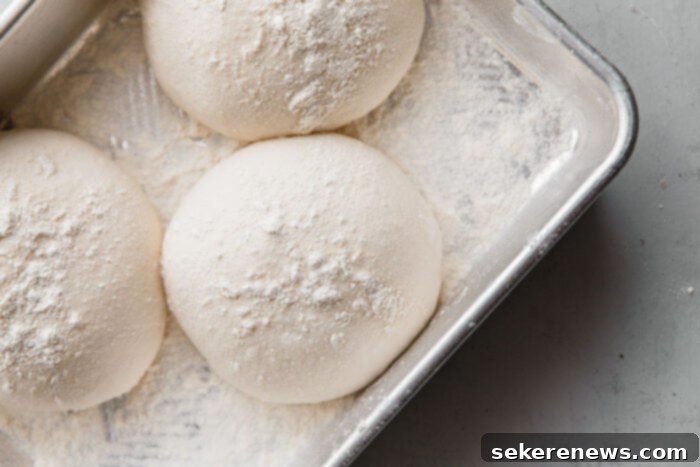
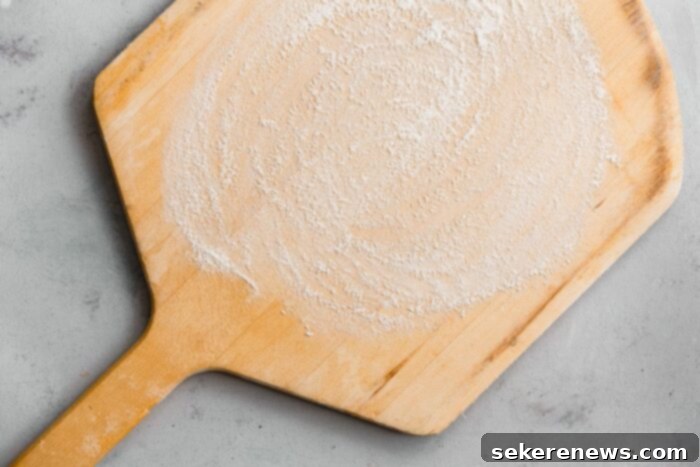
Step 3: Superheat the Steel and Gently Prepare the Dough Ball
Immediately before you begin the exciting process of assembling your first pizza, activate your oven’s broiler and set it to high for approximately 10 minutes. This intense, targeted blast of heat will “supercharge” your baking steel, ensuring it reaches its absolute maximum temperature, which is essential for achieving that sought-after blistered, airy crust. Concurrently, generously dust your clean countertop with all-purpose flour. With utmost care, gently lift one perfectly proofed sourdough pizza dough round from its proofing container (remembering to cover the remaining dough to prevent it from drying out) and place it delicately onto the floured surface. Lightly dust the top of this dough ball with an additional sprinkle of flour, preparing it for shaping.
Step 4: Initial Pressing – Forming the Pizza Base and Crust
With the dough positioned on your floured countertop, use both hands and the soft pads of your fingertips to gently press the dough. Start from the very center and work your way outwards towards the edges, being deliberate in maintaining a slightly thicker rim around the perimeter. This thicker edge is crucial; it will develop into your beautiful, airy, and chewy crust. Rotate the dough continuously as you press, ensuring an even thickness across the base and a consistent round shape. The primary goal here is to gently degas the center of the dough while carefully preserving the precious air trapped within the crust, which will give you that desirable rise and characteristic open texture.
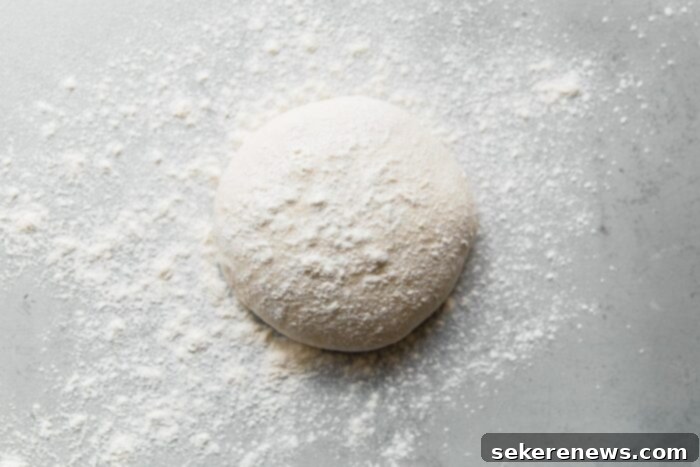
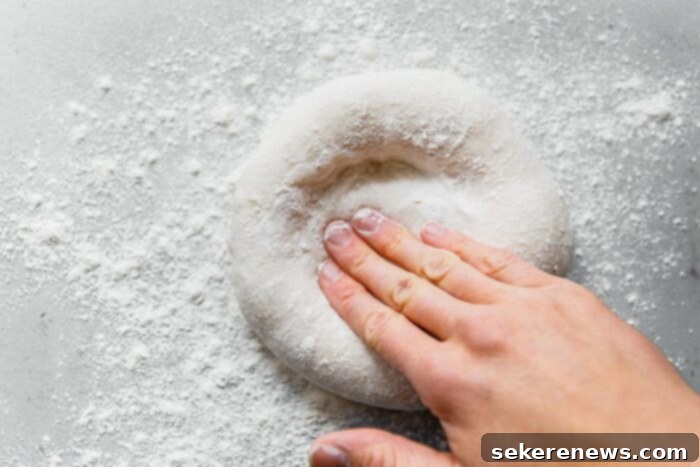
Step 5: Stretching the Dough – The Art of Achieving a Thin, Even Crust
Once your dough disc has been pressed out to approximately 6 to 7 inches in diameter, it’s time for the gravity-assisted stretch, a technique that allows for a beautifully thin and even crust. Carefully lift the dough with both hands, allowing the center to rest gently on your knuckles. Gently push your knuckles outwards, allowing the natural weight and elasticity of the dough to stretch it. Continuously rotate the dough, ensuring it stretches evenly into a thin, roughly 10-inch disc, all while carefully preserving those slightly rounded, thicker edges that will become your magnificent crust. Handle the dough with extreme care to prevent any tearing. Once it’s stretched to your desired size and thinness, carefully transfer the delicate dough onto your meticulously prepared, flour-dusted pizza peel. Work swiftly but gently during this stage to prevent sticking.
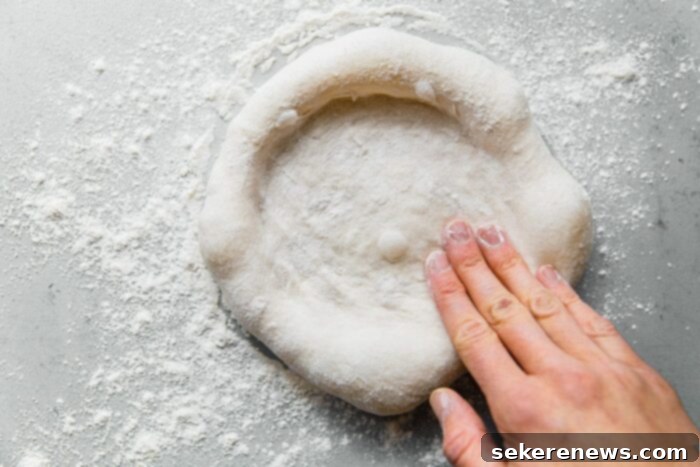
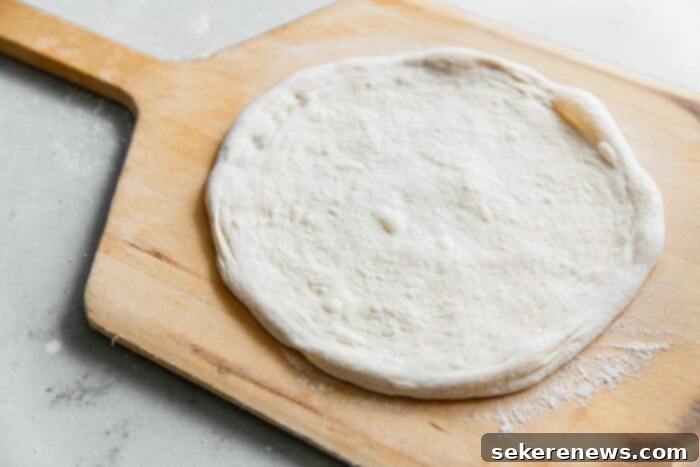
Step 6: Layering Sauce and Oil – The Essential Flavor Base
With your delicately stretched dough resting on the pizza peel, drizzle a small amount of high-quality extra virgin olive oil over its surface. Use your clean hands to gently brush the oil, ensuring it coats the entire surface evenly, paying particular attention to the edges of the crust. This olive oil contributes significantly to both the crust’s golden-brown color and its rich, Mediterranean flavor. Next, spoon roughly ⅓ to ½ cup of your delicious homemade pizza sauce (or your chosen alternative) into the center of the dough. Using the back of a spoon, carefully spread the sauce into a thin, even layer, making absolutely sure to leave a distinct ¾-inch border free from sauce on all sides. This clean border is vital for allowing the crust to puff up beautifully and achieve that desirable airy texture during baking.
Step 7: Adding Toppings – The Margherita Essentials for Flavor and Appeal
Now, it’s time to add the iconic toppings that define a classic Margherita pizza. Evenly distribute torn pieces of fresh mozzarella cheese over the sauce. Each pizza will require approximately ⅓ of an 8-ounce ball of mozzarella. If you are using fresh mozzarella packed in water, it is crucial to blot it thoroughly dry with paper towels to eliminate excess moisture, which can otherwise make your pizza soggy and prevent a crisp crust. Finally, adorn your pizza with several fresh basil leaves, torn by hand. The fresh basil will infuse its wonderfully aromatic essence into the pizza as it bakes, adding a vibrant burst of freshness and color that is both appealing and delicious.
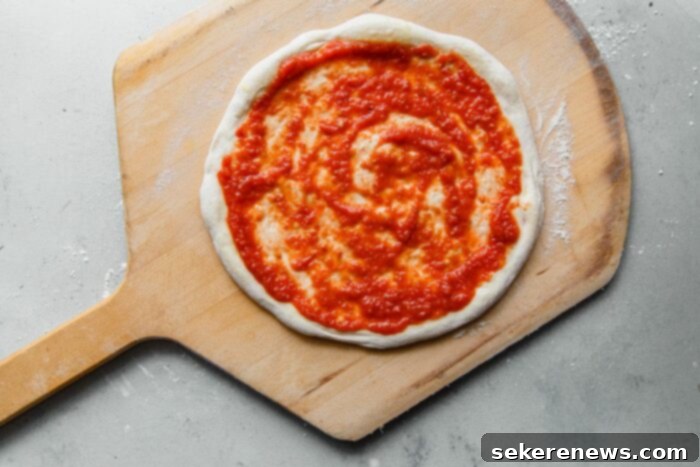

Step 8: Baking Your Masterpiece – High Heat for the Perfect Crispy Crust
With your pizza expertly topped, it’s time for the intensely hot oven! Gently, yet confidently, transfer the assembled pizza from the peel onto the preheated baking steel. The blistering heat of the steel will immediately begin to cook the bottom crust, initiating that desirable crispness and characteristic leopard spotting. Immediately turn off the broiler and reset your oven to a steady 500°F (260°C). Allow the pizza to bake for 4 to 5 minutes. During this crucial baking time, keep a close watch, and if necessary, rotate the pizza on the steel once or twice to ensure even cooking and a uniformly crisp, lightly spotted bottom crust. To finish and achieve that beautiful, airy top crust, turn the broiler back on for a very short duration, typically 1-2 minutes, watching it with extreme care until the edges of the crust have achieved a beautiful golden-brown color and slight charring. This brief, intense heat blast ensures a perfectly puffed and blistered crust, truly mimicking an authentic Neapolitan style.

Step 9: Serve Immediately – Savoring Your Homemade Sourdough Pizza
Once baked to absolute perfection, carefully remove the pizza from the oven using your prepared pizza peel and gracefully slide it onto a sturdy wooden cutting board. For an elevated touch of gourmet flavor and a burst of freshness, lightly drizzle with an additional flourish of high-quality extra virgin olive oil, scatter a few more vibrant fresh basil leaves, and if your palate desires, grate some fresh Parmigiano-Reggiano cheese over the hot pizza. Quickly cut your culinary masterpiece into quarters (or eight slices, if you prefer) and serve it immediately. The delightful crispness of the crust, the molten cheese, and the fresh, aromatic toppings are all at their absolute peak when enjoyed straight out of the oven.
To seamlessly continue your pizza feast, remember to **reset your oven temperature back to 500°F (260°C) and engage the broiler for a quick 10-minute blast** before you begin assembling and baking the next pizza. This crucial step ensures that your baking steel is fully reheated and ready to deliver another perfectly crisp and chewy crust. Repeat the entire assembly and baking process for the remaining sourdough pizza dough balls, ensuring each pizza is served fresh, piping hot, and utterly delicious for an unforgettable homemade pizza experience.


Creative Pizza Topping Variations for Your Sourdough Crust
While the classic Margherita is a testament to simple perfection, our incredibly versatile sourdough pizza dough serves as an outstanding canvas for a myriad of other delectable topping combinations. Feel free to use the traditional Margherita topping formula, including our beloved homemade pizza sauce, as your foundational base, then unleash your culinary creativity and customize with your personal favorite ingredients to craft a truly unique pizza experience.
Some of our personal favorite topping combinations that truly shine and are dramatically enhanced by the unique flavor and texture of a sourdough crust include:
- Spicy Calabrian Chiles: For an exciting fiery kick and a beautiful pop of vibrant color.
- Earthy Roasted Mushrooms: Adds incredible umami depth and a tender texture, especially when paired with a luxurious drizzle of white truffle oil.
- Salty Anchovies: A classic Italian addition that delivers an intense, savory, and wonderfully briny flavor profile.
- Robust Calabrese Salami: Offers a delightful combination of spicy, rich, and subtly smoky characteristics that perfectly complement the sourdough tang.
- Briny Kalamata Olives: Provides a delightful salty burst and a distinct Mediterranean essence, cutting through the richness of the cheese.
- Fresh Arugula: Best added immediately after baking for a peppery, slightly bitter, and wonderfully fresh contrast that brightens the entire pizza.
Beyond these suggestions, consider elevating other fantastic pizza recipes you already adore. For instance, our popular mushroom pizza with Havarti cheese, fresh herbs, and white truffle oil, or the bright and zesty lemon truffle arugula pizza, would both be dramatically enhanced by the unique flavor complexities and exceptional texture of this homemade sourdough crust. The possibilities are truly boundless, allowing you to tailor each pizza to perfectly match your mood, preferences, and the fresh ingredients available to you.


Sourdough Pizza Dough: The Full Recipe
Pin
Review
SaveSaved!
Following the comprehensive pizza dough recipe, you’ll discover our tried-and-true formula for a classic Margherita-style pizza, featuring our favorite homemade pizza sauce. This combination is guaranteed to become an instant family favorite, captivating palates with its simple yet profound flavors. Feel completely empowered to use this recipe as a robust base, then unleash your creativity by customizing with any desired toppings, making each pizza uniquely yours.
Equipment
-
Danish Dough Whisk
-
Dough Proofing Box
-
Pizza Peel
-
Baking Steel
Ingredients
Sourdough Pizza Dough:
- 225 grams filtered water (accurately measured at 90°F-95°F / 32°C-35°C)
- 15 grams kosher salt (or fine sea salt)
- 250 grams ripe sourdough starter (ensure it’s 100% hydration, active, and bubbly)
- 250 grams Type “00” flour (plus additional for dusting; Central Milling or Caputo brand are highly recommended)
- 125 grams high-protein bread flour (such as King Arthur brand for best results)
Assembly and Toppings (For Three 10-Inch Margherita-Style Pizzas):
- all-purpose flour (for shaping and dusting your workspace and dough)
- semolina flour (for generously dusting the pizza peel to prevent sticking)
- extra virgin olive oil (a good quality oil for drizzling over the crust and for finishing)
- 1 batch homemade pizza sauce (or your preferred high-quality store-bought marinara or pizza sauce)
- 8 ounces fresh mozzarella cheese, not packed in water (blotted thoroughly dry and torn into small, irregular pieces)
- fresh basil leaves (a generous amount, plus extra for garnishing after baking)
- Parmigiano-Reggiano cheese (freshly grated, optional for serving, but highly recommended for flavor)
