Ultimate American Flag Cake Recipe: A Festive & Easy Berry Delight
As the air fills with anticipation for upcoming celebrations like Labor Day and next summer’s Fourth of July festivities, I’m thrilled to unveil my spectacular American Flag Cake recipe. This dessert is more than just a sweet treat; it’s a vibrant, patriotic masterpiece designed to be the star of any gathering. I recently whipped up this very cake for my family, and the rave reviews were immediate and resounding. Their enthusiasm was all the motivation I needed to perfect and share this beloved recipe with all of you.
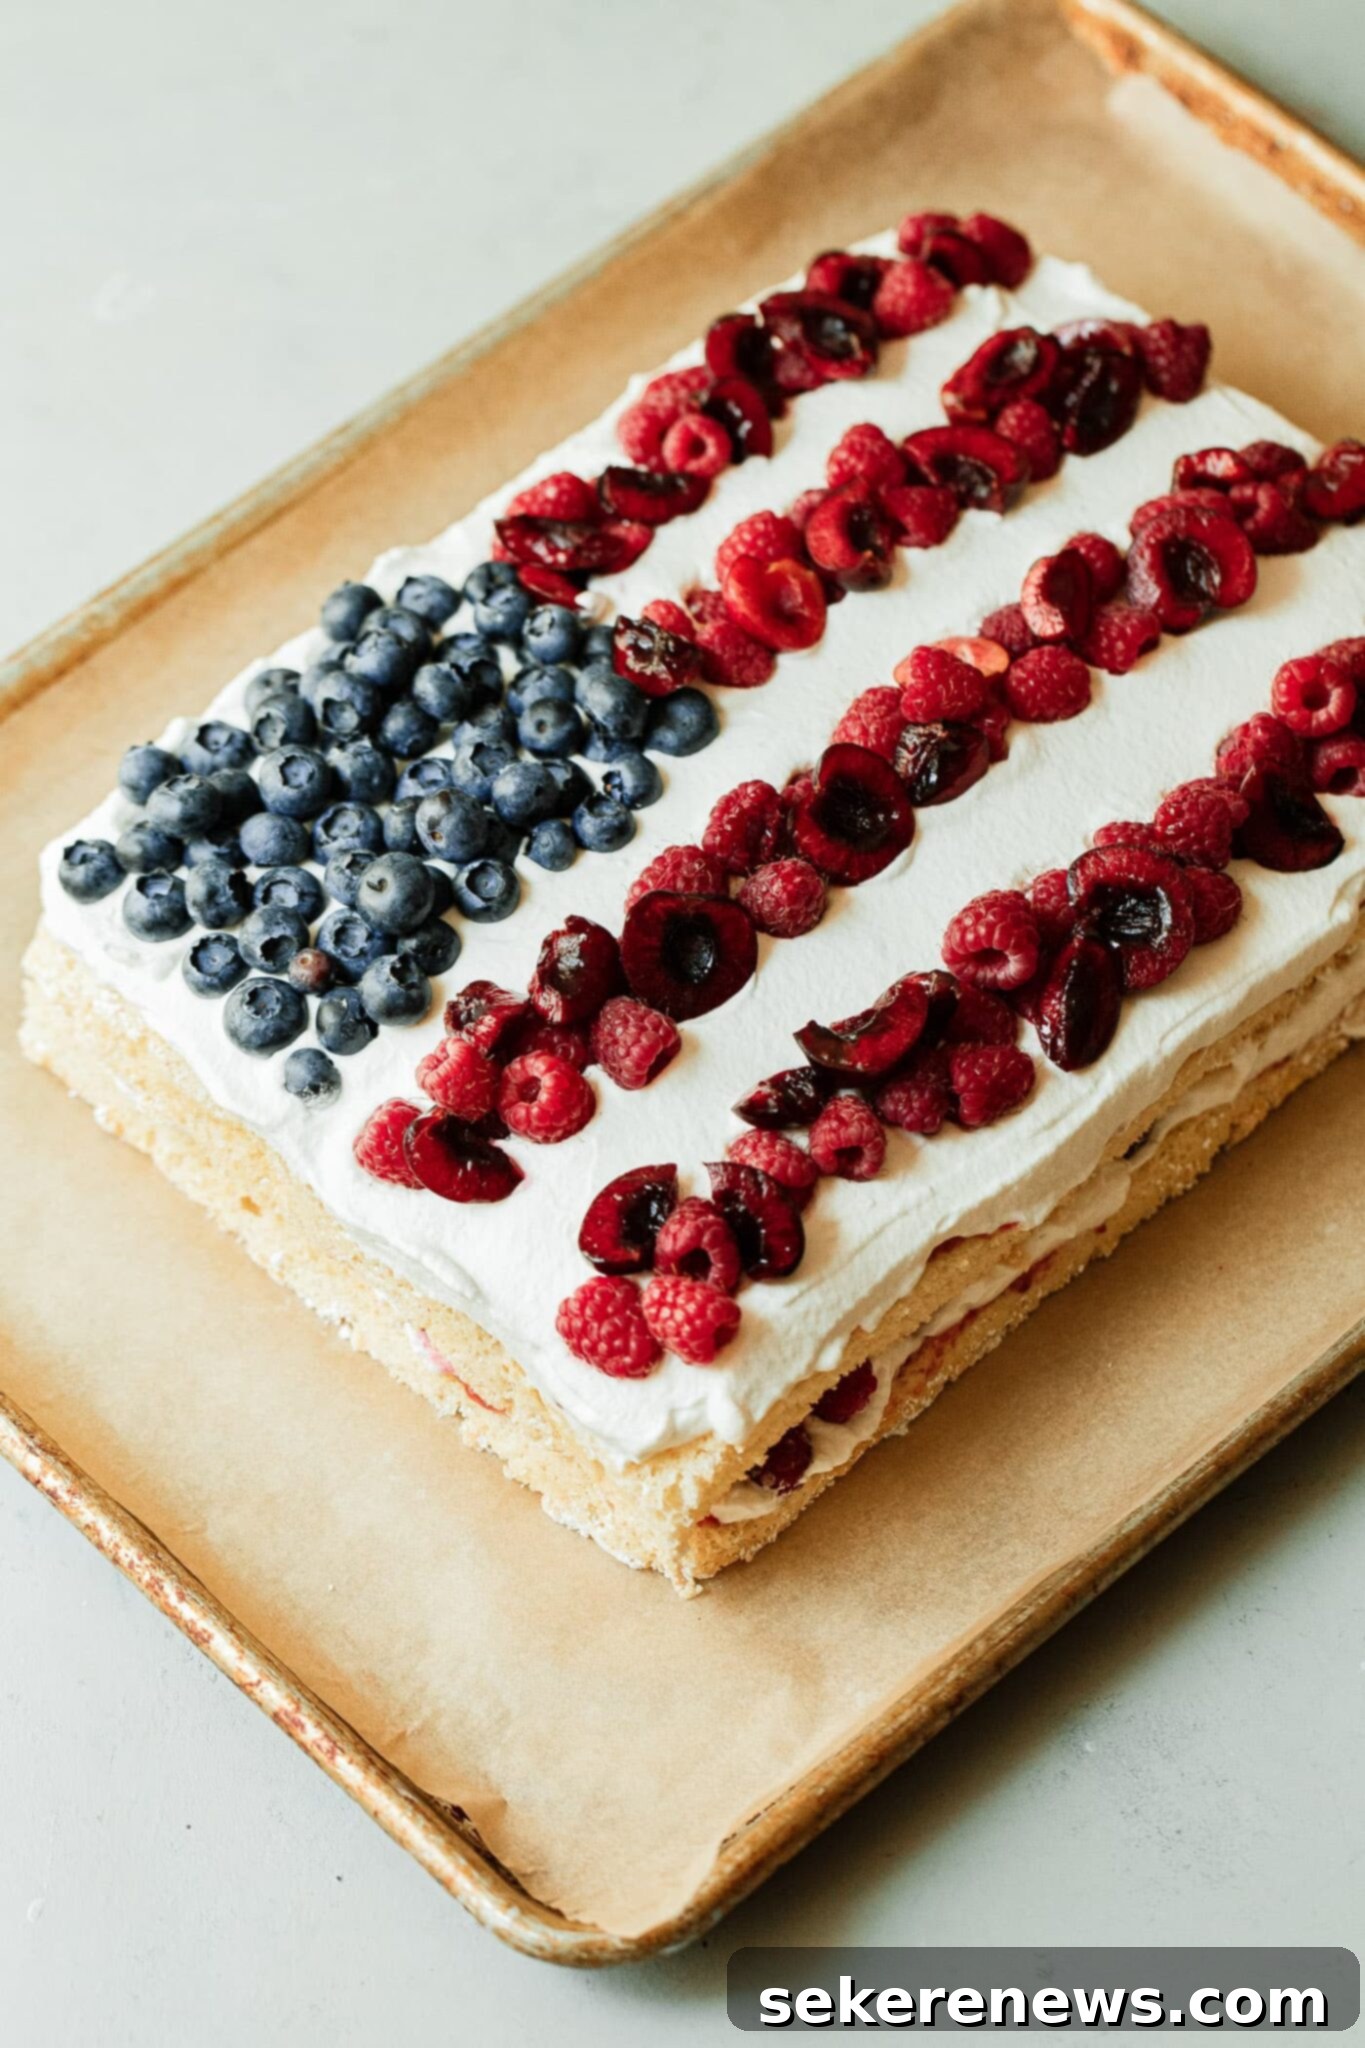
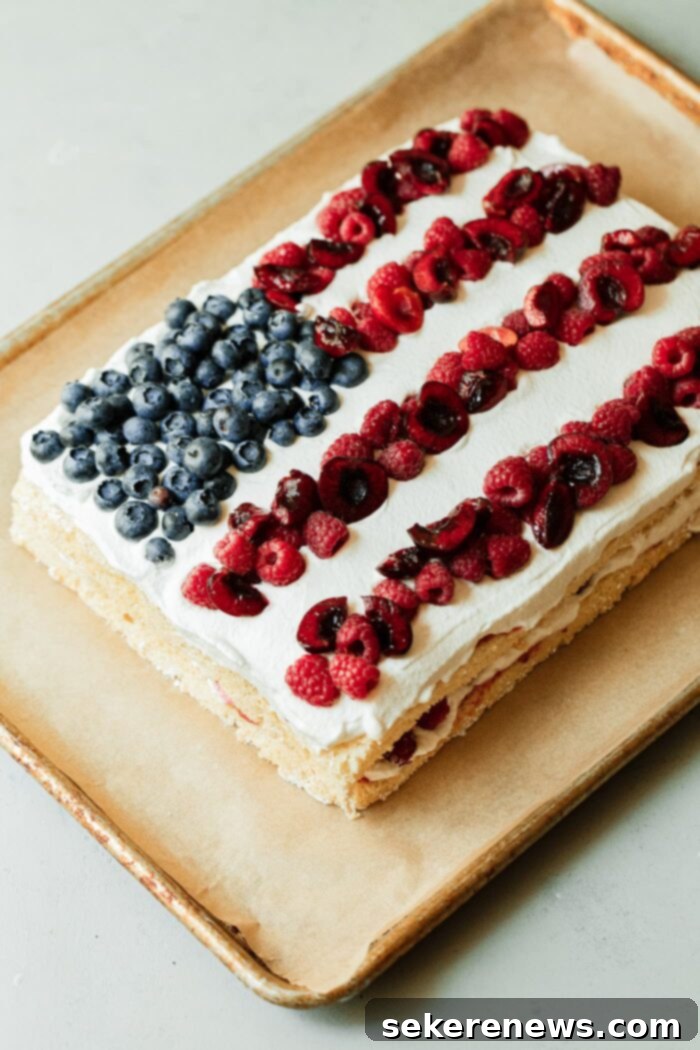
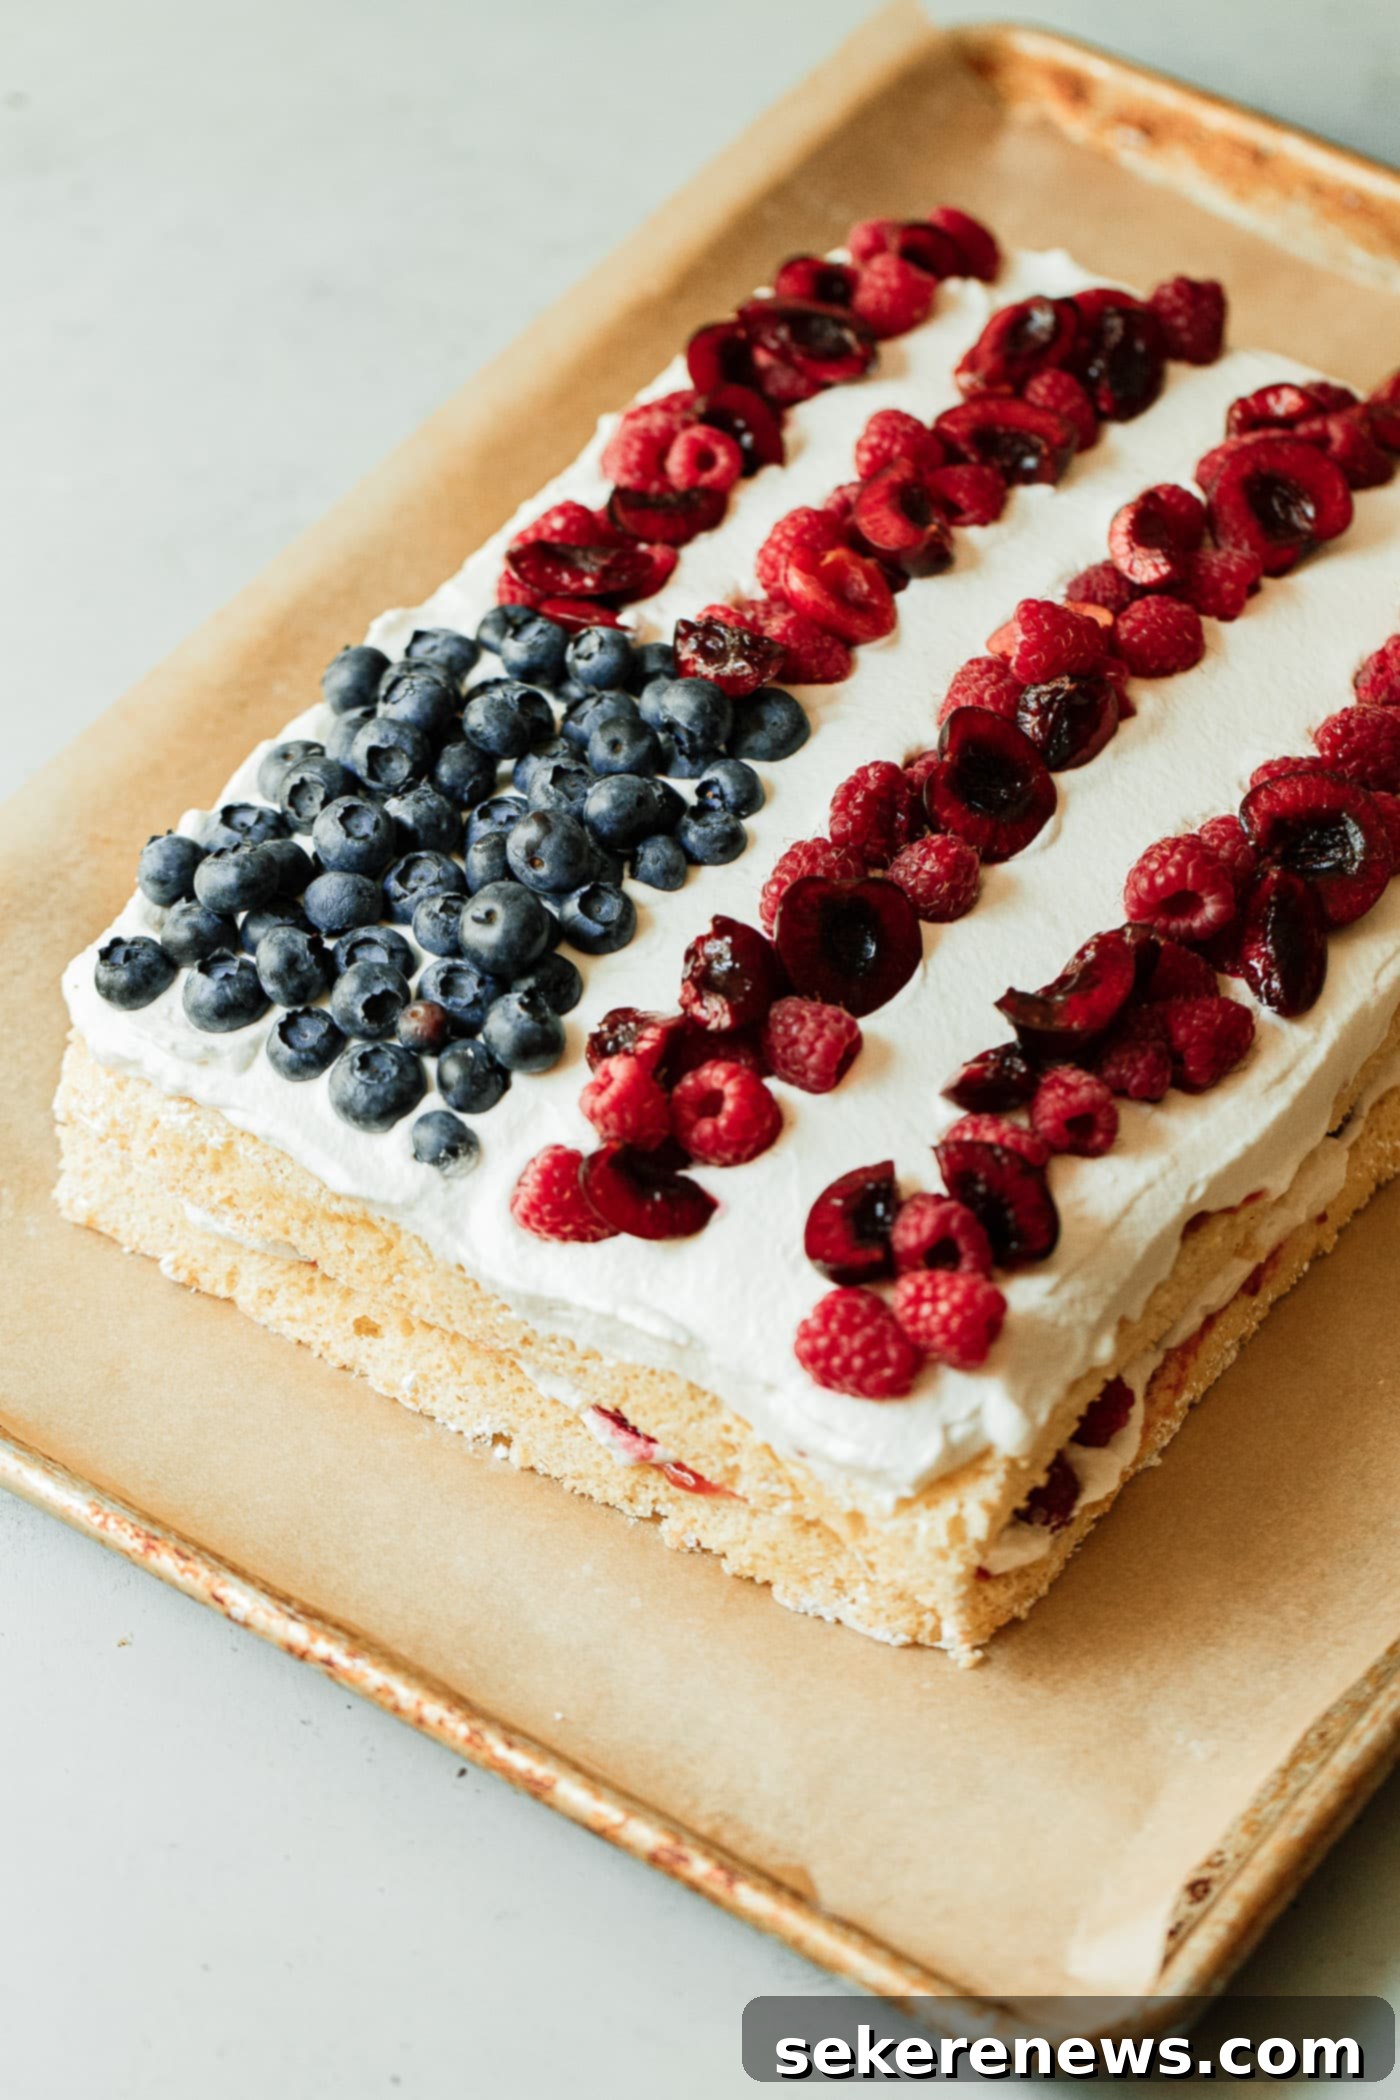
At its heart, this delightful dessert showcases a wonderfully light and fluffy vanilla sponge cake base, generously layered with creamy, dreamy whipped cream filling, and adorned with a bountiful array of fresh summer berries. These colorful components are thoughtfully arranged to beautifully represent the iconic American flag, making it an ideal choice for national holidays.
However, don’t let the patriotic theme limit your imagination! While it’s a showstopper for the Fourth of July or Labor Day, this cake is incredibly versatile. Its delicate texture and subtly sweet flavor, which perfectly celebrates the peak of berry season, make it my absolute favorite summer cake for any occasion. Feel free to customize the decorations to suit any party or simply enjoy it as a refreshingly light dessert throughout the warmer months. It’s a truly adaptable recipe that promises to impress, no matter the event.
Why This American Flag Cake Will Be Your New Favorite Summer Dessert
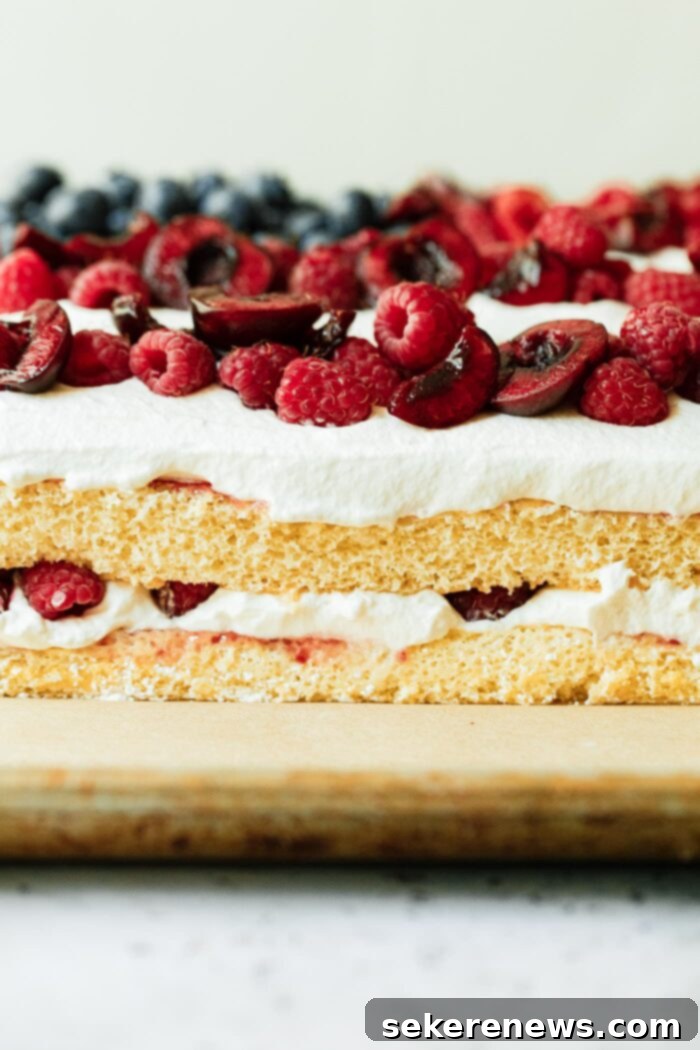
This exquisite Flag Cake recipe is a thoughtful and delicious adaptation of my family’s cherished Raspberry Roll Cake. We’ve taken the beloved flavors and textures and reimagined them into a format that’s both visually striking and remarkably simple to assemble. For this particular American Flag Cake, we allow the airy sponge cake to cool completely, then neatly slice it into two perfectly equal rectangular layers.
This streamlined method is a game-changer for anyone who might feel intimidated by more complex cake recipes, especially traditional roll or Swiss-style cakes. By preparing the sponge in a sheet pan and then simply cutting it, assembling and decorating become incredibly straightforward and stress-free. It’s an excellent option for novice bakers, those short on time, or anyone looking for a reliable, impressive dessert that doesn’t require advanced decorating skills. The result is a stunning, multi-layered cake that tastes as incredible as it looks, making it an instant hit for potlucks, barbecues, or any festive occasion.
Deconstructing the Perfect Flag Cake: Key Components
- Sponge Cake: The foundation of this spectacular dessert is a soft, airy, and remarkably light vanilla sponge cake. Its delicate texture provides the perfect counterpoint to the rich fillings without being overly heavy. This particular sponge cake recipe has been rigorously tested to ensure a consistently perfect result every time – just remember to read through the instructions carefully before you begin baking to achieve that ideal fluffy consistency.
- Preserves: During the assembly process, each luscious cake layer is delicately spread with a thin, glistening layer of raspberry preserves. This essential component does more than just add a burst of vibrant fruit flavor; it infuses the sponge cake with additional moisture, ensuring every bite is tender and sweet. The subtle tartness of the raspberry beautifully complements the vanilla and cream.
- Whipped Cream: A generous blanket of lightly sweetened whipped cream, subtly flavored with pure vanilla extract, gracefully envelops the cake. This cloud-like filling and topping is a hallmark of summer desserts, offering a fresh, airy quality that never weighs the cake down. It’s the ideal creamy canvas for the colorful berry decoration.
- Fresh Berries: This Flag Cake truly shines thanks to an abundance of ripe, peak-season summer berries. The middle layer of the cake is generously filled with thinly sliced fresh strawberries, adding a sweet and juicy surprise. For the patriotic decoration on top, blueberries create the distinctive ‘star’ field, while raspberries and optional red cherries form the vibrant red stripes, creating a beautiful and rustic representation of the American flag. The combination of textures and flavors from the fresh fruit is simply irresistible.

Essential Tools for Baking Your Flag Cake
Having the right kitchen equipment can make all the difference in ensuring a smooth and successful baking experience. For this delightful Flag Cake, here are the key tools you’ll need:
- Stand Mixer or Hand-Held Mixer: Essential for whipping the egg whites into fluffy peaks and achieving that perfectly light sponge cake batter. A stand mixer fitted with a whisk attachment is ideal for ease, but a good quality electric hand mixer will also do the trick.
- Half Sheet Pan: This standard 18 x 13-inch pan is crucial for baking our thin, rectangular sponge cake layer, which will then be cut into two for stacking.
- Parchment Paper: Absolutely vital for preventing the delicate sponge cake from sticking to the pan. Do not skip this step! It ensures easy release and an intact cake base.
- Large Rubber Spatula and Offset Spatula: You’ll need a large rubber spatula for gently folding the sponge cake batter, helping to maintain its airy volume. A large offset spatula is perfect for evenly spreading the batter in the pan, as well as for applying the whipped cream and preserves during the assembly and decoration phases.
- Serrated Knife: A long serrated knife will be your best friend for cleanly slicing the cooled sponge cake into two equal rectangles without tearing or compressing its delicate structure.
Step-by-Step Guide: How to Assemble Your Stunning Flag Cake
Crafting this beautiful American Flag Cake is a straightforward and rewarding process. Once your fluffy sponge cake has cooled, the fun of assembly and decoration begins. Follow these simple steps to bring your patriotic dessert to life:
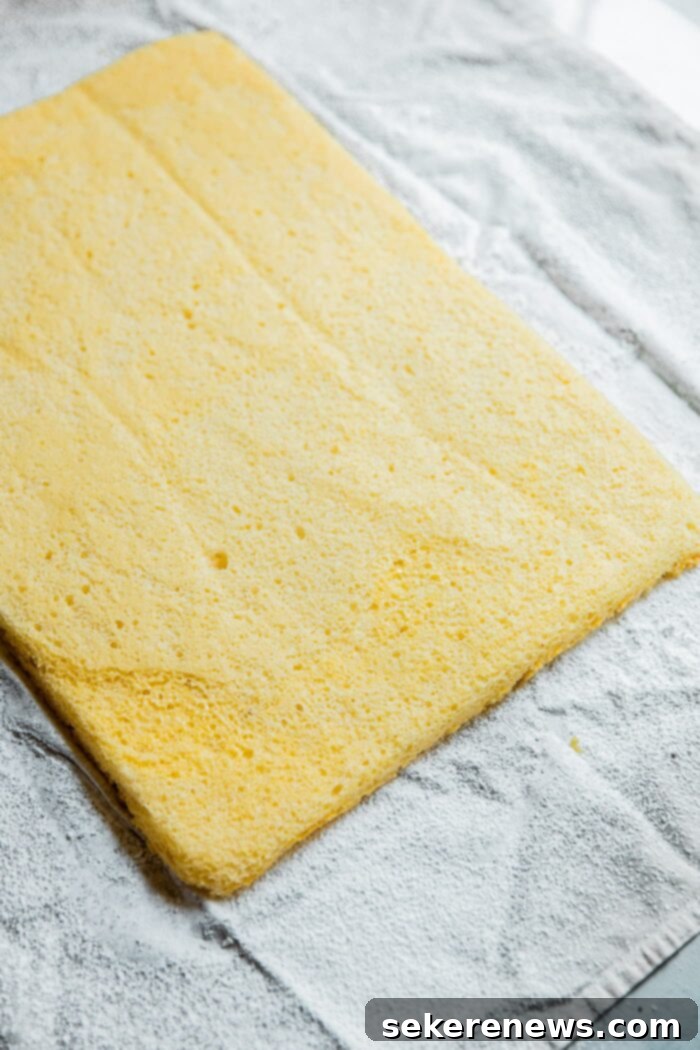
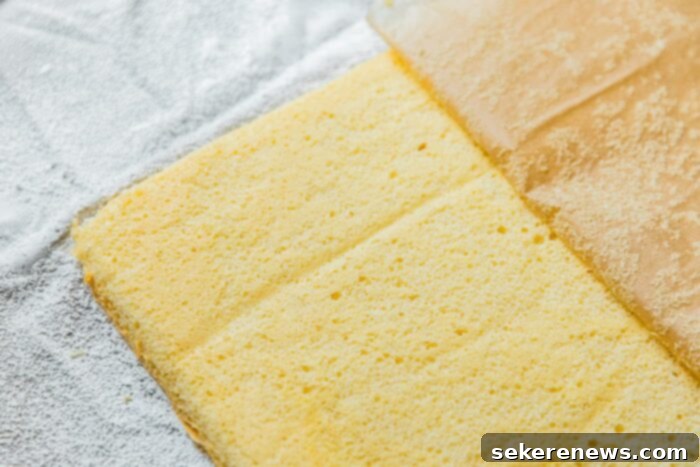
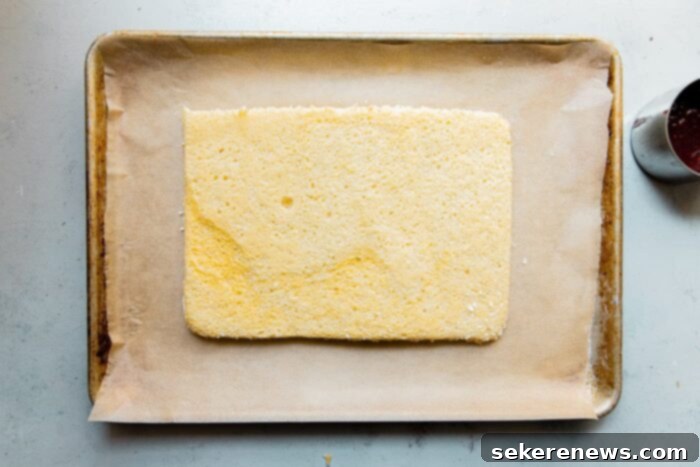
STEP ONE: Prepare the Cake Layers. First, take your fully cooled sponge cake and, using a large serrated knife, carefully cut it cross-wise into two perfectly equal-sized rectangular layers. The serrated edge helps prevent crushing the delicate cake. Gently lift one of these cake pieces and transfer it to a clean half sheet pan or your chosen flat serving platter, ensuring it’s lined with parchment paper for easy handling.
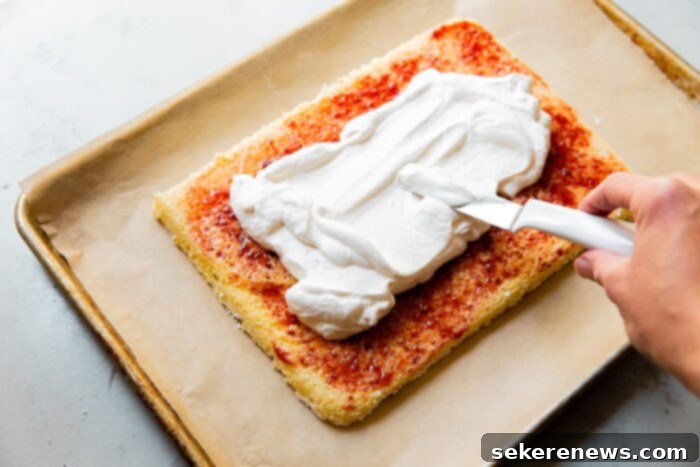
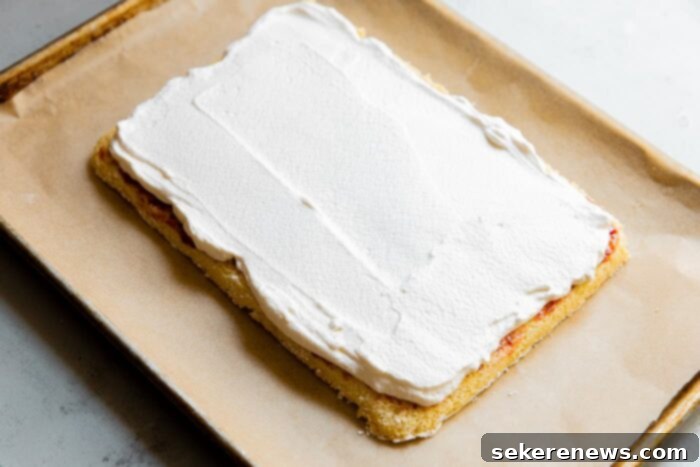
STEP TWO: First Layer of Filling. With a small offset spatula, delicately spread approximately half of your prepared raspberry preserve mixture onto the first cake layer. Aim for a very thin, even coating to ensure moisture and flavor without overwhelming the sponge. Immediately follow this with roughly half of the sweetened whipped cream, spreading it smoothly to cover the entire surface, reaching all edges of the cake layer.
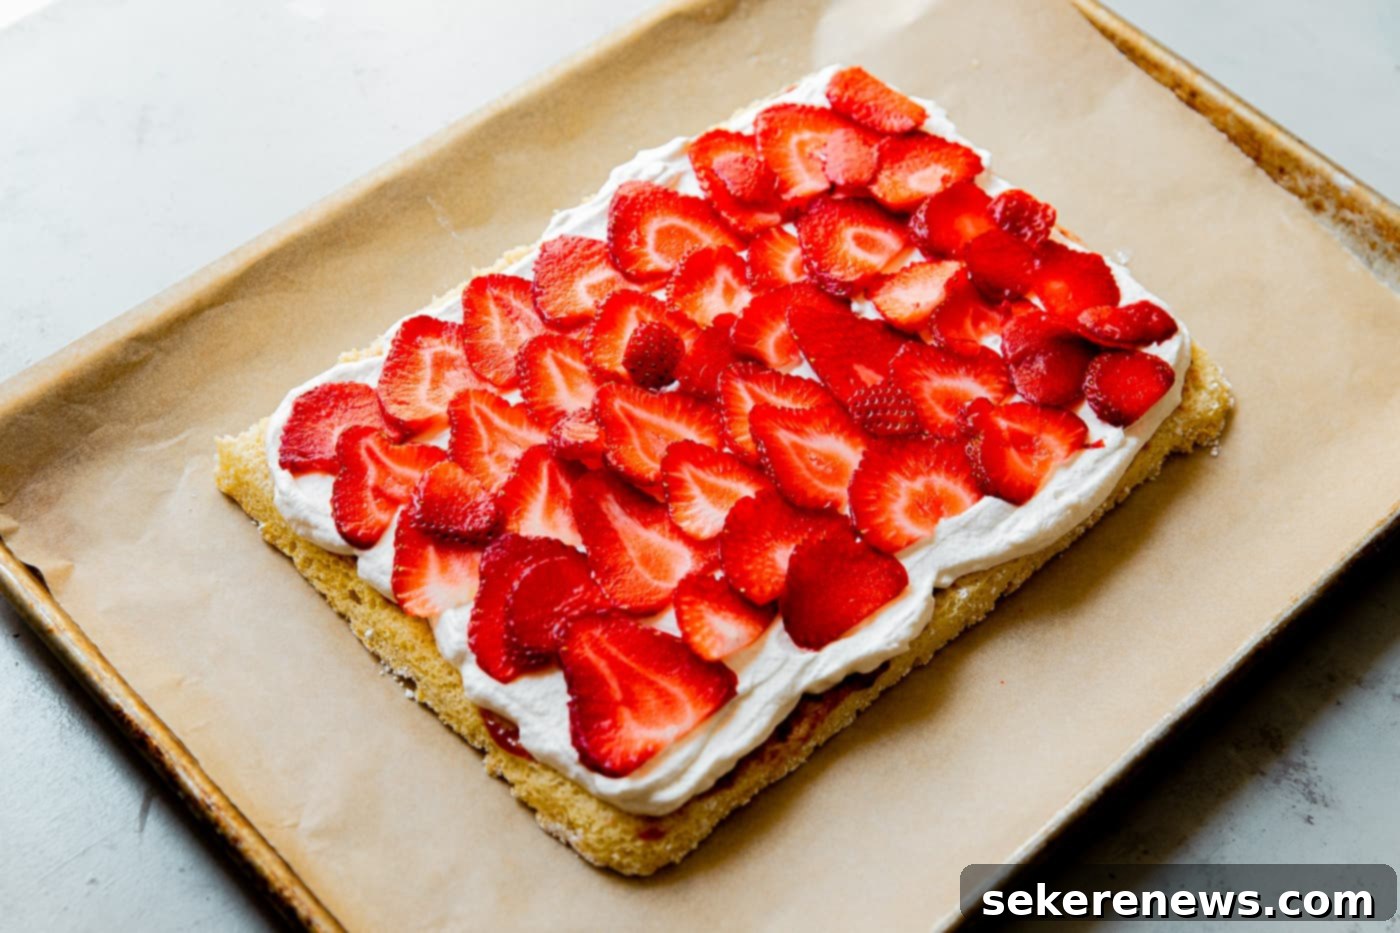
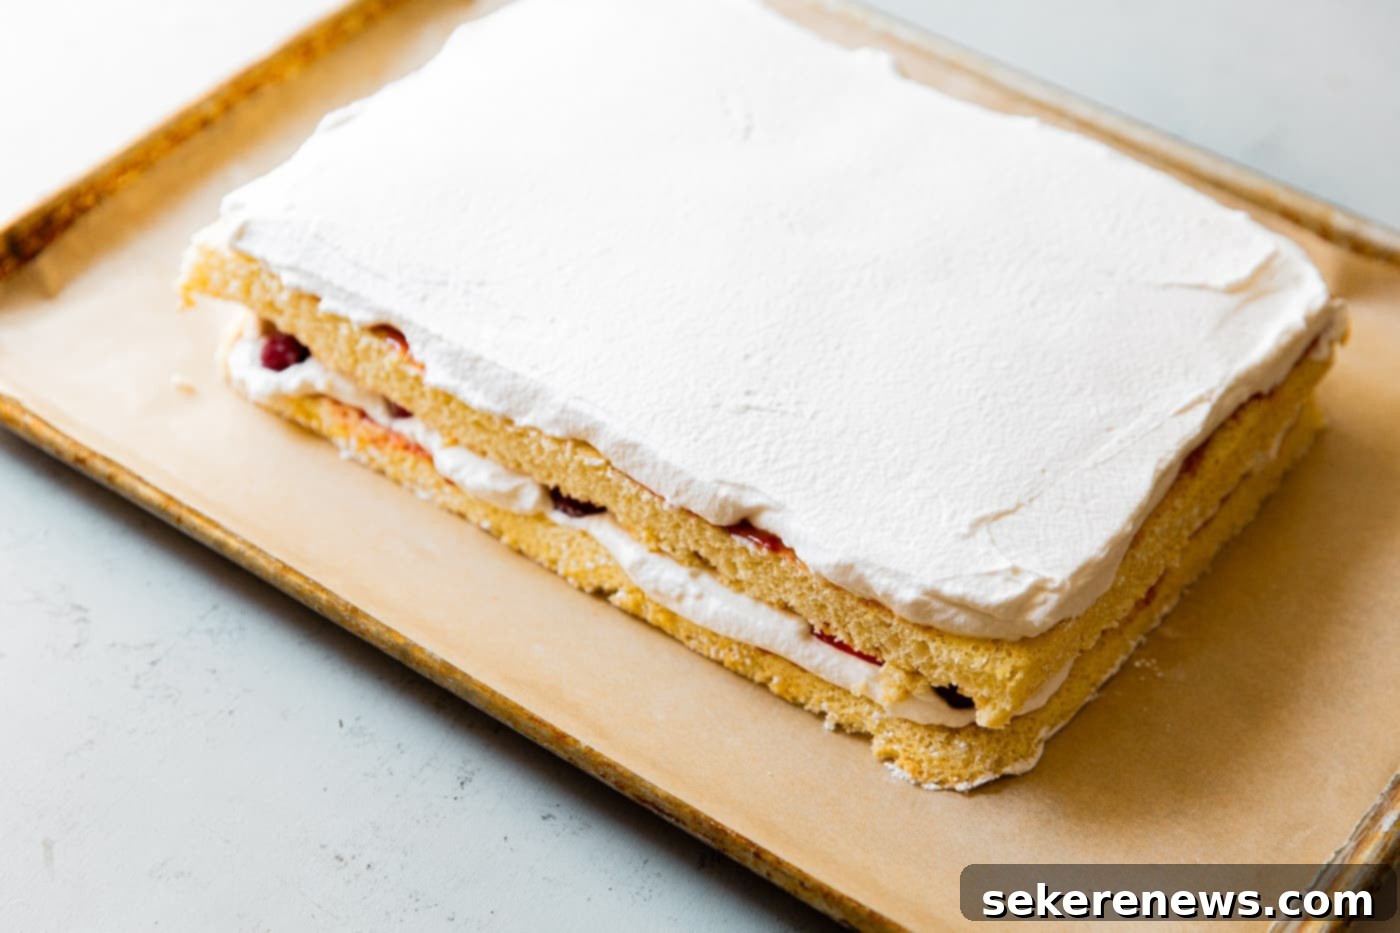
STEP THREE: Add Strawberries and Top Layer. Artfully arrange the thinly sliced strawberries over the whipped cream, slightly overlapping them to create a full, vibrant layer that covers the entire surface. Once the strawberries are in place, gently position the remaining sponge cake layer on top. This is then followed by a final, thin layer of raspberry preserves and the remaining sweetened whipped cream, creating a smooth, inviting surface for your flag design.
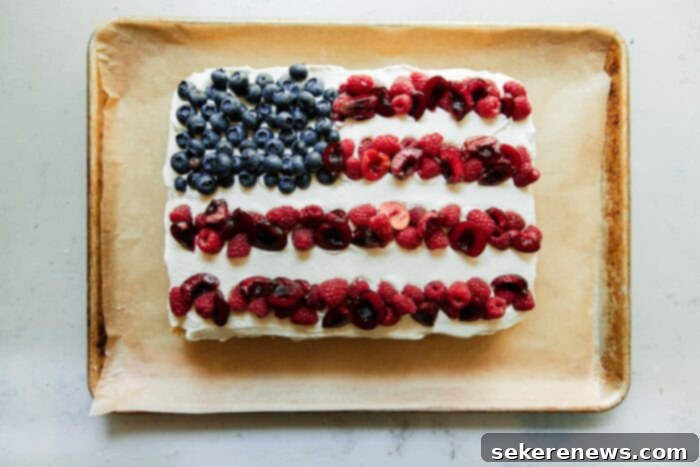
STEP FOUR: Create the Flag Design. Now for the artistic touch! Carefully arrange the blueberries in the top left corner of the cake, creating the distinct ‘star’ portion of the American flag. I find a generous cluster of blueberries looks more rustic and appealing than strict rows. To form the iconic ‘stripes,’ arrange a delightful mixture of fresh raspberries and pitted, halved cherries (if using) in four horizontal rows across the remainder of the cake. The vibrant reds against the white cream and blue berries will truly pop, making your American Flag Cake a festive centerpiece!
Mastering Your Flag Cake: Prep, Storage, and Serving Tips
One of the best features of this Flag Cake, besides its stunning appearance and delicious taste, is its excellent make-ahead potential. You can confidently assemble and decorate this patriotic dessert 1 to 2 days before you plan to serve it. In fact, many find that the flavors actually meld and deepen slightly overnight, making it even more delightful!
To store your masterpiece, lightly cover it with plastic wrap. Be mindful to drape the plastic wrap gently, ensuring it doesn’t press directly onto the delicate whipped cream to prevent any smudging or sticking. Store the covered cake in the refrigerator until you’re ready to serve. When it’s time to enjoy, remove the cake from the fridge and let it sit at room temperature for about 10 to 15 minutes. This brief resting period allows the sponge cake to soften slightly and the whipped cream to reach its optimal creamy texture, ensuring every slice is perfect.
This American Flag Cake is truly a celebration on a platter – easy to make, beautiful to behold, and utterly delicious to eat. Whether you’re honoring a national holiday or simply embracing the joys of summer, this berry-filled sponge cake with its light whipped cream is sure to be a crowd-pleaser. Enjoy baking and sharing this festive treat!
Flag Cake
Pin
Review
SaveSaved!
Prep Notes: For maximum convenience and flavor development, this delightful Flag Cake can be fully assembled and decorated 1 to 2 days prior to serving. The slight resting period actually allows the flavors to meld beautifully, often improving the taste. To store, simply cover the cake lightly with plastic wrap, ensuring not to press down on the whipped cream, and keep it chilled in the refrigerator until ready to be served.
Equipment
-
KitchenAid 5 Qt. Artisan Stand Mixer
-
Half Sheet Pan
-
Natural Parchment Paper
-
Large Rubber Spatula and Offset Spatula
Ingredients
Sponge Roll Cake:
- unsalted butter or baking spray for greasing and preparing the pan
- 6 large eggs, room temperature whites and yolks separated for optimal fluffiness
- 1 cup (200g) granulated sugar divided equally for egg whites and yolks
- 1 teaspoon pure vanilla extract for a classic vanilla flavor in the sponge
- 1 cup (120g) cake flour, sifted if not using a scale, fluff flour well, scoop, and level with back of knife for accuracy
- ⅓ cup (40g) powdered sugar for dusting the kitchen linen
Preserve Filling & Fresh Berries:
- ½ cup (150g) raspberry preserves I recommend high-quality brands like St. Dalfour or Bonne Maman for best flavor
- 1-2 teaspoons fresh lemon juice optional, if needed for thinning preserves to an easily spreadable consistency
- 2 cups (1 pint; 475mL) cold heavy cream for making the fluffy whipped cream
- 1½ teaspoons pure vanilla extract to flavor the whipped cream
- ¼ cup (24g) powdered sugar to sweeten the whipped cream
- 7-8 ounces strawberries hulled and very thinly sliced for the internal layer
- 3-4 ounces (¾ cup) blueberries for the ‘star’ section of the flag
- 6 ounces raspberries for the red stripes
- 3-4 ounces red cherries optional, pitted and halved, to mix with raspberries for stripes
Instructions
Prepare and Bake Sponge Cake:
-
Preheat your oven to 375°F (190°C) and position an oven rack in the center. Lightly grease a half sheet pan (approximately 18 x 13-inches) with unsalted butter or a baking spray. Carefully line the pan with parchment paper, allowing some overhang on the longer sides to make lifting easier later. Lightly grease the parchment paper once again. Set the prepared pan aside.

-
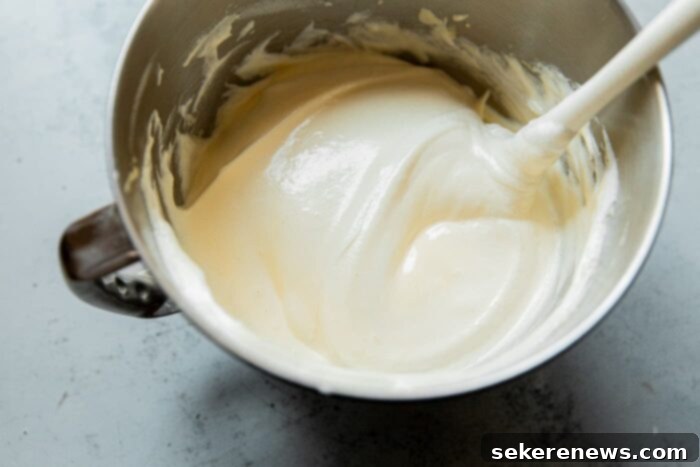
In the bowl of a stand mixer fitted with a whisk attachment, place the room-temperature egg whites. Begin whisking on low speed for 30 seconds to 1 minute, until the whites appear light and foamy. Increase the speed to medium-high and slowly and gradually sprinkle in ½ cup (100g) of granulated sugar. Continue beating until the mixture forms medium peaks. This means when you lift the whisk attachment, the peak of the beaten whites should gently tip over but not completely collapse. Carefully transfer this fluffy egg white mixture to a large, clean mixing bowl and set it aside while you prepare the egg yolk mixture.

-
Wipe the stand mixer bowl clean (a small amount of egg white residue is perfectly fine). Add the egg yolks, the remaining ½ cup (100g) granulated sugar, and the pure vanilla extract to the bowl. Using the whisk attachment, beat this mixture on high speed until it becomes thick, pale yellow, and forms a “ribbony” consistency (when you lift the whisk, the batter should fall back into the bowl in a ribbon-like stream and hold its shape for a few seconds). This usually takes about 3 minutes. Remove the bowl from the stand mixer. Gently incorporate about one-third of the whipped egg whites into the beaten yolk mixture using the whisk attachment to lighten the texture. Then, using a large rubber spatula, carefully fold in the remaining egg whites in two additions, taking care not to deflate the mixture. This gentle folding technique is key to keeping the cake airy.

-
Sprinkle approximately one-quarter of the sifted cake flour over the batter. Using your large rubber spatula, gently fold it in until just combined. Repeat this process with three more additions until all of the flour has been evenly incorporated, and the batter appears airy and smooth. Be sure to scrape the sides and bottom of the bowl thoroughly to ensure no pockets of dry ingredients remain. Don’t worry if the batter deflates slightly; this is normal. Transfer the prepared batter evenly into the greased and parchment-lined half sheet pan. Using a large offset spatula, spread the batter into a uniform layer, ensuring it fills the entire pan right to the edges.
-
Gently transfer the sheet pan to the preheated oven and bake for 10 to 12 minutes, or until the cake is lightly golden in color and springs back when lightly touched. While the cake is baking, lay a clean kitchen linen or tea towel (with the long edge facing you) onto a large, clean working surface. Using a fine-meshed sieve, generously dust the entire linen with the reserved ⅓ cup (40g) powdered sugar. As soon as the cake is removed from the oven, immediately run a thin knife around the edges of the pan to loosen the cake. Using kitchen mitts and with the long edge of the pan facing you, carefully and quickly invert the sheet pan and cake onto the powdered sugar-dusted linen in one swift, confident motion. Allow the cake to cool completely to room temperature – this will take approximately 30-45 minutes – before proceeding with assembly and decoration.

Assemble and Decorate Cake:
-
Note for Jam Preserves: The consistency of your raspberry preserves is important for smooth spreading. If they are very thick, you may need to thin them down slightly; otherwise, they could tear the delicate cake during spreading. I highly recommend using a touch of fresh lemon juice, as it adds a lovely bright punch, but a small amount of water will also work. Add 1-2 teaspoons of liquid at a time and whisk gently until the preserves are easily spreadable but not watery. Use your best judgment to achieve the right consistency.
-
In a thoroughly clean stand mixer bowl (preferably chilled), combine the cold heavy cream, powdered sugar, and vanilla extract. Using the whisk attachment, start whipping on low speed, then gradually increase to medium-high. Continue to beat the cream until it becomes thick and forms medium peaks (be careful not to over-whip, or it will become grainy). Set this luscious whipped cream aside. Using a large serrated knife, precisely cut the cooled sponge cake in half cross-wise to create two perfectly equal-sized rectangular layers. Gently lift one piece and carefully transfer it to a clean, parchment-lined half sheet pan or your chosen serving platter for the assembly process.
-
Using an offset spatula, spread roughly half of the thinned raspberry preserve onto the first cake layer in a very thin, even coating. This adds a lovely fruity tang and moisture. Immediately follow with about half of the sweetened whipped cream, spreading it smoothly and evenly until it reaches all edges of the cake.

-
Now, layer the thinly sliced strawberries over the whipped cream, overlapping them slightly to create a full and visually appealing internal layer that covers the entire surface. Once the strawberries are perfectly placed, carefully set the remaining sponge cake layer directly on top. Finish this second cake layer by spreading on the final layer of raspberry preserves, followed by the remaining whipped cream, ensuring a smooth and even top surface for your flag design.

-
It’s time to create your patriotic masterpiece! Arrange the blueberries meticulously in the top left corner of the cake to create the ‘star’ portion of the American flag. For a more rustic and appealing look, I personally prefer a generous quantity of blueberries grouped together rather than strictly defined rows. To form the ‘red stripes,’ artfully arrange a delightful mixture of fresh raspberries and any pitted, halved red cherries (if you’ve chosen to use them) in four distinct horizontal rows across the remaining white whipped cream surface. Take your time to make the stripes visually distinct and vibrant.

-
Prep and Storage Instructions: For optimal convenience and flavor, this Flag Cake can be fully assembled and beautifully decorated 1 to 2 days prior to your serving date. As the cake rests, the flavors gently meld and often enhance. To store, lightly cover the cake with plastic wrap, being careful to tent it slightly so it doesn’t touch and disturb the whipped cream. Keep refrigerated until you are ready to serve. For the best serving experience, remove the cake from the refrigerator and allow it to sit at room temperature for 10 to 15 minutes before slicing and enjoying its delightful layers.
Prep and Storage Notes:
- This Flag Cake is an excellent make-ahead dessert! You can confidently assemble and decorate it 1 to 2 days before you plan to serve. In fact, allowing it to rest often enhances the depth of its flavors. Lightly cover the cake with plastic wrap, ensuring it does not touch the whipped cream, and store it in the refrigerator.
- For the best texture and taste, remove the cake from the fridge about 10 to 15 minutes before slicing and serving. This allows the sponge to soften slightly and the whipped cream to reach its ideal creamy consistency.
