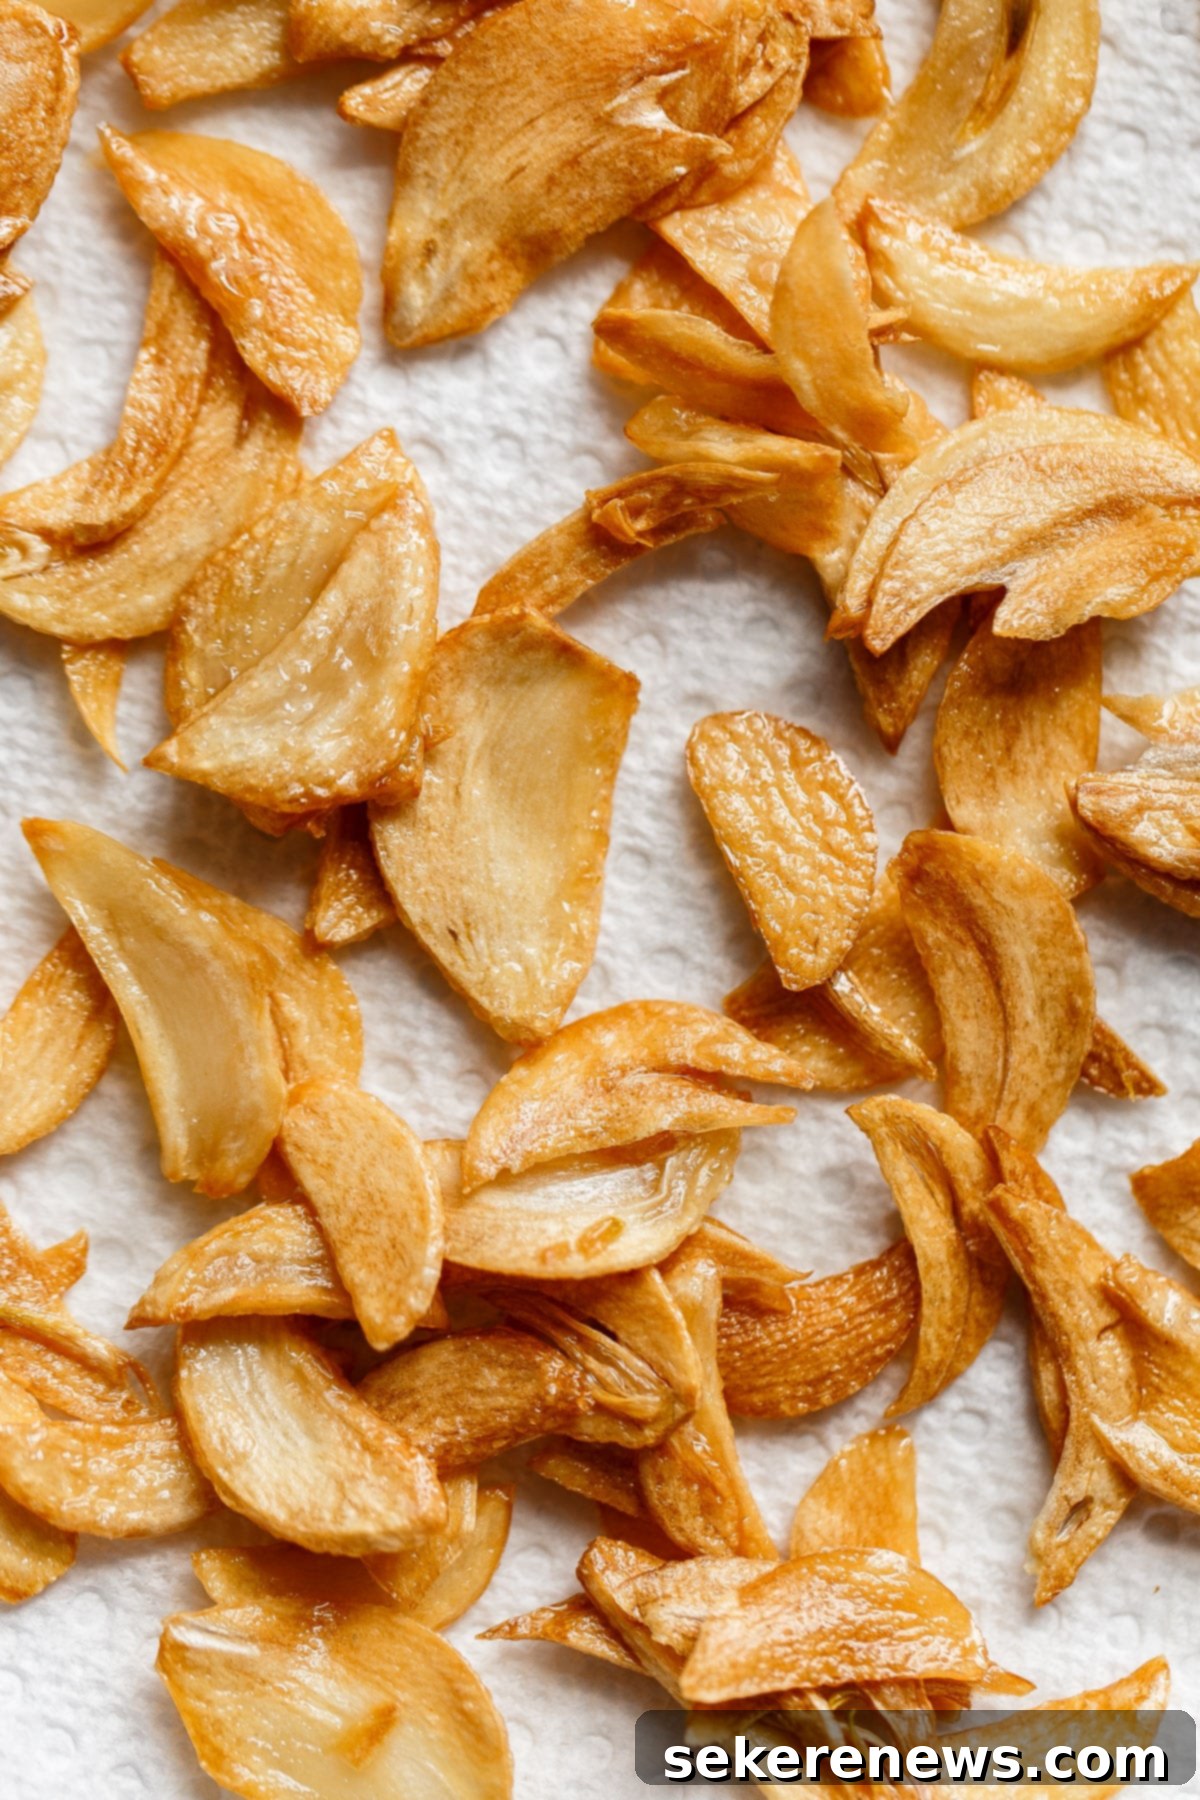
Ultimate Guide to Homemade Crispy Garlic Chips: Easy Recipe & Endless Culinary Uses
Unlock a secret ingredient that will revolutionize your home cooking! This easy, no-fuss tutorial shows you exactly how to make incredibly crispy garlic chips and explains myriad ways to incorporate them into your culinary repertoire, adding a gourmet touch to everyday meals.

Garlic chips! Have you ever experienced their magic? If not, prepare to have your culinary world rocked. Once you discover the sheer delight of homemade crispy garlic chips, you’ll find yourself eagerly sprinkling them on practically everything that comes out of your kitchen. They are truly a game-changer.
Imagine them as savory fairy dust – a potent, concentrated burst of pure, caramelized garlic flavor enveloped in a delightfully crispy, crunchy package. These golden slivers provide a fantastic textural contrast, elevate the taste of any dish tenfold, and will undoubtedly impress everyone you cook for. It’s a simple addition with immense rewards, offering a truly win-win situation in the kitchen.
While I’m excited to share an incredible recipe later this week that features these amazing crispy garlic chips as a star ingredient, I believe they deserve their own dedicated moment in the spotlight. This quick and easy recipe and cooking tutorial will guide you through making them at home, ensuring your cooking repertoire will never be the same again. Get ready to elevate your meals!
How to Make Perfect Crispy Garlic Chips at Home
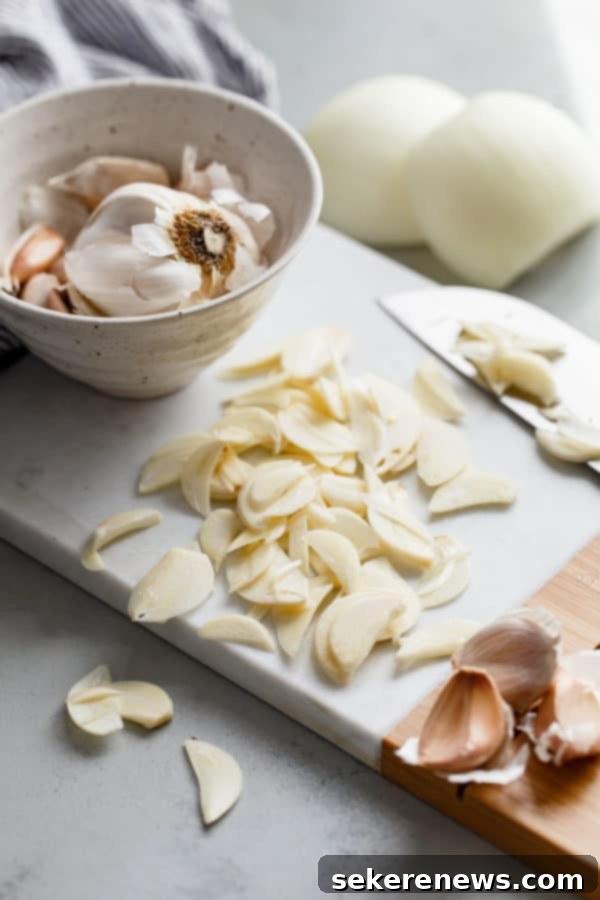
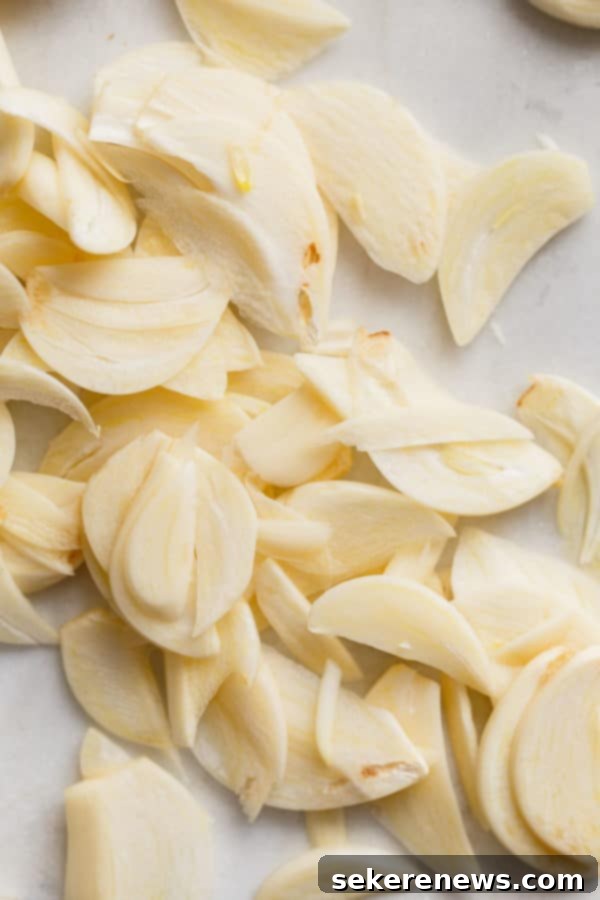
Crispy garlic chips are precisely what their name suggests: delicate slices of garlic, cooked in oil until they achieve a wonderfully crispy, crunchy texture and a beautiful golden-brown hue. Essentially, we’re talking about perfectly fried garlic. The key to success lies in slicing the garlic very thinly and ensuring the slices are uniform in thickness. This uniformity is crucial for even cooking, preventing some pieces from burning while others remain undercooked.
Yes, we are shallow frying today, but please don’t let that deter you! The great news is that this process is incredibly quick and simple. Using a small skillet, the entire operation takes less than ten minutes from start to finish. You won’t need vast quantities of oil – this small-batch recipe calls for only 1/4 cup – nor will you require a specialized frying thermometer. It’s a remarkably accessible technique for anyone, regardless of their frying experience.
Even better, cleanup is minimal to non-existent. And the rewards? You’ll be left with approximately 1/4 cup of exquisite crispy garlic chips (a small amount goes a surprisingly long way in terms of flavor impact!) and a practical amount of homemade garlic-infused oil. This aromatic oil is a fantastic bonus, perfect for low-heat cooking, crafting delicious salad dressings, drizzling over finished dishes, or even for dipping crusty bread. It’s a two-for-one deal that adds incredible depth to your cooking.
Essential Ingredients & Equipment for Crispy Garlic Chips
Gathering the right tools and ingredients before you start will make the process even smoother. Here’s what you’ll need for a successful batch of crispy garlic chips and their delicious byproduct, garlic oil:
- 6 Large Peeled Garlic Cloves: Quality is key here. Choose fresh, firm cloves. The “large” size is important as it makes slicing easier. Precision slicing is paramount for even cooking and optimal crispiness. Aim for slices that are almost translucent – a mandoline slicer is ideal for this, but a very sharp knife and a steady hand can also work wonders.
- Small Skillet (preferably 7″ to 8″ inches in diameter or smaller): A smaller pan ensures that the garlic slices are submerged in the oil without needing a huge quantity of oil. This makes the shallow frying efficient and less wasteful.
- Heatproof Spatula: Essential for carefully stirring and separating the garlic slices during cooking, and for safely handling them in hot oil.
- 1/4 Cup Pure Avocado Oil (or Olive Oil): The choice of oil impacts both the chips and the resulting infused oil. We’ll delve deeper into oil selection below. This amount is the minimum needed to adequately shallow fry the garlic for this recipe.
- Fine-Meshed Strainer (or Slotted Spoon): Crucial for quickly separating the cooked garlic chips from the hot oil. A fine-meshed strainer is highly recommended as it allows you to collect all the delicate chips and efficiently reserve the flavorful garlic oil.
- Paper Towel-Lined Plate: For draining excess oil from the crispy chips after they are removed from the pan, ensuring maximum crispiness.
Choosing the Best Oil for Frying Garlic Chips
The type of oil you choose for making garlic chips is more important than you might think, especially if you plan to reserve and utilize the resulting garlic-infused oil in other culinary creations. A high-quality oil will not only ensure perfectly crispy chips but also yield a more flavorful and versatile garlic oil. For optimal results, I highly recommend using either pure avocado oil or a good quality olive oil.
Avocado Oil: The Versatile Choice
Pure avocado oil boasts an impressively high smoke point and a remarkably neutral flavor profile. This makes it an excellent choice for frying, as it can withstand higher temperatures without breaking down or imparting unwanted flavors to your garlic chips. Furthermore, it’s generally considered a healthier and less processed alternative compared to other common neutral oils like canola or vegetable oil.
I frequently opt for avocado oil in this recipe, particularly when I intend to use the crispy garlic chips across a diverse range of dishes and prefer a versatile infused oil that can be re-heated to higher temperatures in future cooking. Its neutral base allows the pure essence of the garlic to shine through, making it adaptable for almost any cuisine.
Olive Oil: The Flavorful Alternative
While olive oil has a slightly lower smoke point than avocado oil, it is still a perfectly suitable and highly recommended substitute for this recipe. Using olive oil will impart a more robust and distinctly flavorful infused garlic oil. This rich, aromatic oil lends itself exceptionally well to Italian or Mediterranean-inspired dishes. Imagine drizzling it over pasta, using it as a base for salad dressings, or simply enjoying it with some crusty bread for dipping. The nuanced flavor of olive oil complements the caramelized garlic beautifully, creating a more pronounced aromatic experience.
Consider your intended use for the garlic oil when making your choice. If versatility and a neutral base are your priorities, go for avocado oil. If you’re aiming for a deeper, more pronounced flavor profile that aligns with Mediterranean cooking, olive oil is your best bet.
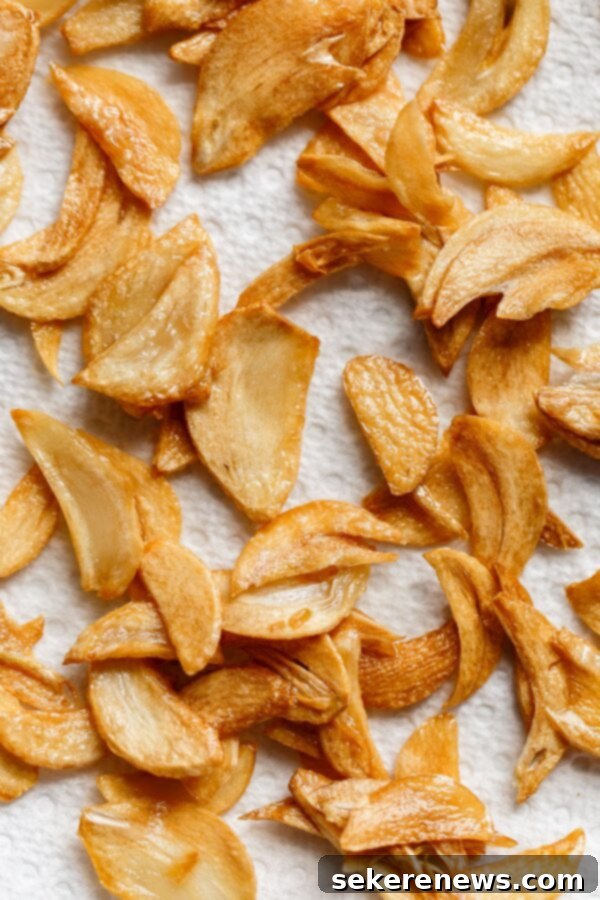
Creative Ways to Use Crispy Garlic Chips and Infused Oil
Once you have a batch of these golden, crunchy delights, you’ll find countless ways to enhance your meals. Crispy garlic chips are not just a garnish; they’re a flavor booster and a textural marvel. Here are some of my favorite ways to use them, along with ideas for the versatile garlic-infused oil:
- Salads & Vegetables: Sprinkle crushed or whole garlic chips generously over fresh green salads, roasted vegetables (like asparagus, broccoli, or Brussels sprouts), or sautéed greens for an instant flavor and texture upgrade. They are particularly wonderful on creamy mashed potatoes or even baked potatoes, adding a savory crunch.
- Soups & Dips: Use them as a elegant garnish for homemade soups (think creamy tomato soup, lentil soup, or a hearty potato chowder) or over your favorite dips, such as hummus, baba ghanoush, or a classic French onion dip.
- Pasta Dishes: These chips are a match made in heaven for pasta. Sprinkle them over simple aglio e olio, a rich pasta amatriciana, or a light spaghettini with roasted tomatoes and fresh basil. Their crunch and concentrated garlic flavor complement almost any pasta sauce, from creamy to hearty, adding depth and sophistication.
- Stir-fries & Rice Pilafs: Elevate Asian-inspired stir-fries or savory rice pilafs by topping them with a scattering of crispy garlic chips just before serving. They provide a delightful contrast to softer textures and infuse the dish with an extra layer of umami.
- Eggs & Breakfast: A surprising but delicious addition to scrambled eggs, omelets, or avocado toast for a gourmet breakfast or brunch.
- Garlic-Infused Oil Uses:
- Salad Dressings: Use the flavorful oil as the base for vinaigrettes, adding a subtle garlic note.
- Low-Heat Cooking: Sauté vegetables, meats, or seafood in garlic oil for an extra layer of flavor.
- Drizzling: Finish grilled meats, roasted fish, bruschetta, or pizza with a drizzle of this aromatic oil.
- Dipping: Serve with crusty bread for a simple, elegant appetizer.
- Marinades: Incorporate into marinades for chicken, fish, or vegetables.

Storing Crispy Garlic Chips and Infused Garlic Oil Safely
Proper storage is essential to maintain the crispness of your garlic chips and the quality of your garlic-infused oil. While these homemade delights are best enjoyed fresh, they can certainly be prepared ahead of time.
Storing Garlic Chips:
Like many fried items, crispy garlic chips are at their absolute peak of flavor and texture immediately after they’ve been made and have cooled completely. However, they are also excellent for make-ahead purposes. Once fully cooled, transfer the garlic chips to an airtight container. Store them at room temperature, away from direct sunlight or heat, where they will retain their crispness for up to one month. To ensure they stay as crispy as possible, avoid storing them in the refrigerator, as the humidity can cause them to soften.
Storing Garlic-Infused Oil:
Infused oils, especially those made with fresh ingredients like garlic, require careful storage to prevent spoilage and potential health risks. Oils are susceptible to degradation from light and heat, so it’s best to store your homemade garlic oil in a small, airtight container in the refrigerator unless you plan to use it immediately. When refrigerated, homemade garlic oil can be safely stored for up to one month. If you notice any signs of spoilage, such as cloudiness, off-odors, or mold, it’s safest to discard the oil immediately.
A note on garlic oil safety: While the frying process in this recipe significantly reduces the risk, unpreserved garlic in oil (especially raw garlic) can create an anaerobic environment where *Clostridium botulinum* bacteria can thrive and produce dangerous toxins. By cooking the garlic and then immediately straining and refrigerating the oil, you mitigate much of this risk. Always use fresh, clean garlic and ensure proper refrigeration.
Recipe: Crispy Garlic Chips

Rating: 4.6 stars (22 ratings)
Print Recipe | Pin Recipe | Review | Save
- Yield:
- 3 Servings
- Prep Time:
- 5 minutes
- Cook Time:
- 5 minutes
- Total Time:
- 10 minutes
This tutorial shows you how to make crispy garlic chips at home, and ways to incorporate them into your cooking repertoire!
Ingredients:
- ¼ cup (60 mL) avocado or olive oil
- 6 large peeled garlic cloves, very thinly sliced
Instructions:
-
Set a fine-meshed sieve over a small heatproof bowl and line a small plate with a paper towel. Ensure all your tools are within easy reach, as the cooking process is quick.

Prepare your workspace for efficiency. -
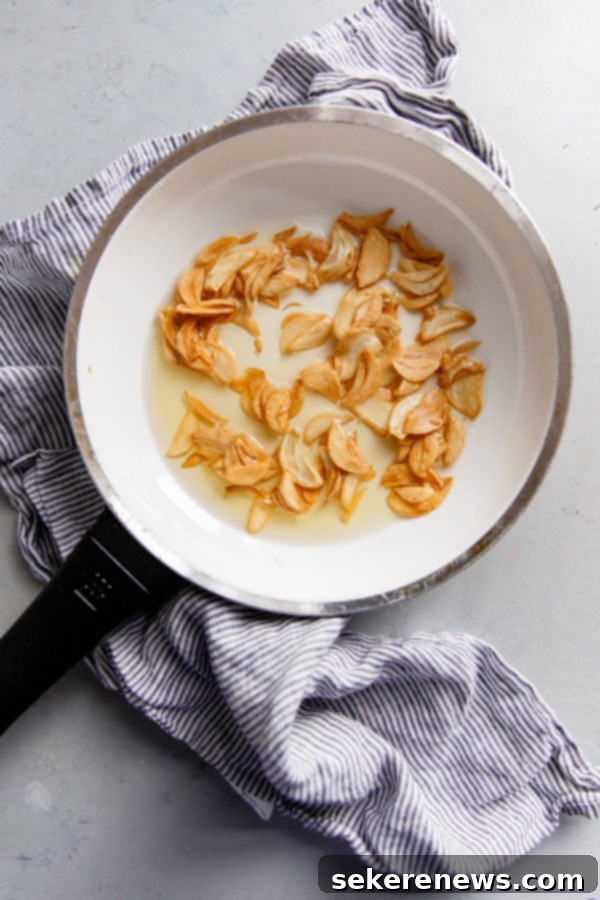
Briefly heat the oil in a small skillet (roughly 7″ to 8″ inches in diameter or smaller) over medium heat. The goal is a gentle sizzle, not boiling oil. Add the thinly sliced garlic to the skillet; they should immediately begin to sizzle upon contact with the oil. Use a heatproof spatula to gently spread the garlic slices into a single, thin, and even layer, ensuring they cook uniformly.
-
Reduce the heat to medium-low. The garlic slices should be actively bubbling in the pan, but should not be browning too rapidly. Adjust the heat as necessary – too high and they’ll burn; too low and they’ll get soggy. Some slices may initially stick together; while they will still be fine, try to gently break them apart with your spatula as much as possible. Continue cooking the garlic for approximately 2 to 3 minutes, stirring continuously and flipping the slices periodically, until they turn a beautiful, even golden-brown color. Watch them very carefully, as they can go from perfectly golden to burnt in a matter of seconds.

Constant stirring and careful observation are key to perfect garlic chips. -
Working quickly to prevent further cooking, carefully pour the garlic chips and oil into the fine-meshed strainer set over your heatproof bowl. This will separate and drain the chips while reserving the precious cooking oil. Immediately transfer the drained garlic chips to the paper towel-lined plate, spreading them into a single layer. This allows any remaining excess oil to be absorbed, ensuring maximum crispiness. Let them cool completely to room temperature before using or storing. For the best texture, enjoy them immediately after cooling. Otherwise, store in an airtight container at room temperature for up to a month.
-
Meanwhile, once the garlic-infused oil has cooled slightly, transfer it into a small, clean, airtight container. Store this flavorful oil in the refrigerator for up to a month. It’s excellent for making salad dressings, light sautéing, drizzling over roasted vegetables, or as a dipping oil for bread.
Recipe Notes & Tips for Success:
- If you wish to produce a larger batch of crispy garlic chips or more homemade garlic oil, feel free to scale up the quantities of both garlic and oil proportionally. When doing so, use a larger skillet to ensure the garlic still cooks in a single, even layer. Remember, the 1/4 cup of oil in this recipe is the absolute minimum amount needed for the specified quantity of garlic to achieve proper shallow frying.
- Oil Choice Reminder: Pure avocado oil, with its high smoke point and neutral flavor, is excellent for a versatile infused oil. Olive oil provides a more robust, flavorful infused oil, ideal for Italian or Mediterranean dishes.
- For those who love deeply rich garlic flavor, I highly recommend taking your garlic journey one step further by making garlic confit next! It’s another fantastic way to preserve and enjoy garlic’s essence.
Nutrition Information (Per Serving):
- Serving: 1 serving
- Calories: 28 kcal
- Carbohydrates: 3g
- Protein: 1g
- Fat: 2g
- Polyunsaturated Fat: 1g
- Sodium: 9mg
- Fiber: 1g
Frequently Asked Questions About Crispy Garlic Chips
To help you master the art of crispy garlic chips, here are some common questions and answers:
Q: Can I use pre-minced garlic?
A: No, for crispy garlic chips, you absolutely need fresh, whole garlic cloves that you slice yourself. Pre-minced garlic is often too wet and inconsistent in size, making it impossible to achieve the desired crispness and even cooking. It will likely burn quickly or turn mushy.
Q: What’s the best way to slice garlic thinly and uniformly?
A: A mandoline slicer is your best friend for this task. It allows for incredibly thin and consistent slices, which is key to perfectly crispy chips. If you don’t have a mandoline, use your sharpest chef’s knife and take your time to slice each clove as thinly as possible. Uniformity prevents some chips from burning while others remain soft.
Q: My garlic chips burned quickly. What went wrong?
A: This is a common issue! Garlic burns very easily due to its sugar content. The most likely culprits are:
- Heat too high: Ensure you start on medium heat only briefly, then reduce to medium-low.
- Not stirring enough: Continuous stirring helps ensure even cooking.
- Leaving them unattended: This is a quick process (2-3 minutes total!), so do not walk away from the pan.
- Slices were too thick: Thicker slices take longer to cook, increasing the risk of burning the edges while the center cooks.
Q: My garlic chips aren’t crispy; they’re chewy. Why?
A: Chewy garlic chips usually mean they weren’t cooked long enough or didn’t drain properly. Ensure they are golden brown and fully dried on paper towels. Also, make sure your slices are thin enough. If they are too thick, they won’t crisp up properly.
Q: Can I reuse the garlic oil for other purposes?
A: Absolutely! The garlic-infused oil is a wonderful byproduct. It’s fantastic for sautéing, making salad dressings, drizzling over finished dishes, or dipping bread. Just be sure to store it properly in the refrigerator for up to one month to maintain its quality and safety.
Q: How can I make a larger batch?
A: You can easily scale up this recipe. However, instead of simply adding more garlic to a small pan, you might need to use a larger skillet or fry the garlic in multiple batches. The key is to avoid overcrowding the pan, which can lower the oil temperature and lead to soggy, rather than crispy, chips.
Conclusion: Elevate Your Cooking with Homemade Crispy Garlic Chips
Crispy garlic chips are more than just a garnish; they are a culinary revelation that brings a concentrated burst of savory, caramelized flavor and an irresistible crunch to a multitude of dishes. This easy-to-follow tutorial proves that creating this gourmet ingredient at home is not only achievable but also incredibly rewarding. From elevating simple salads and roasted vegetables to transforming pasta dishes and stir-fries, these golden delights offer endless possibilities to impress your family and friends with minimal effort.
By mastering this simple shallow-frying technique, you not only get a batch of delicious chips but also a versatile, aromatic garlic-infused oil, making this recipe a true kitchen multitasker. So, peel those cloves, sharpen your knife (or grab your mandoline!), and prepare to unlock a new level of flavor in your home cooking. Once you’ve tasted the difference, you’ll wonder how you ever cooked without them!
