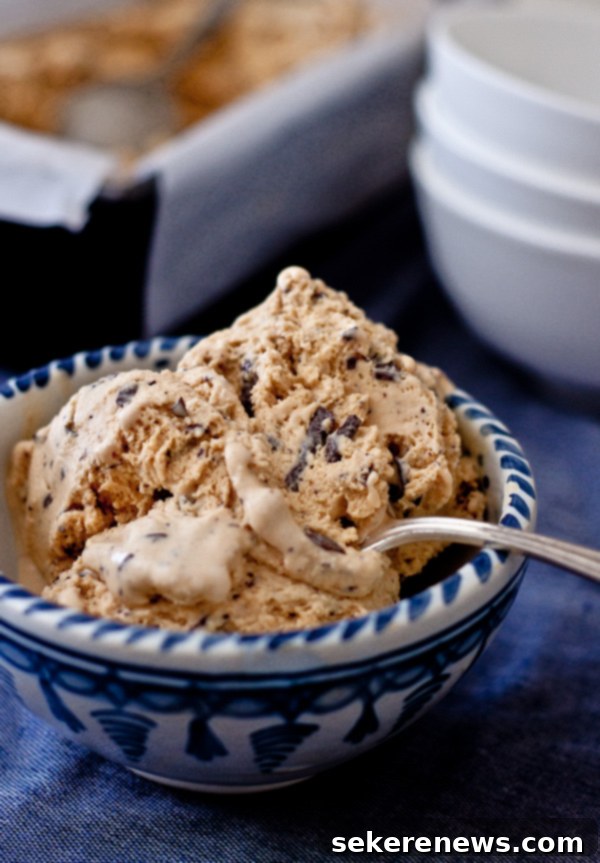
Decadent Burnt Sugar Ice Cream with Dark Chocolate Bits: A Homemade Delight
Indulge in an unbelievably creamy and rich dessert experience with this exquisite burnt sugar ice cream, generously studded with perfectly sized dark chocolate pieces. This isn’t just ice cream; it’s a culinary adventure that promises to delight your palate with its complex, deep flavors and satisfying texture.

There’s something incredibly rewarding about sifting through old culinary treasures, flipping through dog-eared magazine pages, and rediscovering a recipe that instantly captivates your imagination. As part of my ongoing exploration of classic recipes, this particular gem for burnt sugar ice cream with chocolate bits immediately soared to the very top of my must-try list. The sheer mention of “burnt sugar” alone sparked an excitement that a simple “caramel ice cream” just couldn’t replicate, even though, technically, they’re two sides of the same delicious coin.
Indeed, the genius behind coining the term “burnt sugar” for this recipe deserves an award. While burnt sugar is essentially caramel, the name itself evokes a sense of depth, a hint of sophisticated bitterness, and an exotic allure that is simply irresistible. It suggests a flavor profile far more nuanced and profound than traditional caramel, promising a dessert that’s both familiar and wonderfully unique.
The Allure of Burnt Sugar: More Than Just Caramel
What exactly makes “burnt sugar” so special compared to its caramel counterpart? While both involve heating sugar until it melts and changes color, the “burnt sugar” approach often implies taking the sugar a little further, to a deeper amber or even mahogany hue. This deeper caramelization process unlocks a more complex spectrum of flavors – notes that can range from toasted nuts and coffee to a delightful, subtle bitterness that balances the sweetness. It’s this intriguing depth that elevates the ice cream from merely sweet to truly gourmet.

Crafting the Perfect Burnt Sugar Base: A Journey of Flavor
The foundation of this extraordinary ice cream is built upon a ‘dry-sugar’ caramel method, a technique that allows for precise control over the caramelization process. It begins with a deceptively simple act: gently heating granulated sugar in a clean skillet. The key here is patience and constant attention. As the sugar gradually melts and transforms into a shimmering liquid, it’s crucial to stir continuously with a fork, ensuring even cooking and preventing any hot spots that could lead to actual burning (the undesirable kind!).

Achieving the Ideal Caramelization
Your preference dictates how deep you take the caramel. For this recipe, a medium-dark amber is recommended. This shade provides that distinctive, slightly bitter “caramelized” flavor that truly defines “burnt sugar” without tasting acrid. The moment it reaches this point, immediately remove it from the heat. The residual heat in the pan will continue the cooking process, so acting swiftly is essential to prevent over-caramelization.
Once your perfect caramel is achieved, the next step involves carefully incorporating whole milk. This is a moment that requires caution; the hot caramel will sputter and seize upon contact with the cooler milk, forming hard lumps. Do not panic! This is a natural reaction. Return the mixture to low heat and whisk diligently. The warmth will slowly but surely dissolve the hardened caramel back into a smooth, liquid form, infusing the milk with its incredible flavor.
The Tempering and Boiling Method: Safety and Silky Texture
Next, we temper this flavorful milk into an egg and cornstarch mixture. Tempering is a vital step that prevents the egg yolks from scrambling when introduced to heat. You achieve this by slowly drizzling a small amount of the hot caramel milk into the egg mixture while continuously whisking. This gradually raises the temperature of the eggs, preparing them for the next stage.
The tempered mixture is then transferred to a saucepan and brought to a gentle boil for two minutes, stirring constantly. While this “boil-method” might sound unconventional for an ice cream base, it serves a brilliant purpose: it thoroughly cooks the eggs, eliminating any concerns about salmonella and ensuring a safe, stable base. Furthermore, the cornstarch, activated by the heat, works its magic, thickening the mixture to a luxurious pudding-like consistency. This thickening is key to the incredibly creamy texture of the final ice cream, providing a richness that sets it apart.
Cooling and Churning to Perfection
After achieving that perfect, thickened base, it’s crucial to cool it down quickly and completely. Straining the mixture through a fine-meshed sieve ensures a silky-smooth texture, catching any potential small lumps. An ice bath is your best friend here, speeding up the cooling process. Once cooled, cover the surface with plastic wrap to prevent a skin from forming and refrigerate it for at least an hour, or even better, overnight. A thoroughly chilled base is paramount for optimal churning results, yielding a smoother, creamier ice cream.
The final steps involve whisking in cold heavy cream and pure vanilla extract, enhancing the richness and adding a classic aromatic note. Then, it’s off to the ice cream maker! Follow your manufacturer’s instructions, and in the last five minutes of churning, incorporate the finely chopped bittersweet chocolate. These dark chocolate bits are not just an addition; they are a counterpoint, offering a delightful textural contrast and a bitter note that perfectly complements the deep sweetness of the burnt sugar. Transfer to an airtight container, cover the surface with parchment paper or plastic wrap to prevent ice crystals, and freeze for another 4-6 hours to allow it to firm up to the perfect scoopable consistency.

The Unforgettable Taste: A Symphony of Flavors and Textures
There are those rare moments in cooking when you just *know* a recipe is going to be a winner even before the first bite. This burnt sugar ice cream is undeniably one of them. The aroma alone, a blend of rich caramel and dark chocolate, hints at the deliciousness to come.
Upon tasting, you’ll discover that the burnt sugar indeed adds an entirely new dimension of flavor – a sophisticated, almost smoky depth that some describe as reminiscent of roasted coffee or toasted nuts. It’s a flavor that lingers, evolving on the palate with each spoonful. The finely chopped dark chocolate pieces are the perfect companion, providing a pleasing crunch and a robust bitterness that beautifully cuts through the creamy sweetness. This combination creates an incredibly creamy, luxuriously smooth, and dangerously good ice cream that will have you reaching for another scoop before you’ve even finished the first.
Serving Suggestions and Storage
This ice cream is divine on its own, but it also pairs wonderfully with a sprinkle of sea salt to enhance the caramel notes, a dollop of whipped cream, or even alongside a warm brownie or apple crisp. For best results, allow the ice cream to soften at room temperature for a few minutes before serving to achieve the ideal scoopable texture. Store any leftovers in an airtight container in the freezer for up to two weeks, though we doubt it will last that long!
Embark on this delightful culinary journey and create a dessert that will impress and satisfy. Homemade ice cream offers a unique quality that store-bought simply cannot match, and this burnt sugar and chocolate concoction is a testament to that fact. Happy churning!

Burnt Sugar Ice Cream with Chocolate Bits
Pin
Review
SaveSaved!
Equipment
-
KitchenAid 5 Qt. Artisan Stand Mixer
-
KitchenAid Ice Cream Maker Attachment
Ingredients
- ¾ cup (150 g) granulated sugar
- 2 cups (480 mL) whole milk
- 3 large egg yolks
- 1 tablespoon cornstarch
- 1 cup (240 mL) cold heavy cream
- 1½ teaspoons pure vanilla extract
- 3½ ounces bittersweet chocolate (72% cocoa) finely chopped
Instructions
-
Place the sugar in a medium skillet and place over moderate heat. Heat, stirring constantly with a fork, until the sugar begins to melt and turn a deep caramel color. Be careful, once the sugar turns to liquid form, this will happen quickly.
-
Immediately remove the caramel from heat and very slowly pour the milk into the caramel, be careful it may sputter. The caramel will immediately seize and harden – do not worry. Return the mixture to low-medium heat, stirring frequently until all the caramel has dissolved.
-
In a separate bowl, whisk together the egg yolks and cornstarch. Temper the egg yolk mixture with the hot caramel milk, pouring slowly, while whisking constantly with your other hand. Transfer the mixture to a medium saucepan and cook over medum heat, stirring constantly with a wooden spoon. Allow the mixture to come to a low boil, stirring constantly, for 2 minutes. As the cornstarch is brought to heat, the mixture will begin to thicken until it is the texture of pudding. Remove from the heat.
-
Strain the mixture through a fine-meshed sieve into a large heat-proof bowl. Set the bowl in an ice bath, stirring every 10 minutes or so, until the base has cooled. Place ice cream base in an airtight container and set in the refrigerator until it has completely chilled. Once the mixture has cooled, cover surface with plastic wrap and place in fridge for at least one hour or overnight.
-
Once cooled, whisk in the cold cream and vanilla extract. Churn the ice cream in an ice cream maker according to the manufacturer’s instructions. In the last five minutes of churning, add the finely chopped chocolate. Transfer the ice cream to an airtight container, cover the surface of the ice cream lightly with parchment paper or plastic wrap. Freeze for an additional 4 to 6 hours before serving.
