The Ultimate Guide to Easy Homemade Peppermint Bark: A Festive Holiday Treat
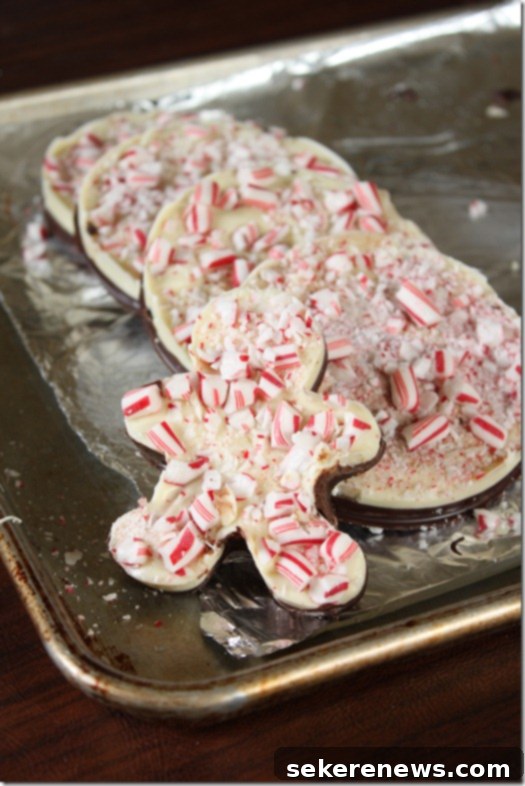
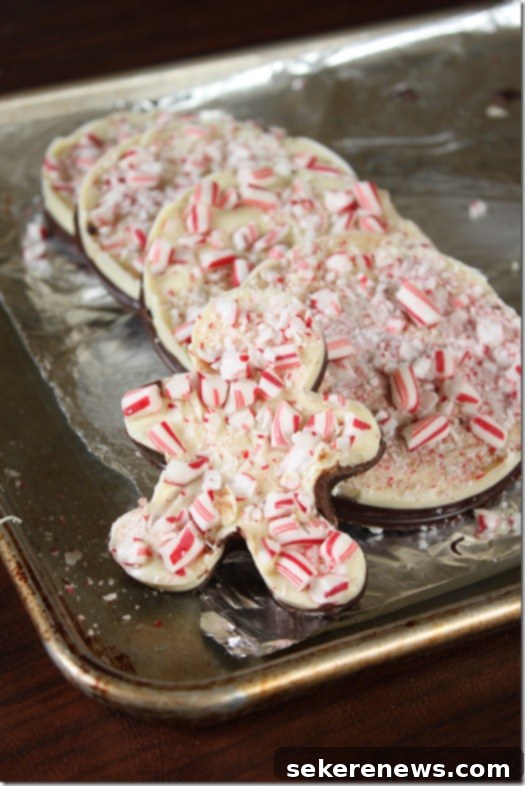
There’s nothing quite like the crisp, minty freshness combined with rich chocolate to evoke the holiday spirit. This easy and delicious **homemade peppermint bark recipe** is a cherished classic, perfect for sharing with loved ones or enjoying as a festive indulgence. Crafted with layers of high-quality dark and white chocolate, and generously sprinkled with vibrant crushed candy canes, it’s not just a treat; it’s an experience. Dive into this guide to create stunning, delicious peppermint bark that will be the star of any holiday gathering or gift basket!
Why You’ll Love This Easy Peppermint Bark Recipe
This isn’t just another dessert; it’s a holiday tradition waiting to happen. Here’s why this particular peppermint bark recipe will quickly become a seasonal favorite:
- Effortlessly Delicious: Despite its impressive appearance, this recipe is incredibly straightforward, requiring minimal ingredients and basic kitchen tools. Perfect for beginners and seasoned bakers alike.
- Perfect for Gifting: Homemade gifts carry a special charm, and this peppermint bark is no exception. Its beautiful layers and festive colors make it an ideal edible present for neighbors, teachers, friends, and family during the holiday season.
- Customizable: While we stick to the classic dark and white chocolate combination, the recipe is versatile. You can easily adjust the type of chocolate or even add extra toppings to suit your taste.
- Iconic Holiday Flavor: The refreshing burst of peppermint paired with rich, smooth chocolate is a flavor combination synonymous with winter holidays and Christmas cheer.
- Kid-Friendly Fun: Crushing candy canes and sprinkling them over the chocolate can be a fun activity for children (with adult supervision!), making it a memorable family tradition.
Understanding Peppermint Bark: A Holiday Staple
Peppermint bark is a confectionary delight traditionally made during the Christmas season. It typically consists of a layer of dark chocolate topped with a layer of white chocolate, both infused with peppermint flavor and crowned with crunchy, crushed peppermint candies (usually candy canes). Its origins are somewhat debated, but it gained significant popularity in the United States in the late 20th century, becoming a ubiquitous holiday candy. It’s cherished for its striking appearance, satisfying crunch, and refreshing minty kick.
Essential Ingredients for Perfect Peppermint Bark
Quality ingredients make all the difference in achieving that perfectly smooth texture and rich flavor. Here’s a closer look at what you’ll need:
- 1 Box Classic Candy Canes: Approximately 10-12 regular-sized candy canes. These provide both the distinctive peppermint flavor and the iconic red and white speckles. Opt for classic red and white striped candy canes for the traditional look.
- 1 (10-ounce) Bag High-Quality White Chocolate Chips: The quality of your chocolate is paramount. Choose a brand that melts smoothly and has good flavor. Real white chocolate will contain cocoa butter, which melts better than white “baking chips” that might be mostly sugar and vegetable oil.
- 1 (10-ounce) Bag High-Quality Semisweet Chocolate Chips: Similar to white chocolate, a good quality semisweet chocolate will melt beautifully and offer a rich, deep chocolate flavor that perfectly complements the peppermint. Dark chocolate (70% or higher) can also be used for a more intense flavor.
- 2 Teaspoons Vegetable Oil, Divided: A small amount of vegetable oil helps the chocolate melt smoothly and gives it a glossy finish, making it easier to spread and preventing it from seizing. You can also use coconut oil (refined, so it doesn’t impart flavor) or a tiny bit of shortening.
Step-by-Step Guide: How to Make Peppermint Bark
Follow these detailed instructions to create stunning, professional-looking peppermint bark in your own kitchen.
- Prepare Your Workspace and Candy Canes:
Begin by lining a half sheet pan (approximately 13×18 inches) with aluminum foil or parchment paper. This non-stick surface is crucial for easily removing the bark once it’s set. Set this aside. Next, unwrap your candy canes. Place them into a sturdy Ziploc freezer bag. Using a rolling pin, gently but firmly crush the candy canes into very small, irregular pieces. You want a mix of fine powder and small chunks for visual appeal and textural contrast. Avoid over-crushing into a fine dust if you prefer some crunch. Set the crushed candy canes aside; they’ll be used for the final festive sprinkle.
- Melt the Dark Chocolate Layer:
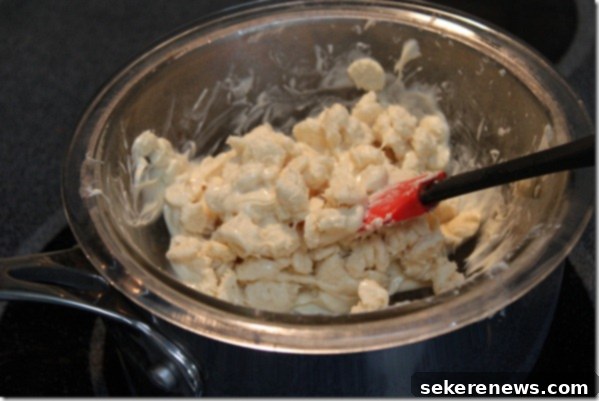
Set up a double boiler. This involves placing a heatproof bowl (glass or metal) over a saucepan of simmering water, ensuring the bottom of the bowl does not touch the water. The steam will gently melt the chocolate, preventing it from burning or seizing. Add the semisweet chocolate chips to the bowl, along with one teaspoon of vegetable oil. Stir the mixture continuously with a rubber spatula, allowing the chocolate to melt completely until it is smooth and free of lumps. Patience is key here; low, indirect heat is your friend.
- Spread and Chill the Dark Chocolate:
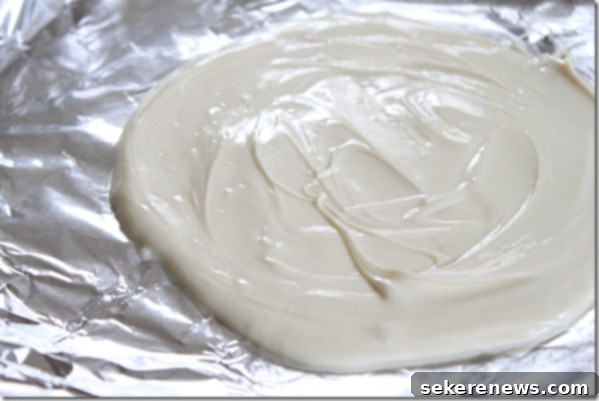
Once the dark chocolate is perfectly melted and smooth, carefully pour it onto your prepared, lined sheet pan. Using an offset spatula or the back of a spoon, spread the chocolate evenly across the pan until it forms a layer roughly ¼-inch thick. Aim for an even thickness to ensure uniform setting and easy breaking later. Immediately transfer the sheet pan to the refrigerator and chill for approximately 30 minutes, or until the dark chocolate layer is completely firm to the touch.
- Melt and Layer the White Chocolate with Peppermint:
Using the same double boiler method, melt the white chocolate chips with the remaining 1 teaspoon of vegetable oil. Stir until the white chocolate is completely melted and incredibly smooth. At this point, you can optionally stir in ¼ to ½ teaspoon of pure peppermint extract into the melted white chocolate for an extra minty punch, though the candy canes provide ample flavor. Remove the chilled semisweet chocolate layer from the refrigerator. Pour the melted white chocolate directly over the hardened dark chocolate layer. Quickly spread it evenly with an offset spatula, creating another ¼-inch thick layer. Work quickly, as the cold dark chocolate will cause the white chocolate to set faster. Immediately and generously sprinkle the crushed candy canes over the wet white chocolate. Press them down gently to ensure they adhere.
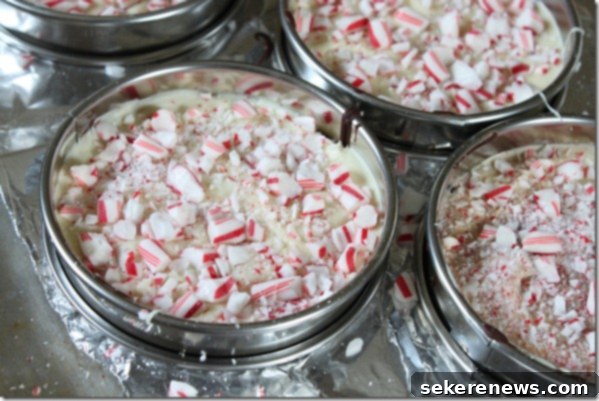
- Chill, Break, and Store:
Transfer the sheet pan with both chocolate layers and candy canes back to the refrigerator. Chill for another 30 minutes to 1 hour, or until both chocolate layers are completely hard and set. Once fully firm, remove the peppermint bark from the refrigerator. Gently peel it off the foil or parchment paper. Place it on a clean, dry surface. Using your hands, a sharp knife, or a kitchen mallet, break the bark into irregular medium-sized shards. For presentation and storage, layer the peppermint bark shards between sheets of wax paper in an airtight container. Store it in a cool, dry place or in the refrigerator for up to 2 weeks. Enjoy your festive homemade peppermint bark!

Tips for Peppermint Bark Perfection
Achieving bakery-quality peppermint bark is easy with a few insider tips:
- Use High-Quality Chocolate: This cannot be stressed enough. Better chocolate equals better flavor and a smoother melt. Compound chocolates (often labeled as “baking chips” without cocoa butter) may not melt as smoothly or taste as rich.
- Avoid Water Contact: When melting chocolate, even a single drop of water can cause it to “seize,” turning it into a grainy, unworkable mess. Ensure your bowl and spatula are completely dry before you start.
- Don’t Overheat: Chocolate is delicate. Melting it slowly over a double boiler or in short bursts in the microwave prevents it from burning or becoming grainy. If using a microwave, stir every 15-20 seconds.
- Even Layers are Key: Try to spread both chocolate layers to a consistent ¼-inch thickness. This ensures a balanced flavor and makes the bark easier to break into appealing shards.
- Work Quickly with White Chocolate: Once the white chocolate is melted, pour and spread it over the chilled dark chocolate without delay. The cold dark chocolate will start setting the white chocolate almost immediately.
- Crush Candy Canes to Your Preference: Some prefer a fine powder for intense mint flavor, while others like larger chunks for a satisfying crunch. Experiment to find your ideal texture!
Peppermint Bark Variations to Explore
While the classic is wonderful, don’t hesitate to get creative:
- Mint Extract Boost: For an extra powerful peppermint kick, add ¼ to ½ teaspoon of pure peppermint extract to the melted white chocolate before spreading.
- Different Chocolate Combinations: Try milk chocolate as the bottom layer, or use all dark chocolate with a layer of peppermint-infused white chocolate.
- Swirled Bark: Instead of distinct layers, try pouring both melted chocolates onto the pan and gently swirling them together with a skewer for a marbled effect before sprinkling candy canes.
- Other Toppings: While candy canes are traditional, consider adding a sprinkle of festive sprinkles, chopped nuts, or a drizzle of contrasting chocolate.
- Shaped Bark: Instead of breaking into shards, once the bark is firm but still pliable, use metal cookie cutters to create festive shapes like stars, trees, or snowflakes.
How to Store Homemade Peppermint Bark
Proper storage ensures your peppermint bark stays fresh and delicious for weeks:
- Airtight Container: Always store peppermint bark in an airtight container to protect it from moisture and air, which can cause it to become stale or absorb other odors.
- Cool, Dry Place: A pantry or cupboard is ideal. If your home is particularly warm, the refrigerator is a better option.
- Layer with Wax Paper: To prevent the shards from sticking together and preserve their appearance, layer them between sheets of wax paper or parchment paper within the container.
- Refrigeration: Storing in the refrigerator can extend its shelf life, especially in warmer climates. Just be aware that it might “bloom” (develop a whitish film) if exposed to extreme temperature changes, though this is purely aesthetic and doesn’t affect taste.
- Shelf Life: When stored correctly, homemade peppermint bark can last for up to 2 weeks at room temperature or 3-4 weeks in the refrigerator.
Peppermint Bark: The Ultimate Edible Gift
Homemade peppermint bark makes for truly thoughtful and impressive holiday gifts. Here’s how to package it beautifully:
- Clear Cellophane Bags: Fill small, clear cellophane bags with shards of bark and tie them with festive ribbons.
- Decorative Tins or Boxes: Layer bark in holiday-themed tins or decorative boxes, again using wax paper between layers.
- Personalized Labels: Add a handwritten tag with “Homemade Peppermint Bark” and a simple “Enjoy!” message.
- Gift Baskets: Include it as part of a larger holiday gift basket alongside other homemade treats, gourmet coffee, or hot cocoa mixes.
Frequently Asked Questions About Peppermint Bark
Got questions? We’ve got answers to help you master this festive treat.
- Why did my chocolate seize when melting?
- Chocolate seizing (turning thick, lumpy, and grainy) is usually caused by even a tiny amount of water or steam coming into contact with the chocolate. Ensure your melting bowl and spatula are completely dry and that the bottom of the bowl does not touch the simmering water in your double boiler.
- Can I use a microwave instead of a double boiler?
- Yes, you can! Place chocolate chips in a microwave-safe bowl and microwave on 50% power for 30-second intervals, stirring thoroughly after each. Continue until the chocolate is smooth. Be extra careful not to overheat, as microwave-melted chocolate can burn easily.
- How fine should I crush the candy canes?
- This is a matter of personal preference. A mix of fine powder and small chunks (about ⅛-¼ inch) usually provides the best visual appeal and a satisfying crunch. Too fine, and you lose some texture; too large, and it might be hard to break the bark cleanly.
- Can I make peppermint bark ahead of time?
- Absolutely! Peppermint bark is an excellent make-ahead treat. Stored properly in an airtight container, it will stay fresh for at least 2 weeks, making it perfect for holiday preparations.
- My layers aren’t sticking together, what went wrong?
- This usually happens if the first chocolate layer (dark chocolate) is too cold when the second layer (white chocolate) is applied. While it needs to be firm, it shouldn’t be ice-cold. If it’s too cold, the white chocolate will set too quickly upon contact, preventing proper adhesion. Try taking the dark chocolate out of the fridge a few minutes before you’re ready to pour the white chocolate.

Homemade Peppermint Bark Recipe
No ratings yet
Pin Recipe
Yield: 15 Servings
Prep Time: 15 minutes
Cook Time: 30 minutes
Total Time: 45 minutes
You will love this easy and delicious homemade peppermint bark recipe made with white and dark chocolate chips. Great for holiday gifting! The instructions below prepare traditional peppermint bark shards. If you prefer, you can use metal cookie cutters as molds to shape the peppermint bark into festive designs.
Ingredients
- 1 box classic candy canes
- 1 (10-ounce) bag high-quality white chocolate chips
- 1 (10-ounce) bag high-quality semisweet chocolate chips
- 2 teaspoons vegetable oil, divided
Instructions
- Line a half sheet pan with aluminum foil or parchment paper. Set aside. Unwrap the candy canes and place in a Ziplock freezer bag. Using a rolling pin, gently crush the candy canes into very small pieces. Set aside.
- Set up a double boiler (heatproof bowl set over a saucepan of simmering water). Place the semisweet chocolate chips into the bowl and add a teaspoon of vegetable oil. Stir mixture with a spatula until the chocolate melts completely and is very smooth.
- Pour the melted chocolate onto the lined sheet pan and spread with an offset spatula until the layer is roughly ¼-inch thick. Place sheet pan in the refrigerator and chill for 30 minutes or until hard.
- Using the same method, melt the white chocolate chips (combining with 1 teaspoon vegetable oil) over the double boiler, stirring until melted and smooth. Remove the chilled semisweet chocolate from the refrigerator and pour the melted white chocolate on top of the semisweet chocolate layer. Use an offset spatula to spread it over the dark chocolate layer – it should be roughly ¼-inch thick. Immediately sprinkle with crushed candy canes.
- Transfer peppermint bark to the refrigerator and chill for 30 minutes or until hard and set. Remove from the refrigerator and break into medium shards. Layer peppermint bark shards between layers of wax paper in a container and store in a cool place or the refrigerator for up 2 weeks.
Nutrition Facts (per serving)
Serving: 1 serving, Calories: 224kcal, Carbohydrates: 27g, Protein: 2g, Fat: 14g, Saturated Fat: 8g, Polyunsaturated Fat: 5g, Cholesterol: 4mg, Sodium: 21mg, Fiber: 1g, Sugar: 24g
Author: Laura / A Beautiful Plate
Course: Chocolate
Cuisine: American
